Are you facing the same error when using the Epic Launcher to play a game? First, it’s a good idea to check whether your Internet connection speeds are sufficient to run the game. If that’s not a problem, don’t worry. We have compiled the best solutions to fix the no connection or the AS-3 error in the Epic Games Launcher on Windows 11.
1. Allow Epic Games Launcher Through The Windows Defender Firewall
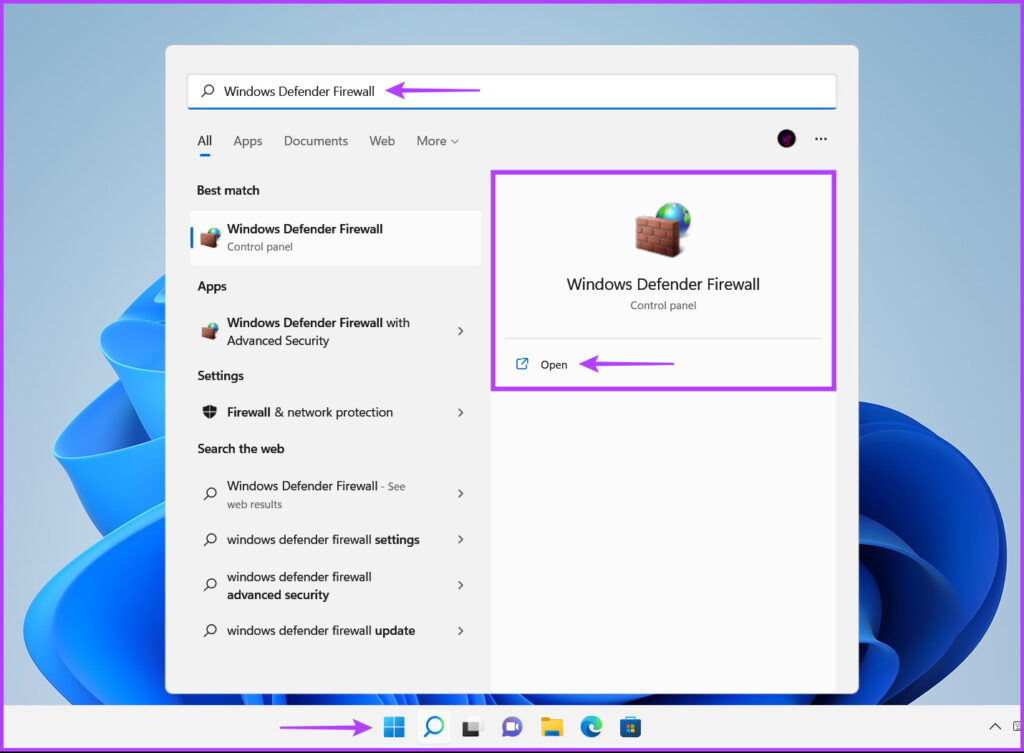
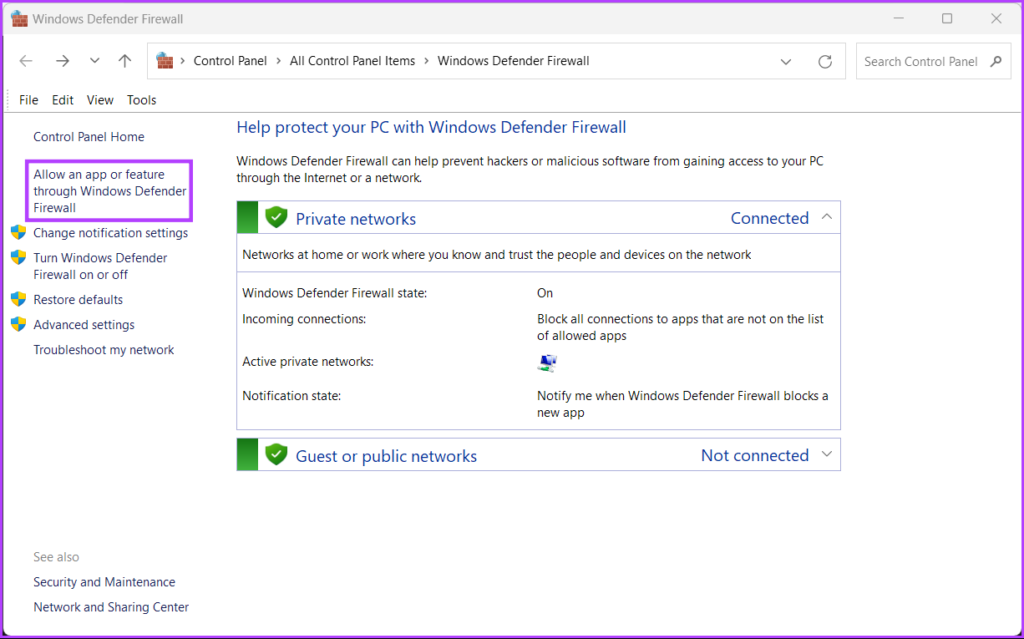
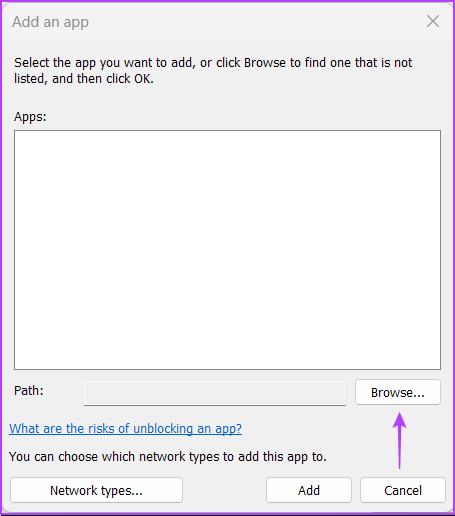
Windows Defender Firewall permits or denies programs from accessing the network or other Internet resources to stop malicious apps and programs from accessing your computer from outside the network or contacting other locations from your computer. That’s why you’ll need to allow Epic Games Launcher with the necessary permissions on your Windows Defender Firewall. It’s a good idea to check and manually allow the Epic Games Launcher app through the Windows Defender Firewall. Here’s how you can easily allow the Epic Games Launcher through the Windows Defender Firewall on your Windows 11 PC. Of course, you’ll need Administrative privileges to make changes. Step 1: Click the Start button on the Taskbar, type Windows Defender Firewall, and click on Open next to the search result for Windows Defender Firewall. Step 2: When the Windows Defender Firewall settings open in the Control Panel window, click on the ‘Allow an app or feature through Windows Defender Firewall’ option in the left column. Step 3: From the next screen, click on the Change Settings button. When a User Account Control prompt appears, select Yes. Next, click on ‘Allow another app’ button at the bottom. Step 4: When a window opens, click on the Browse button. Step 5: Copy and paste the following path into the Address bar of the window: When the window opens the designated folder, select the ‘EpicGamesLauncher.exe’ and click Open. Step 6: That’ll add the ‘UnrealEngineLauncherProxy’ app to the list. Click on Add at the bottom. Step 7: The new ‘UnrealEngineLauncherProxy’ entry will appear in the Allowed apps and features list. Make sure you check the boxes for Private and Public next to it.
2. Disable VPN or Proxy Servers
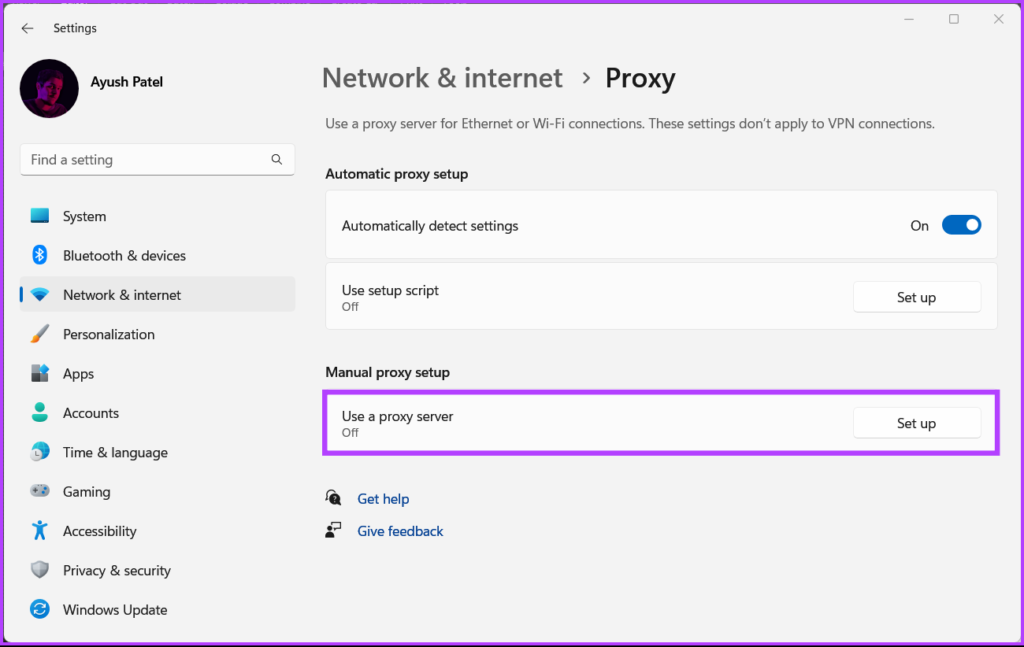
Epic recommends that you disable VPN or Proxy Servers if you use one with the Epic Games Launcher. The VPN or Proxy Servers might slow things down on your network. So, it’s a good idea to turn them off temporarily to check if that helps. You’ll need to disable the VPN or proxy server on your Windows 11 PC and use the internet connection normally. Here’s how you can disable VPN and Proxy Server on your Windows 11 PC. For this guide, we’ll use ProtonVPN and disable it. Step 1: Open your VPN client and click on Disconnect option. The disconnect button should appear on the app’s interface and will be located at different place depending on the VPN client you use. Step 2: Open the Settings app using Windows + I keys shortcut. Click on ‘Network & internet’ in the left column, and select Proxy from the right side. Step 3: Under Proxy settings, ensure that the ‘Use a proxy server’ is off. Step 4: If the proxy server is turned on, you’ll need to click on the option and disable it. Then, click the ‘Use a proxy server’ toggle to turn it off and click on the Save button.
3. Flush the DNS Cache and Reset Network Adapter
Another potential solution that can help you fix the AS-3 error in Epic Games Launcher and other connectivity issues on Windows 11 includes flushing or refreshing your PC’s DNS cache. You may also reset the Network Adapter on your Windows computer. Here’s how you can do that in Windows 11 using Command Prompt: Step 1: Click the Start button on the Taskbar, type Command Prompt, and select ‘Run as Administrator’ to open Command Prompt with Administrative privileges. Step 2: Copy and paste the following command into Command Prompt, then press Enter to flush the DNS cache: Step 3: Copy and paste the following command into Command Prompt, then press Enter to reset your Network Adapter: Close the Command Prompt window and restart your PC to apply the changes. After your computer restarts, open the Epic Games Launcher and try launching a game.
4. Edit the Engine.ini File
Usually, some programs or apps store the configuration and settings in a plain-text format in an .INI file. Even Epic Games Launcher uses the same to work properly on Windows. When other solutions didn’t help, you may try editing the ‘Engine.ini’ file to tweak the connectivity and download speed woes when using the Epic Games Launcher. Here’s how you can find and edit the Engine.ini file on your Windows 11 PC: Step 1: Click the Start button on the Taskbar, type %localappdata% in Windows search, and press Enter to open that folder in File Explorer. Step 2: In the File Explorer, look for the EpicGamesLauncher folder and double-click to open it. Step 3: Navigate to Saved folder, click on Config folder, select Windows folder and double-click on Engine.ini file. You’ll need administrative privileges to open and make changes to this file. Step 4: Copy and paste the following lines into the Notepad window that appears: Step 5: Save the file and open the Epic Games Launcher to check if it still throws the same error.
5. Try Using Different DNS Servers
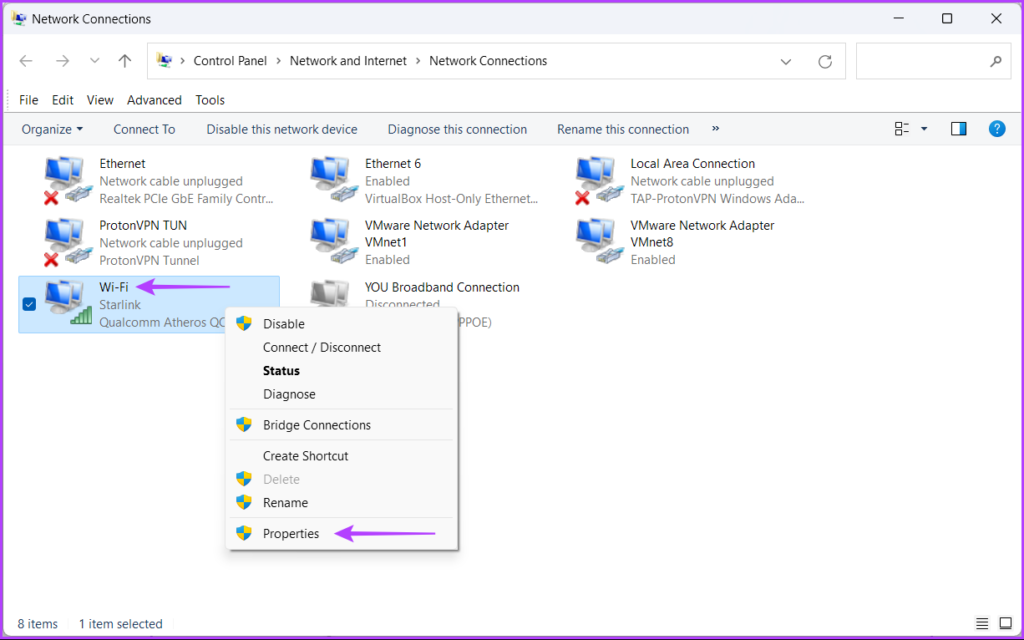
A slow DNS server might be behind your woes, barring you from accessing the Epic Games Launcher. If you use the one that your ISP provided, you may want to use the public DNS servers provided by different services. Here’s how you can easily change your PC’s DNS server to fix issues relating to a slow DNS server: Step 1: Click the Start button on the Taskbar, type ‘view network connections‘ in Windows Search, and click on Open for the ‘View network connections’ result. Step 2: When a Control Panel window opens, right-click on Ethernet or Wi-Fi (depending on the one you use) and select Properties. Step 3: On the Wi-Fi Properties window, select the ‘Internet Protocol Version 4’ option from the list, and click the Properties button. Step 4: Click on ‘Use the following DNS server address,’ type in details for the ‘Preferred DNS server’ and ‘Alternate DNS server’ box. For instance, we used Cloudflare DNS. You may choose between Google’s Public DNS servers, OpenDNS servers, or even Cloudflare’s DNS servers.
Enjoy Your Gameplay Session
With the above mention solutions, the ‘No connection’ or AS-3 error won’t stop you from playing games using the Epic Games Launcher. Besides applying the above solutions, restart your router and modem to create a fresh connection for all the devices on your network. Let us know which solution helped you the most in the comments section below. The above article may contain affiliate links which help support Guiding Tech. However, it does not affect our editorial integrity. The content remains unbiased and authentic.