Of course, if you’re a Desktop user with an external webcam, you can just unplug it. However, if that’s not an option or you don’t wish to keep unplugging and replugging the camera, you can disable it on Windows using various methods. Let’s see how.
1. Disable Camera via the Settings App
The Settings app on Windows 11 lets you view all the cameras connected to your computer. Besides configuring and troubleshooting, you can also disable your PC’s camera via the Settings app. Here’s how. Step 1: Open the Start menu and click the gear-shaped icon to launch the Settings app. Step 2: Select the Bluetooth & devices tab in the left column and then click on Cameras. Step 3: Under Connected cameras, you’ll see all the available cameras. Select the camera you want to disable. Step 4: Click the Disable button at the bottom. Step 5: Select Yes when the confirmation pop-up appears. Step 6: Select Yes again when the User Account Control (UAC) prompt appears. Once you disable your camera, it will appear under Disabled cameras in the Settings app. You can re-enable your camera again by clicking the Enable button next to it.
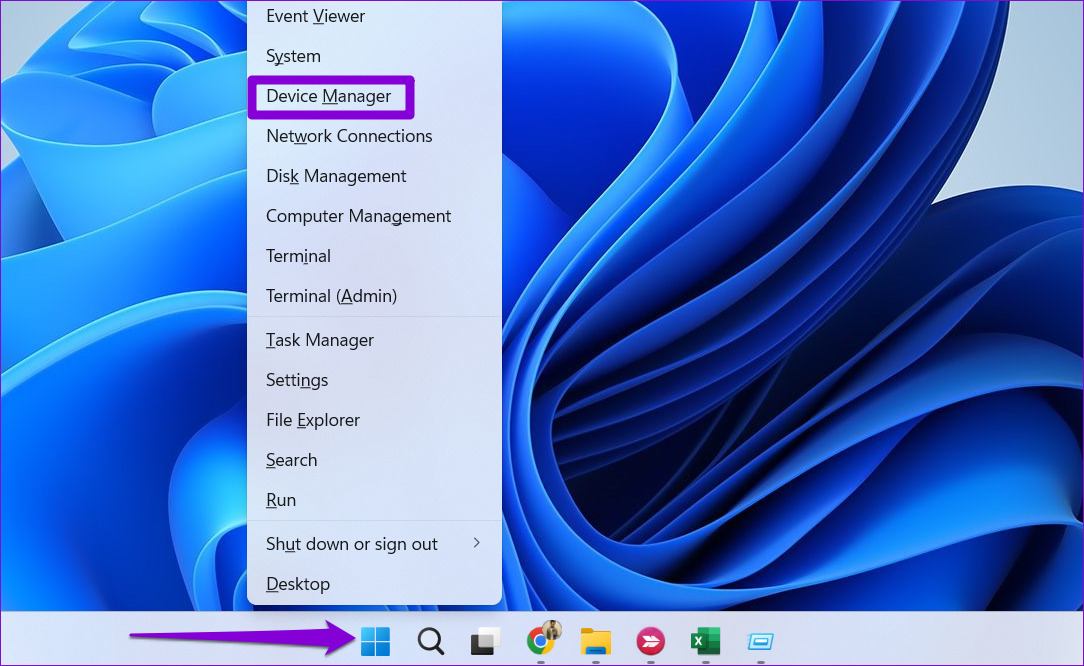
2. Disable Camera Using Device Manager
Device Manager is a useful tool that displays a graphical view of all the hardware that is connected to your PC. You can use it to configure, manage, and troubleshoot all of your hardware devices, including the camera. Follow the steps below to disable the camera using the Device Manager on Windows 11. Step 1: Press the Windows key + X to open the Power User menu and select Device Manager from the list. Step 2: In the Device Manager window, expand the Cameras section by double-clicking on it. Right-click on your camera and select Disable device. Step 3: Choose Yes when the warning message appears. Once you complete the above steps, the camera will be disabled. If you want to re-enable the camera at any point, follow the same steps above and select the Enable device option in Step 2.
3. Disable Camera Access Through Privacy Settings
Another way to disable the camera is to go through the privacy settings on Windows and disable camera access for apps. This method is useful if you only want to disable the camera for a few apps rather than the entire system. Here’s what you need to do. Step 1: Right-click on the Start icon and select Settings from the menu. Alternatively, you can press the Windows key + I to quickly launch the Settings app. Step 2: Use the left sidebar to switch to the Privacy and security tab. Step 3: Scroll down to App permissions and click on Camera. Step 4: Toggle off the Camera access option if you want to disable the camera for all apps. Alternatively, if you only want to disable camera access for a few apps, leave the Camera access toggle turned on, and enable the switch next to ‘Let apps access your camera.’ Then, you can enable or disable an app’s access to the camera by using the toggle next to it. Note that Windows 11 keeps track of apps that have recently used your camera. You can scroll down to the end of the page and expand the Recent activity menu to see which apps have accessed your camera in the last 7 days. If you see any suspicious app on this list, you might want to uninstall it or disable its camera access.
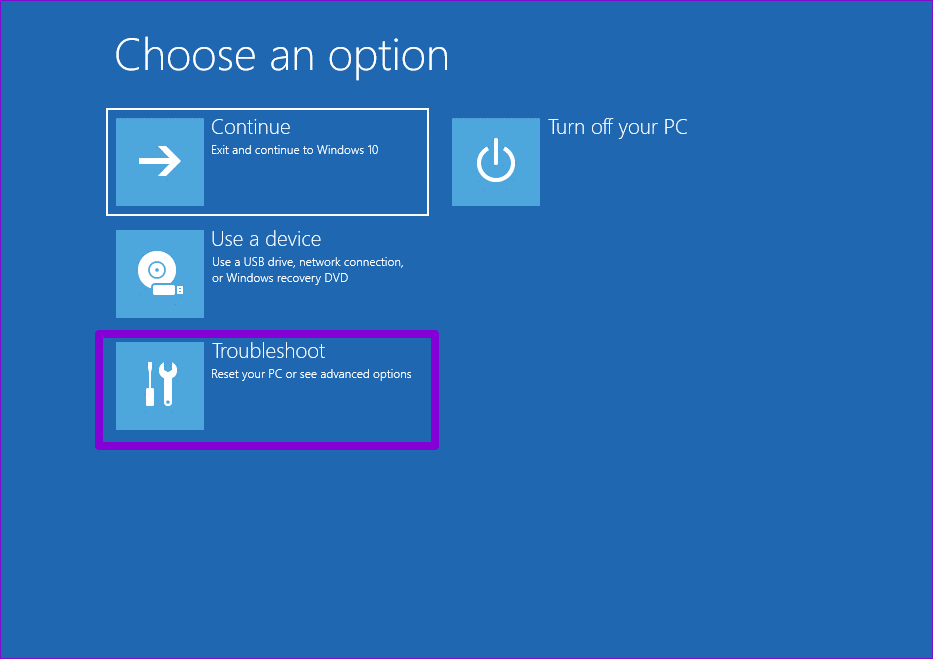
4. Disable the Camera From BIOS
The BIOS (Basic Input Output System) is the software responsible for properly booting up your system. Some Windows 11 computers give you the option to disable various features such as Bluetooth, camera, microphone, and more through the BIOS menu. If your PC supports this feature, you can follow the steps below to disable the camera from BIOS. Step 1: Press the Windows key + I to open the Settings app. In the System tab, click on Recovery. Step 2: Click the Restart now button next to Advanced startup. Step 3: Wait for your PC to reboot and select Troubleshoot. Step 4: Click on Advanced options. Step 5: Click on UEFI Firmware Settings. Step 6: Select the Restart option. Step 7: Once your PC enters the BIOS mode, head to Security or Privacy section and select an option named Integrated Camera or Webcam. Then, select the Disabled option. Note: The appearance of the BIOS menu can vary between different computer brands and even different models within the same brand Step 8: Press F10 to save and exit BIOS. Once your PC reboots, your camera will be disabled. To undo the above changes, you can repeat the above steps and select the Enabled option for Integrated Camera or Webcam.
Protect Your Privacy
Your PC’s camera is a useful piece of hardware that lets you communicate with your friends and colleagues via video calls. However, if you don’t use it that often, you may want to disable it using one of the methods mentioned above. Or, you should at least disable camera access for apps that don’t require it. If you don’t want to go through the trouble of repeatedly disabling and re-enabling the camera, why not buy an external webcam with a privacy shutter? The above article may contain affiliate links which help support Guiding Tech. However, it does not affect our editorial integrity. The content remains unbiased and authentic.