The default Photos app comes with a neat iCloud integration. Your photos and videos get automatically synced to the platform on iPhone and iPad – provided you’ve turned on iCloud sync on both the devices. If you don’t want to sync your photos to iCloud and want to free up space, read along to learn to delete photos from iCloud but not iPhone.
Check Photos Space in iCloud
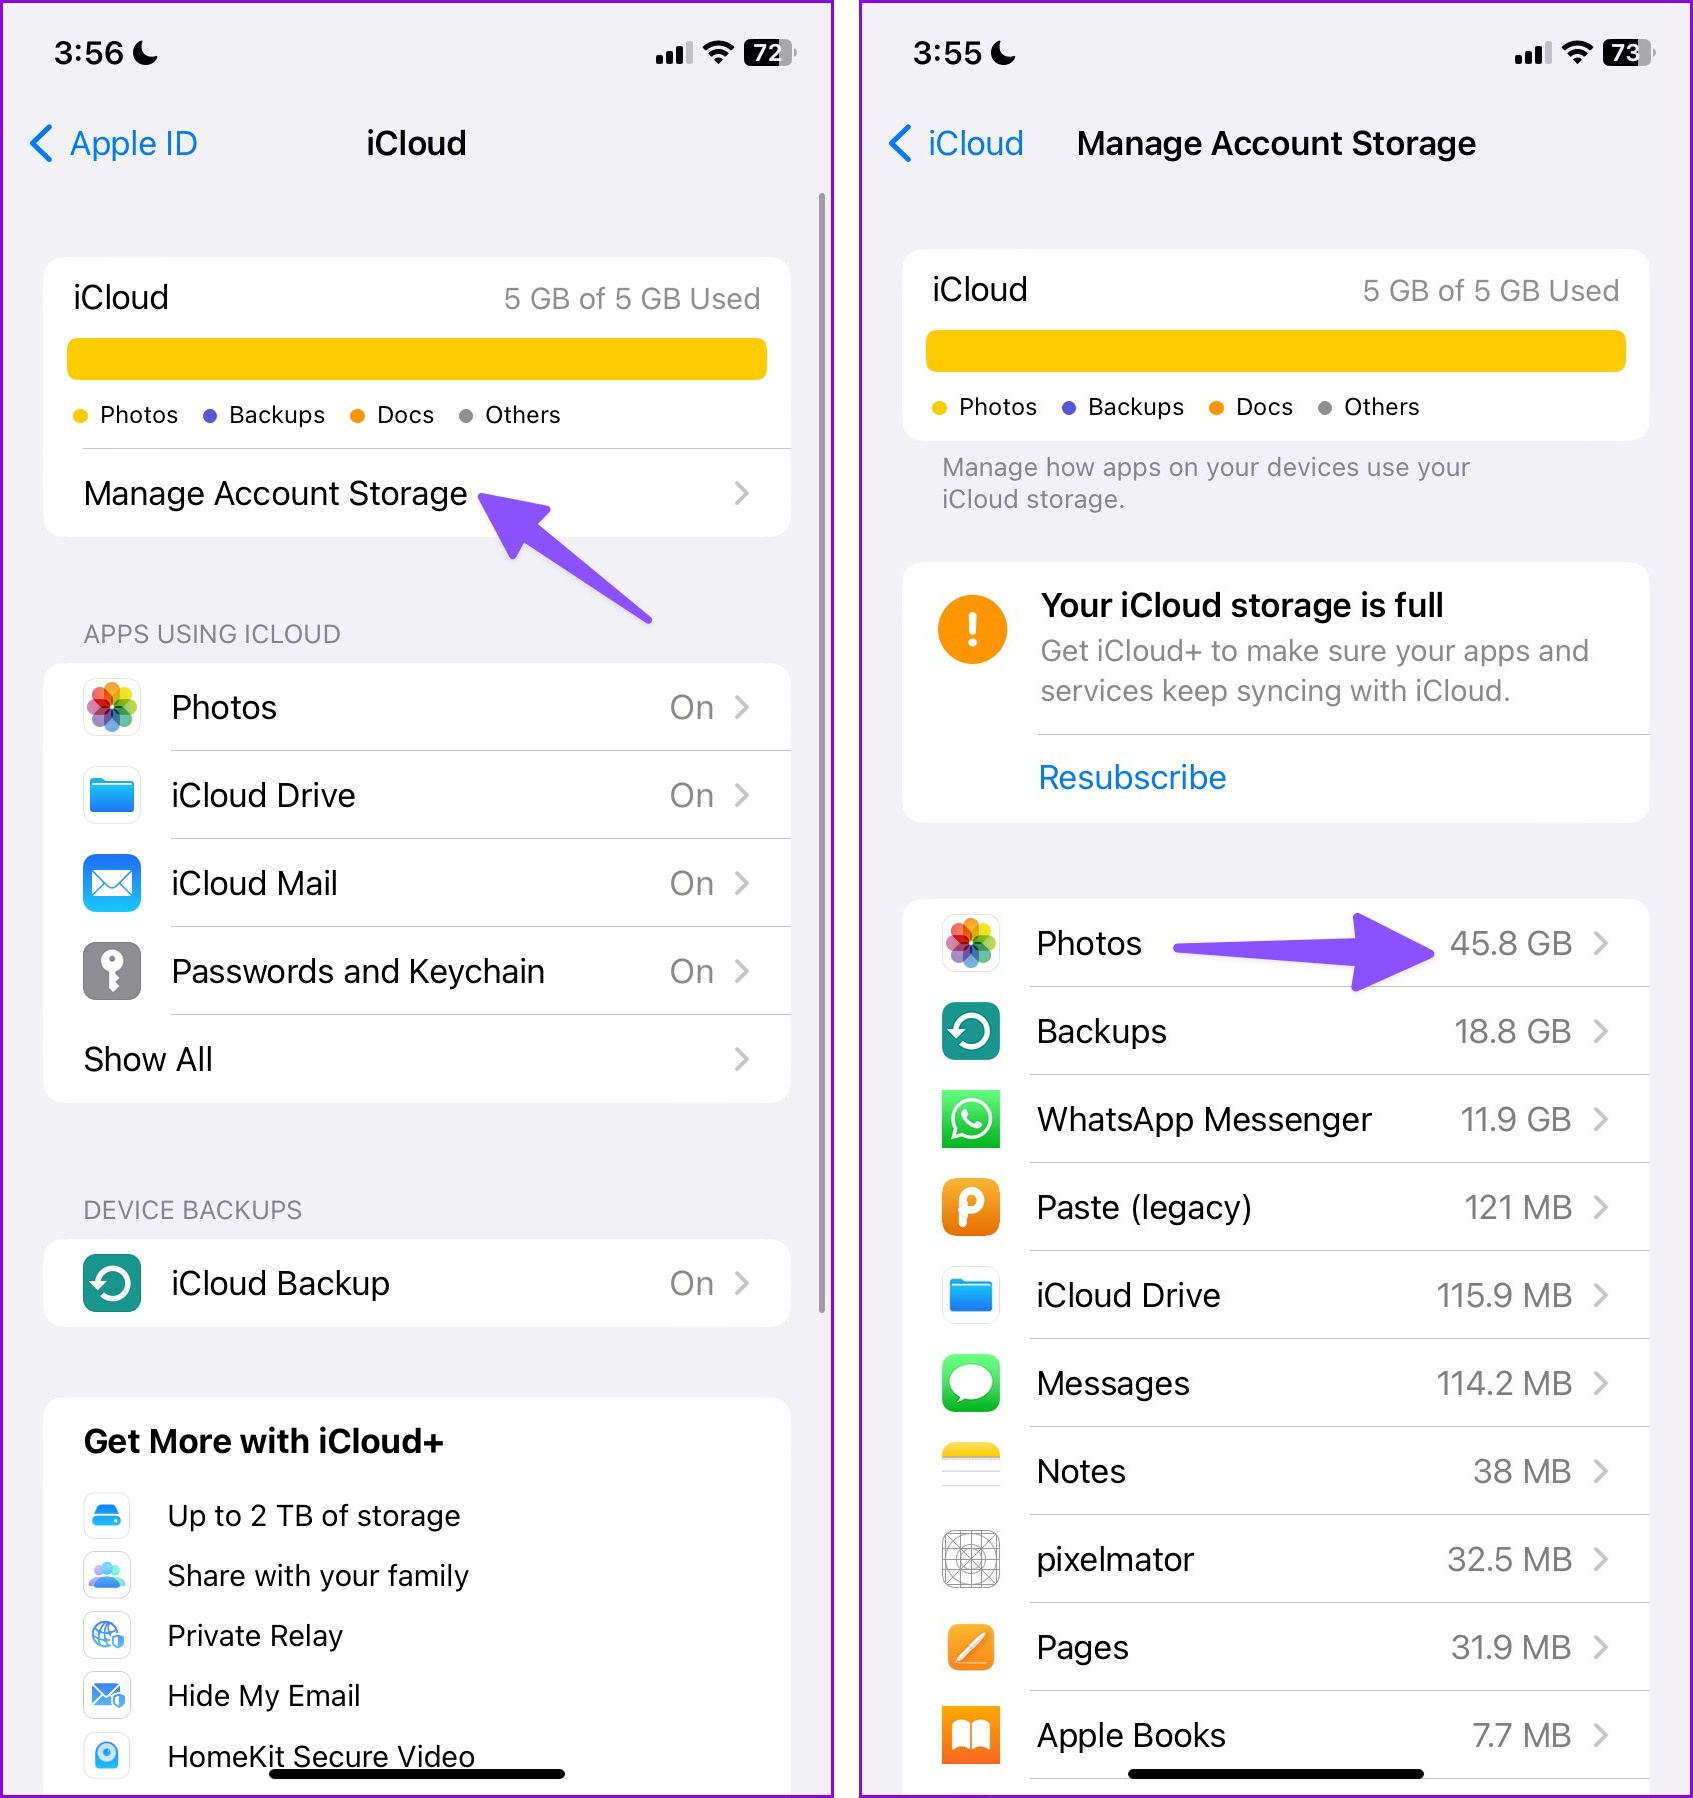
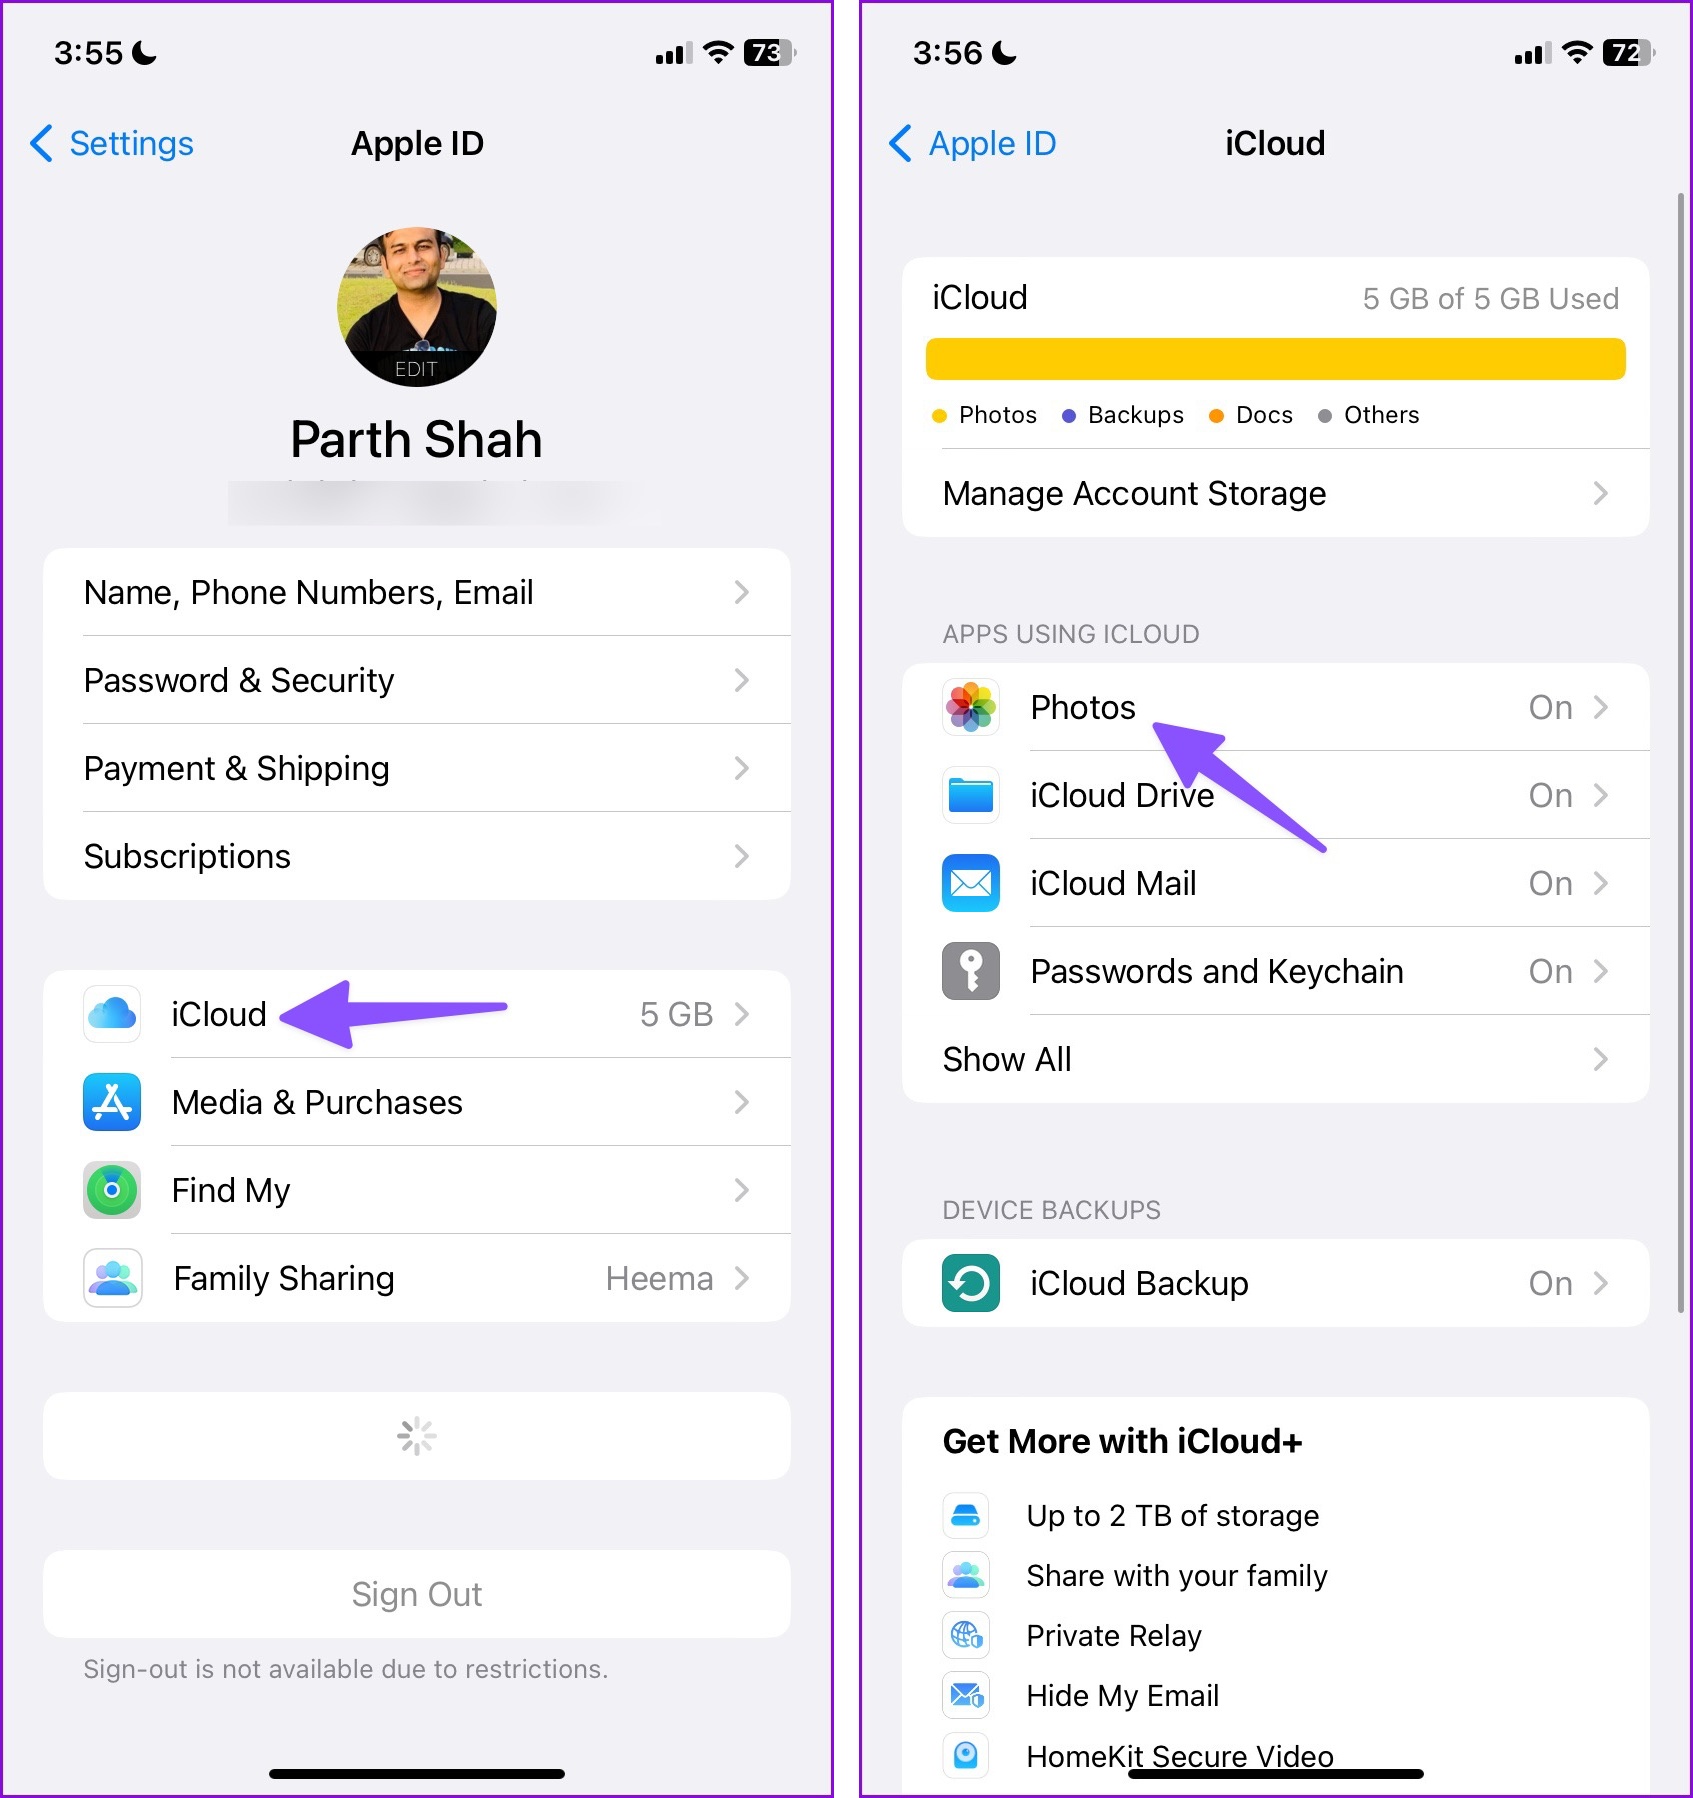
Before we show you how to remove photos from iCloud, you should check the space it takes on your cloud storage service. That way you have a clear idea about the amount of space you get after deleting all photos. Step 1: Open the Settings app on your iPhone. Step 2: Select your account at the top. Step 3: Tap iCloud. Step 4: Tap ‘Manage Account Storage.’ Step 5: Check the detailed iCloud storage breakdown and glance over the Photos space in it.
Download iCloud Photos to iPhone
Before you delete anything from iCloud, you should back up the photos and videos that you still want. When you use the Photos app on iPhone or iPad and delete an image, it deletes the same on all other devices. Apple gives you 30 days to recover accidently deleted photos. You can follow the steps below to download iCloud Photos to your iPhone. Step 1: Launch the Settings app on iPhone. Step 2: Tap on your Account at the top. Step 3: Select iCloud and tap Photos. Step 4: Disable the ‘Sync this iPhone’ toggle and check the two options below: Remove from iPhone: It deletes photos and videos that have been optimized to save space. Choosign this option deletes media from your iPhone, but keeps them safe on iCloud and Photos app on other devices like iPad, Mac, and Apple TV. You can always download original and full versions of photos and media from the web. Download Photos & Videos: It downloads a copy of your iCloud Photos to your iPhone. Step 5: Select Download Photos & Videos and keep a copy of your iCloud media on your iPhone. After you have a backup of your iCloud media library on your iPhone, you are all set to remove photos from iCloud using the web version or the Photos app on another device using the same Apple ID.
Remove Photos From iCloud
Using the iCloud web version is the easiest way to remove uploaded photos. Apple recently gave it a nice makeover too. Step 1: Visit iCloud website on your desktop or mobile browser. Visit iCloud Step 2: Sign in with your Apple account details. It may ask for a six-digit verification code. Step 3: Check iCloud Home and open Photos. Step 4: Use Ctrl + A (Windows) or Command + A (Mac) keyboard shortcut to select all photos and videos. You can also select several photos by holding the Ctrl or Command key and click on photos and videos. Hit the Trash icon at the top-right corner. Step 5: Select Recently Deleted from the sidebar. Step 6: Check your deleted items that you can restore within 30 days. Hit Delete All at the top and confirm the same.
Use the Photos App on iPad or Mac
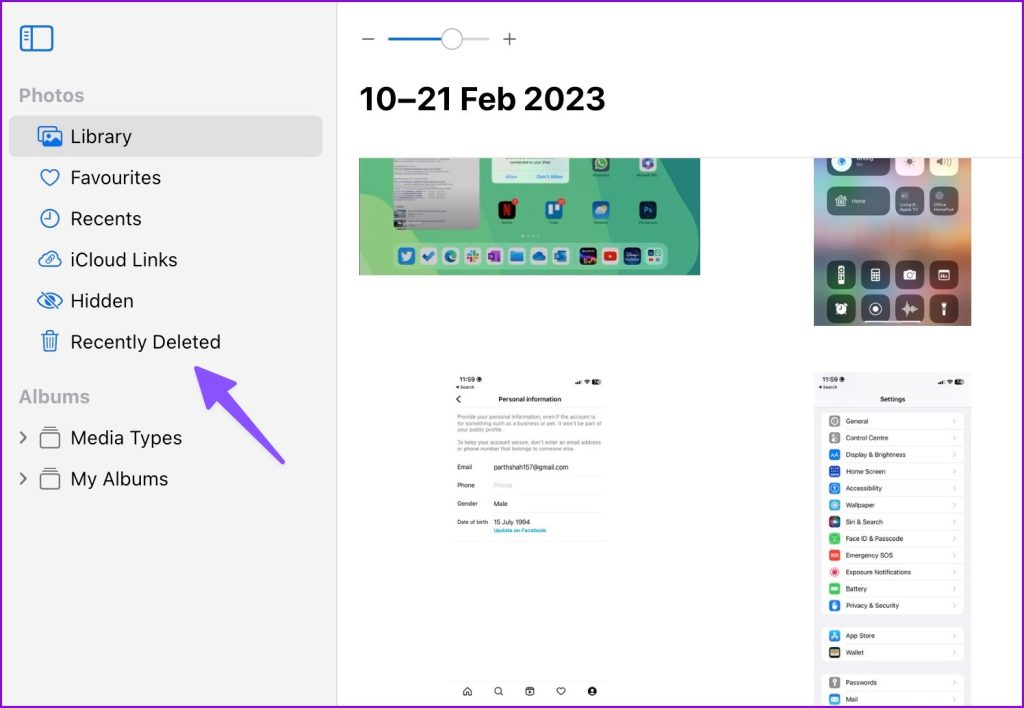
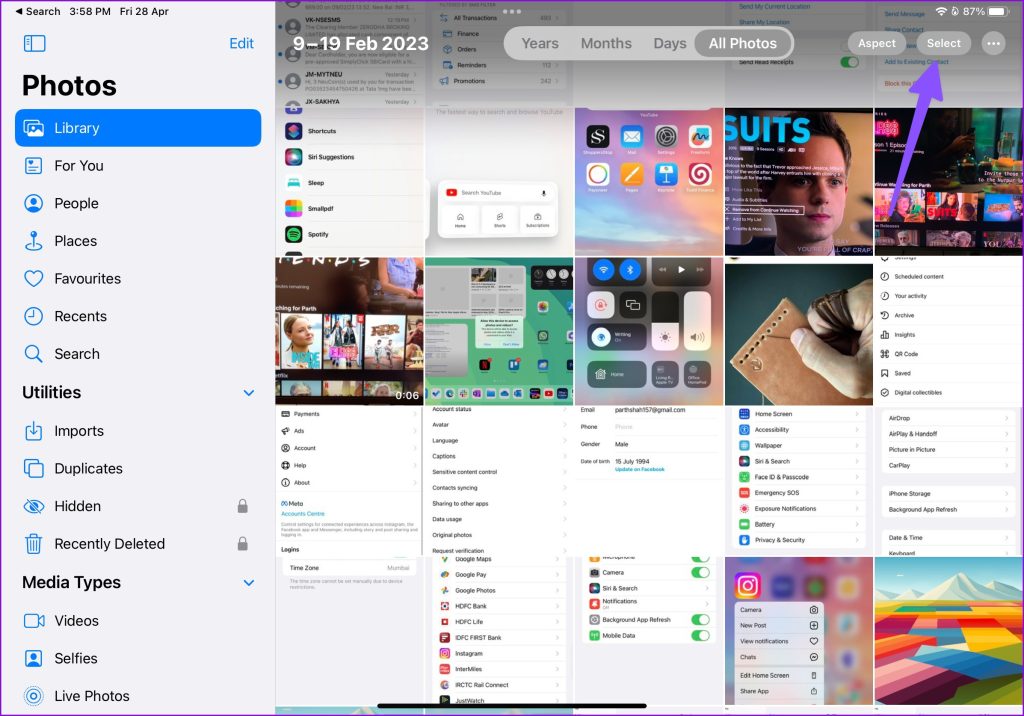
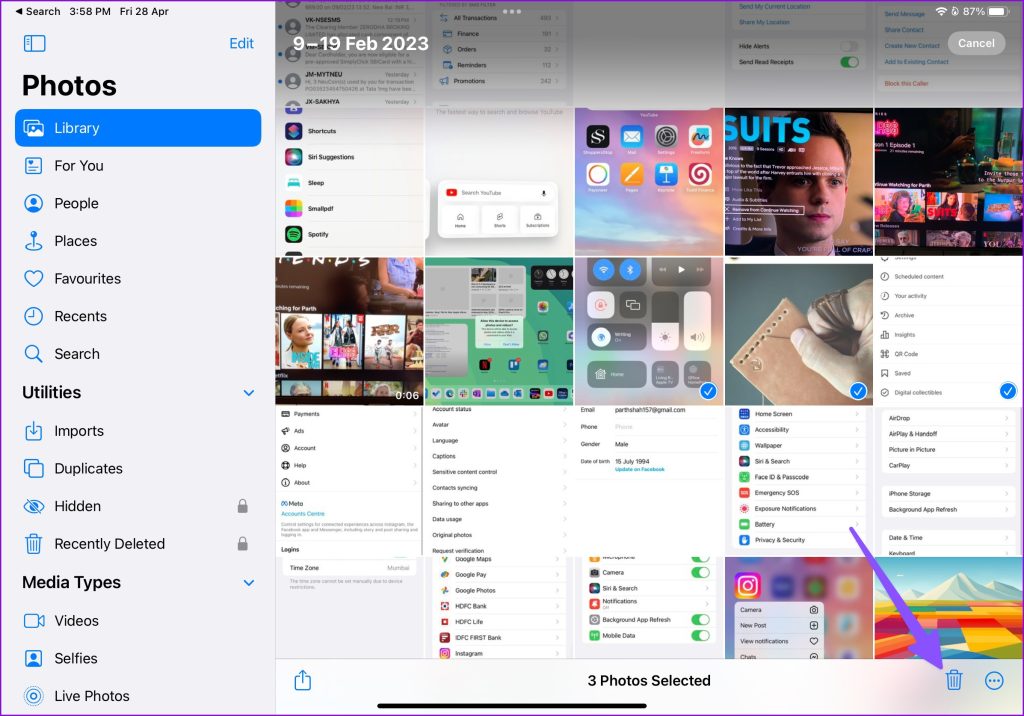
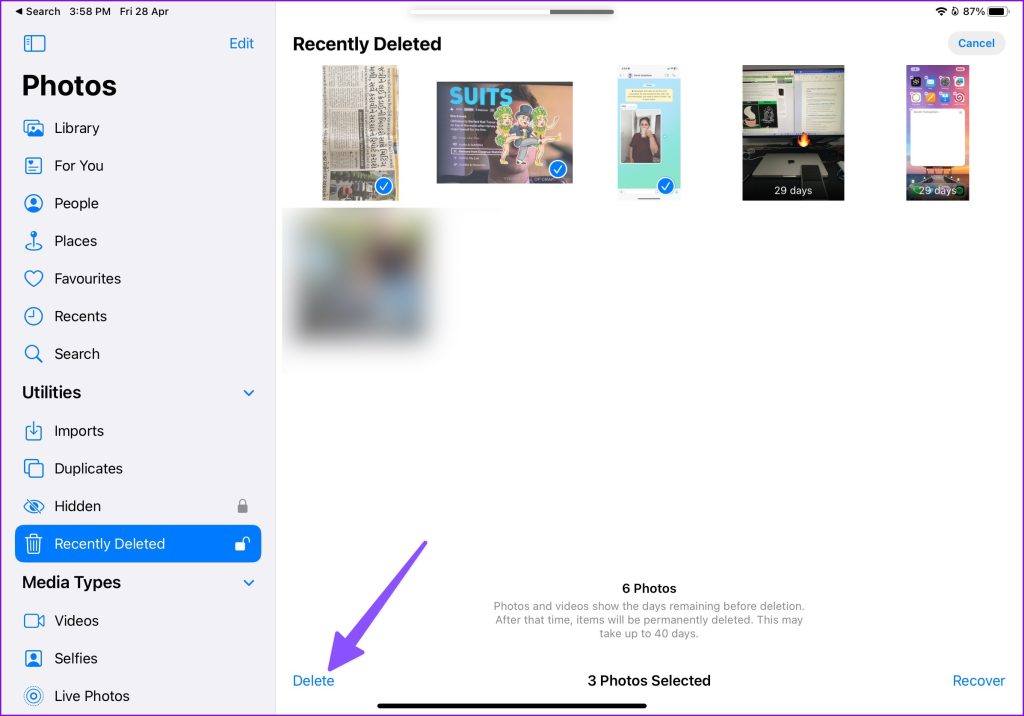
iCloud Photos is also available as a native app on other Apple devices. If you have signed into the same Apple account on iPad or Mac, you can also delete iCloud media from the default Photos app. Let’s take iPad as an example. Step 1: Open the Photos app on your iPad. Step 2: Tap Select at the top-right corner and tap on the photos you want to remove. Step 3: Hit the Trash icon at the bottom-right corner. Step 4: Click the Recently Deleted from the left sidebar. Step 5: Select the photos you want to remove and tap Delete to remove them permanently. If you don’t have another Apple device using the same account ID, use the iCloud web version as discussed above.
Manage Your iCloud Storage Smartly
You can always subscribe to iCloud+, or Apple One plans to unblock more iCloud storage for your account. But if you already use OneDrive or Google Drive, uploading your photos and videos to another cloud service doesn’t make sense. You can remove photos from iCloud and keep the 5 GB space to sync Apple Notes, Contacts, iCloud Passwords, Reminders, Safari history, messages, calls, and other essential app data. The above article may contain affiliate links which help support Guiding Tech. However, it does not affect our editorial integrity. The content remains unbiased and authentic.