Smaller photo sizes make it easy to transfer or upload media. If you have moved large photos from iPhone to Mac and want to cut down on image size, read along to reduce picture file size on Mac too. First, we will show you how to reduce image file size on iPhone or iPad and move to the Mac. You can check our dedicated guide if you want to reduce video size on your iPhone.
How to Reduce Photo Size on iPhone or iPad
There are several ways to compress photos on iPhone or iPad. We will start with the default tools and move to third-party apps to get the job done.
1. Crop an Image in the Photos App
You can crop an image, remove unwanted parts from the image, and reduce the file size. Step 1: Open the Photos app on your iPhone and select an image. Step 2: Tap Edit at the top. Select Crop. You can use the default templates to crop an image in a specific aspect ratio. Make necessary adjustments and tap Done. In our testing, we cropped an image and reduced the image size from 2.1 MB to 1.1 MB.
2. Change File Format From Camera Settings
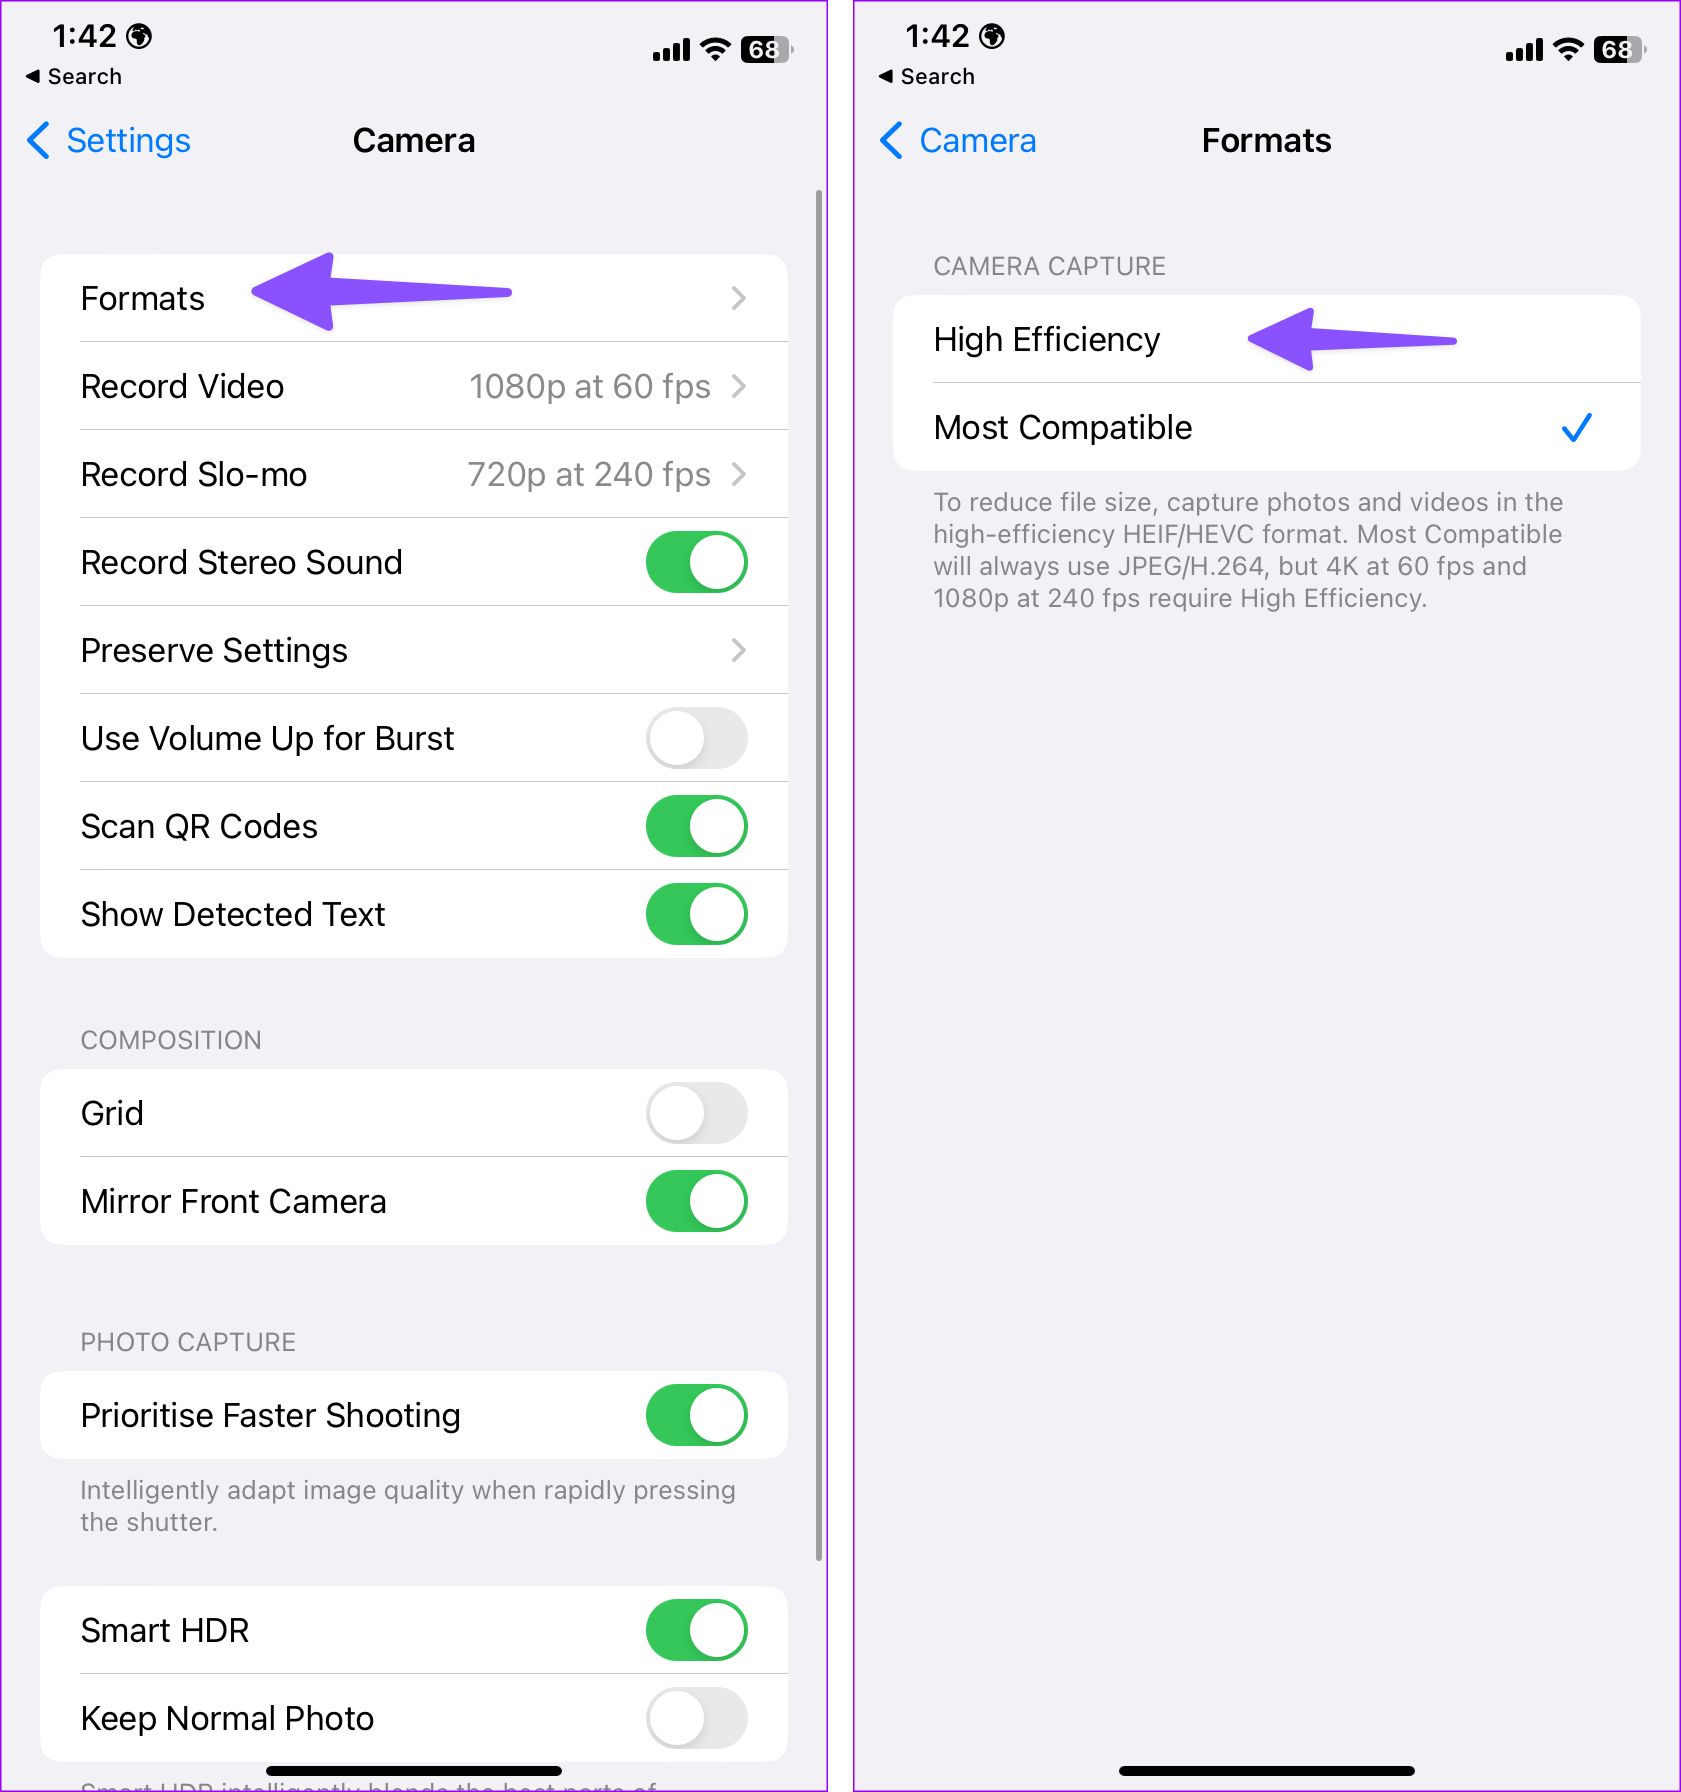
The most common form of picture and video formats might be the reason why your camera pictures are taking up so much space. Apple introduced the new High-Efficiency Image Container (HEIC) format as an alternative to JPEG and PNG. HEIC offers high-quality images in a smaller size. Follow the steps below to change the camera capture format to HEIC. Step 1: Open the Settings app on the iPhone. Step 2: Scroll down to the Camera section. Step 3: Navigate to Formats and select High Efficiency from the following menu. Now, Apple will use HEIC format to shoot pictures that save space and reduce photo file size. However, these pictures still carry a couple of MBs of weight.
3. Use the Shortcuts App
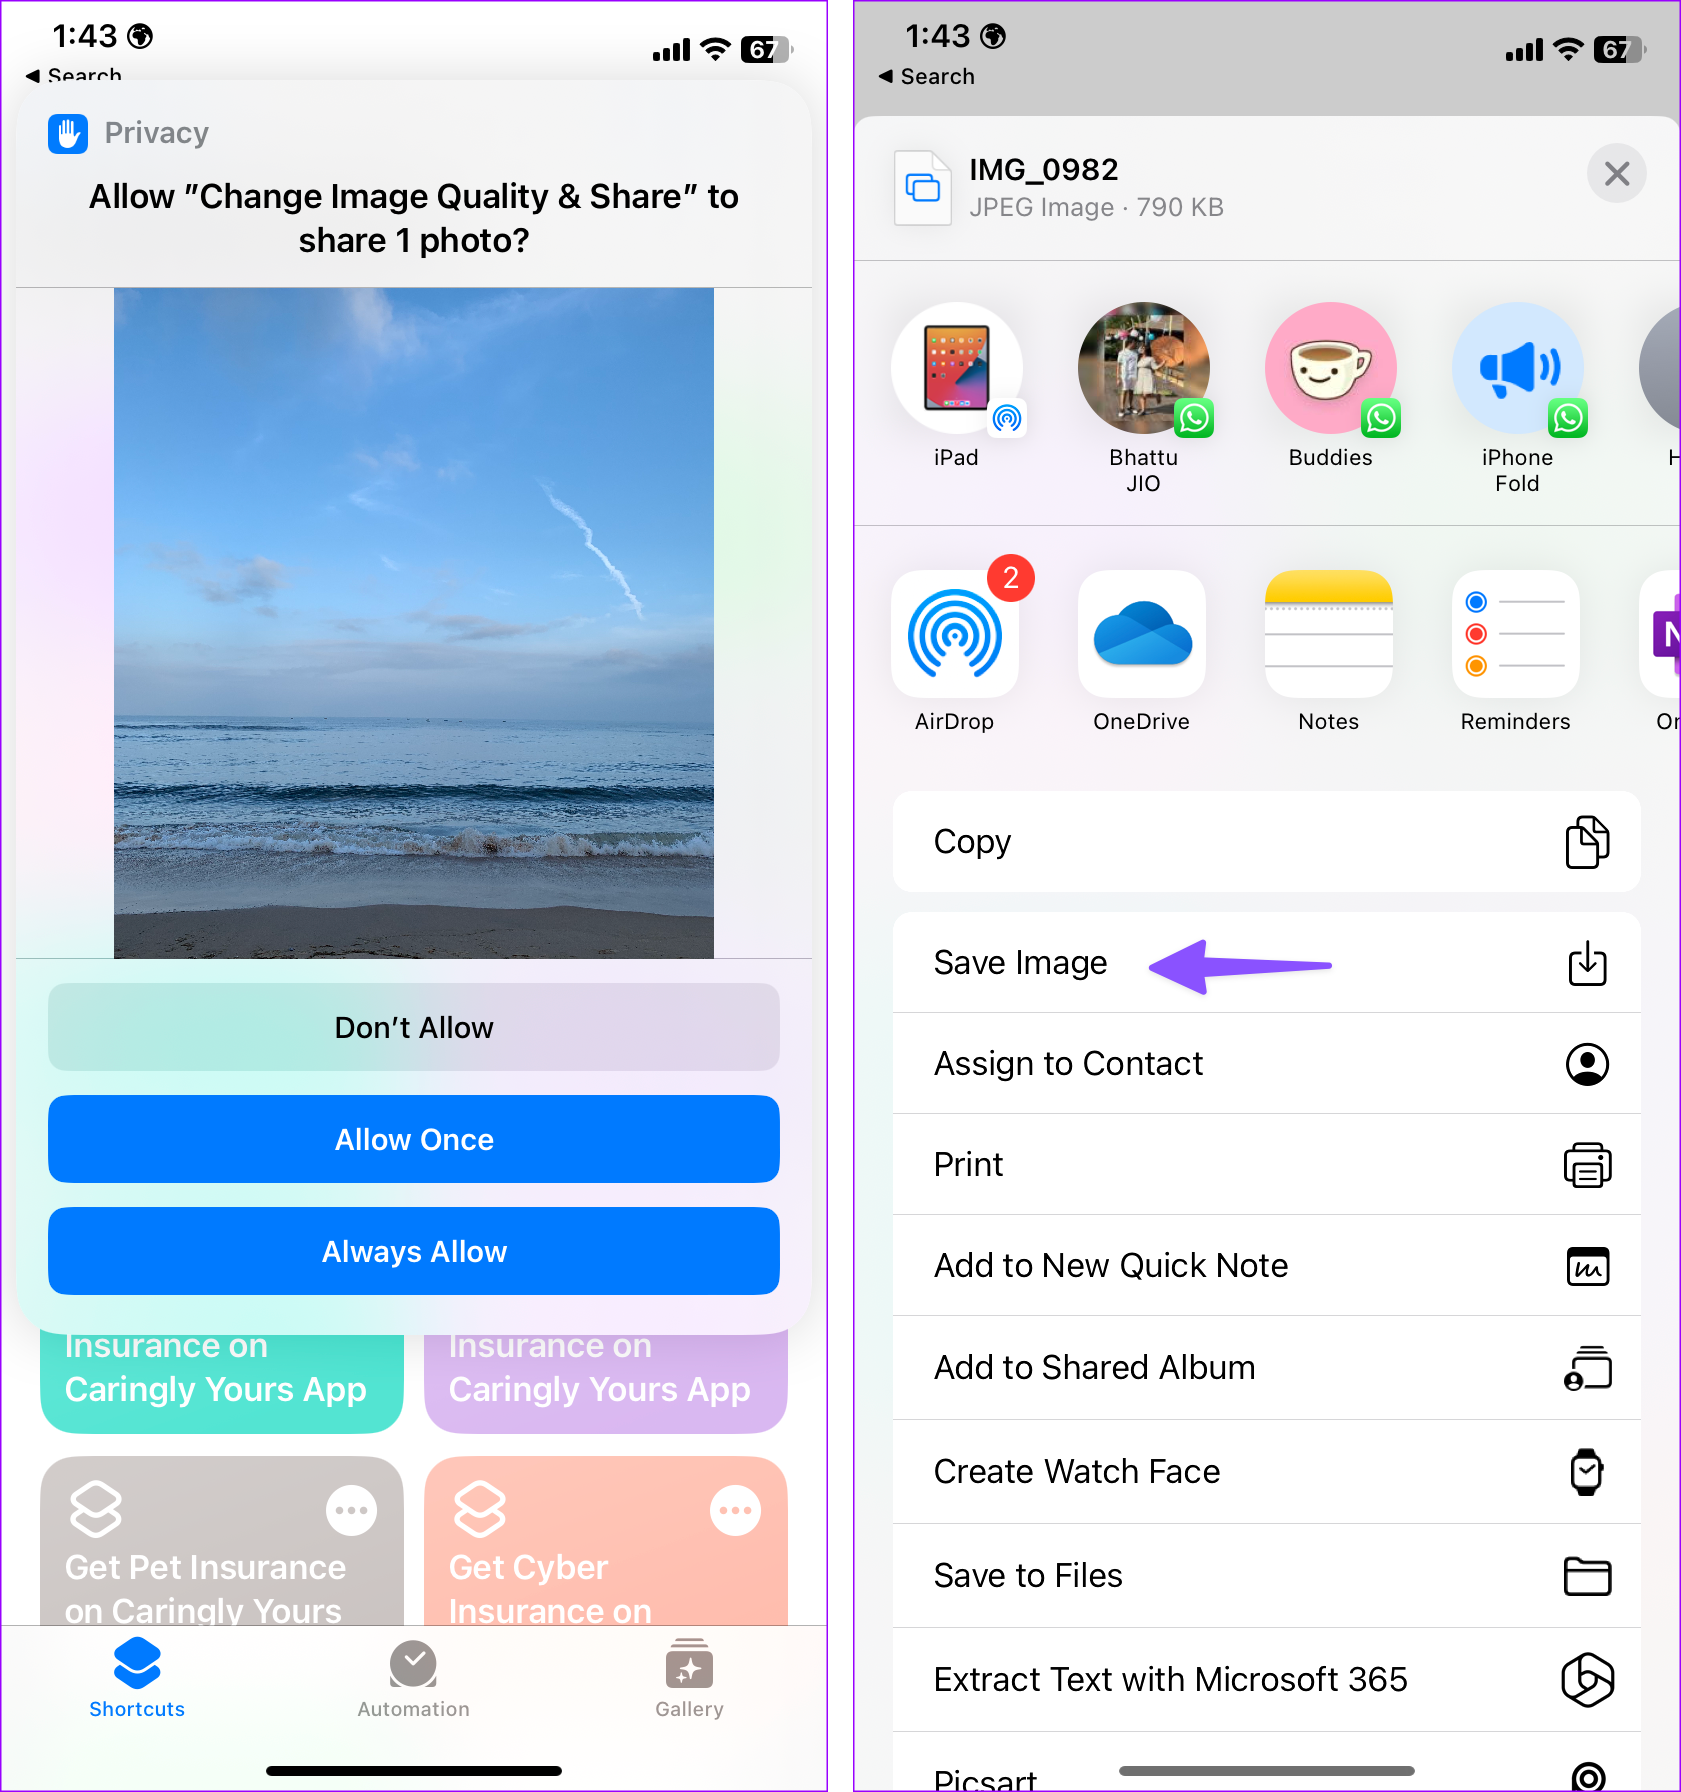
You can use a built-in shortcut to reduce image size with a single tap. Step 1: Use the link below to add a shortcut to your Shortcuts app. Tap Add Shortcut. Download Change Image Quality & Share Shortcut Step 2: The shortcut appears under the All Shortcuts tab. Tap on it. Pick pictures from the following menu. Step 3: Tap Add and select image quality (Low, Medium, or High). Step 4: Allow the shortcut to add compressed images to the Photos app. Tap Save Image from the bottom menu. You can also create a custom shortcut to resize an image with a specific width and height. The above-mentioned shortcuts should be sufficient for most.
4. Use Apple Mail App
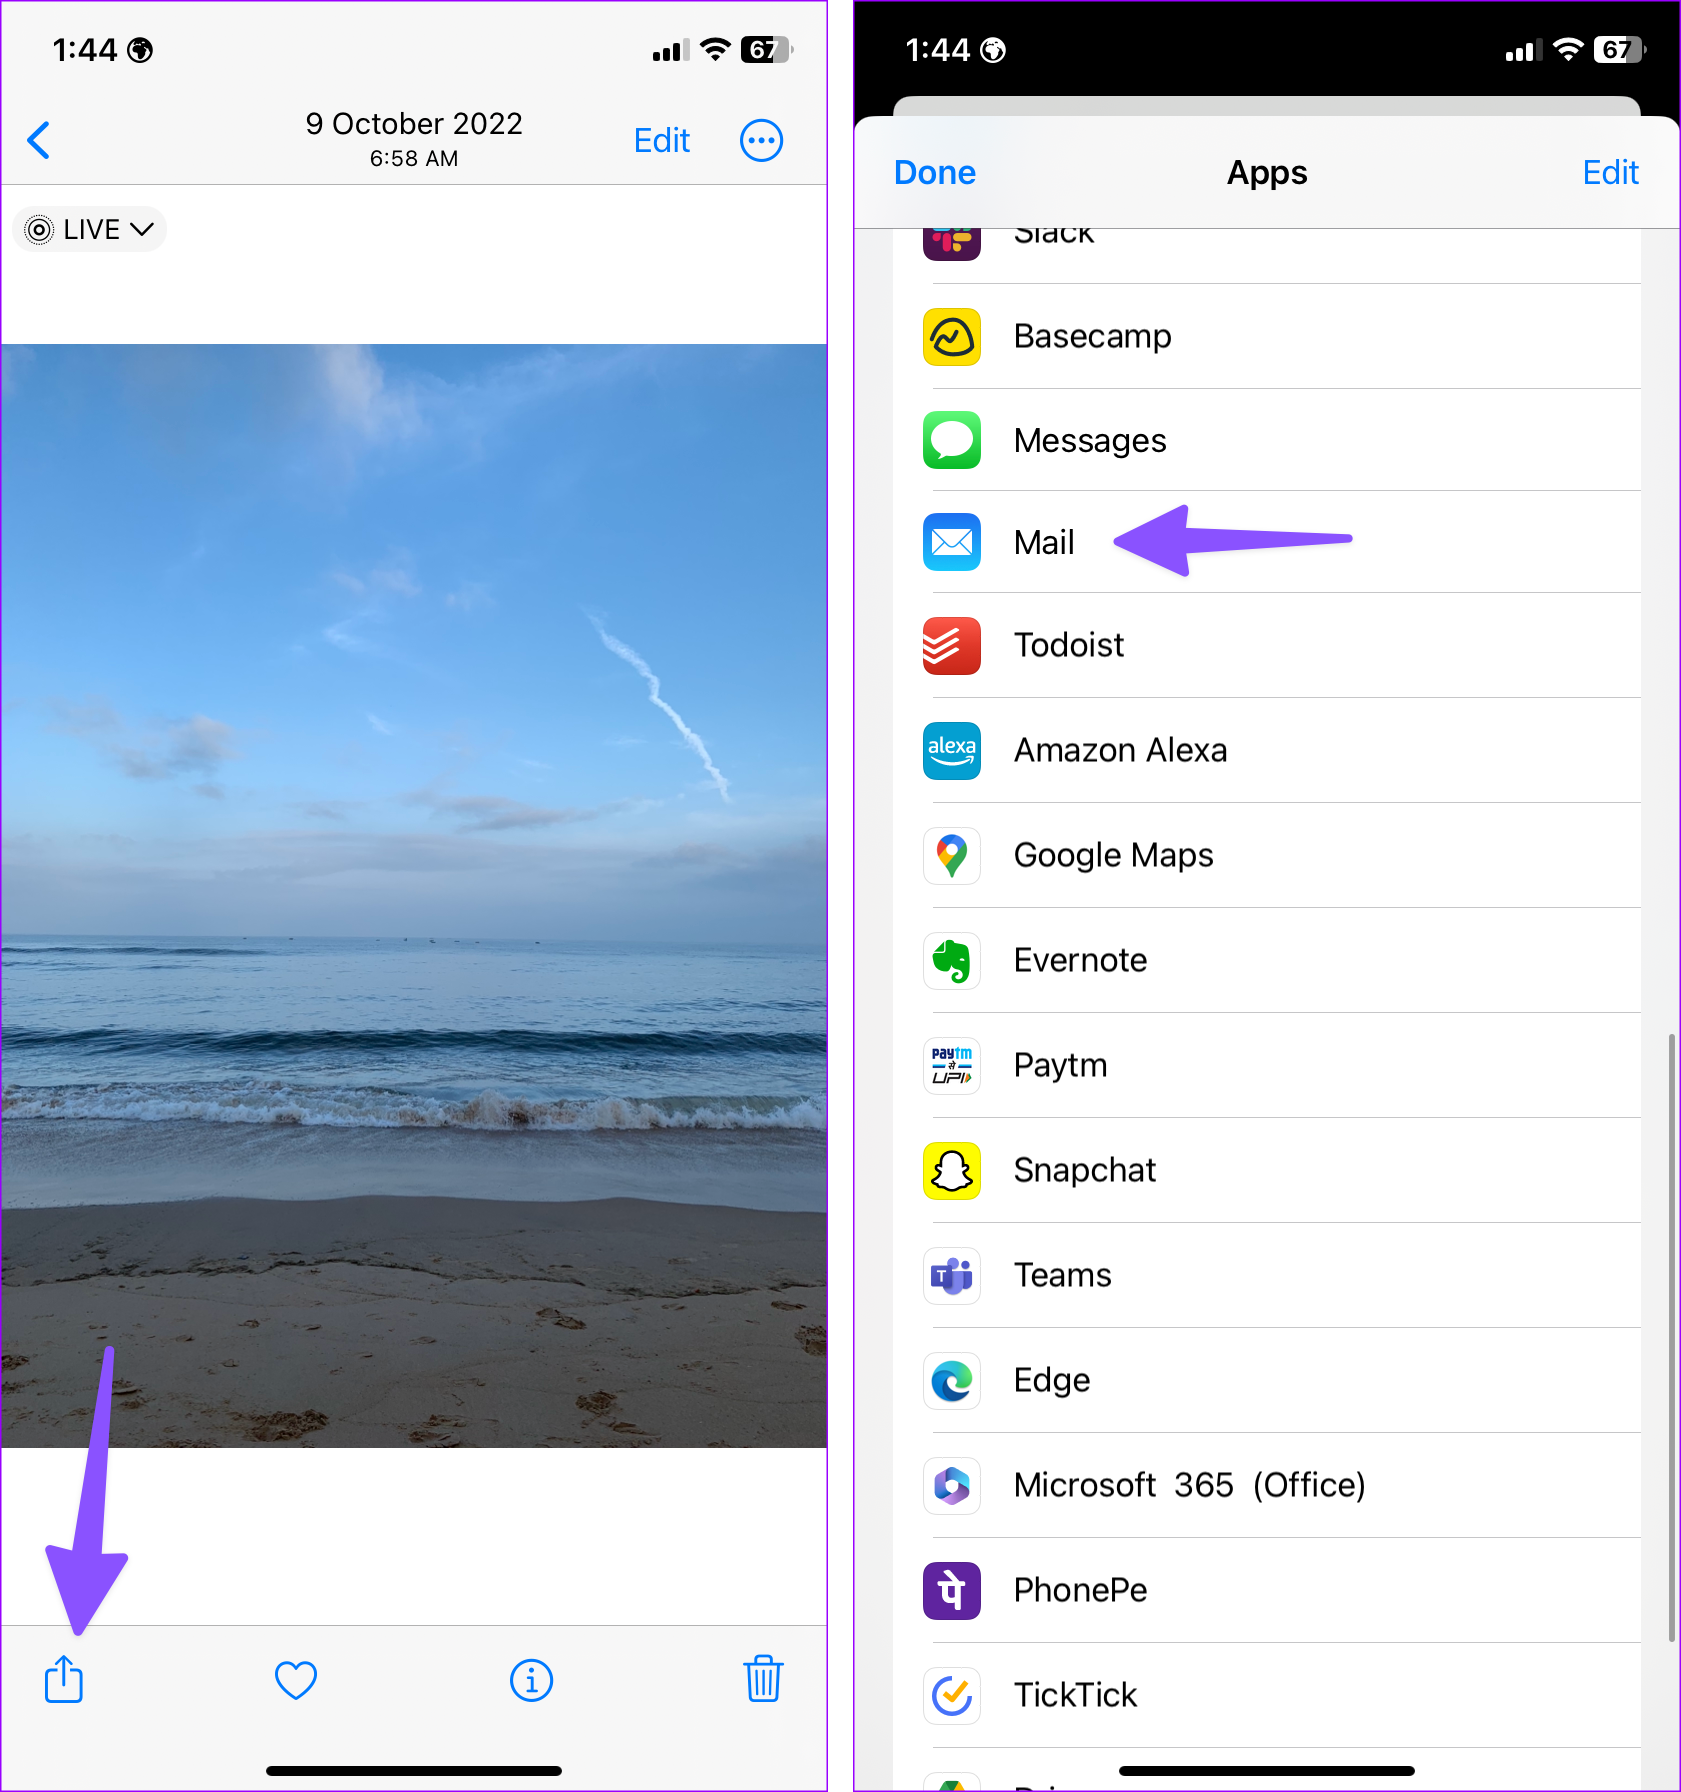
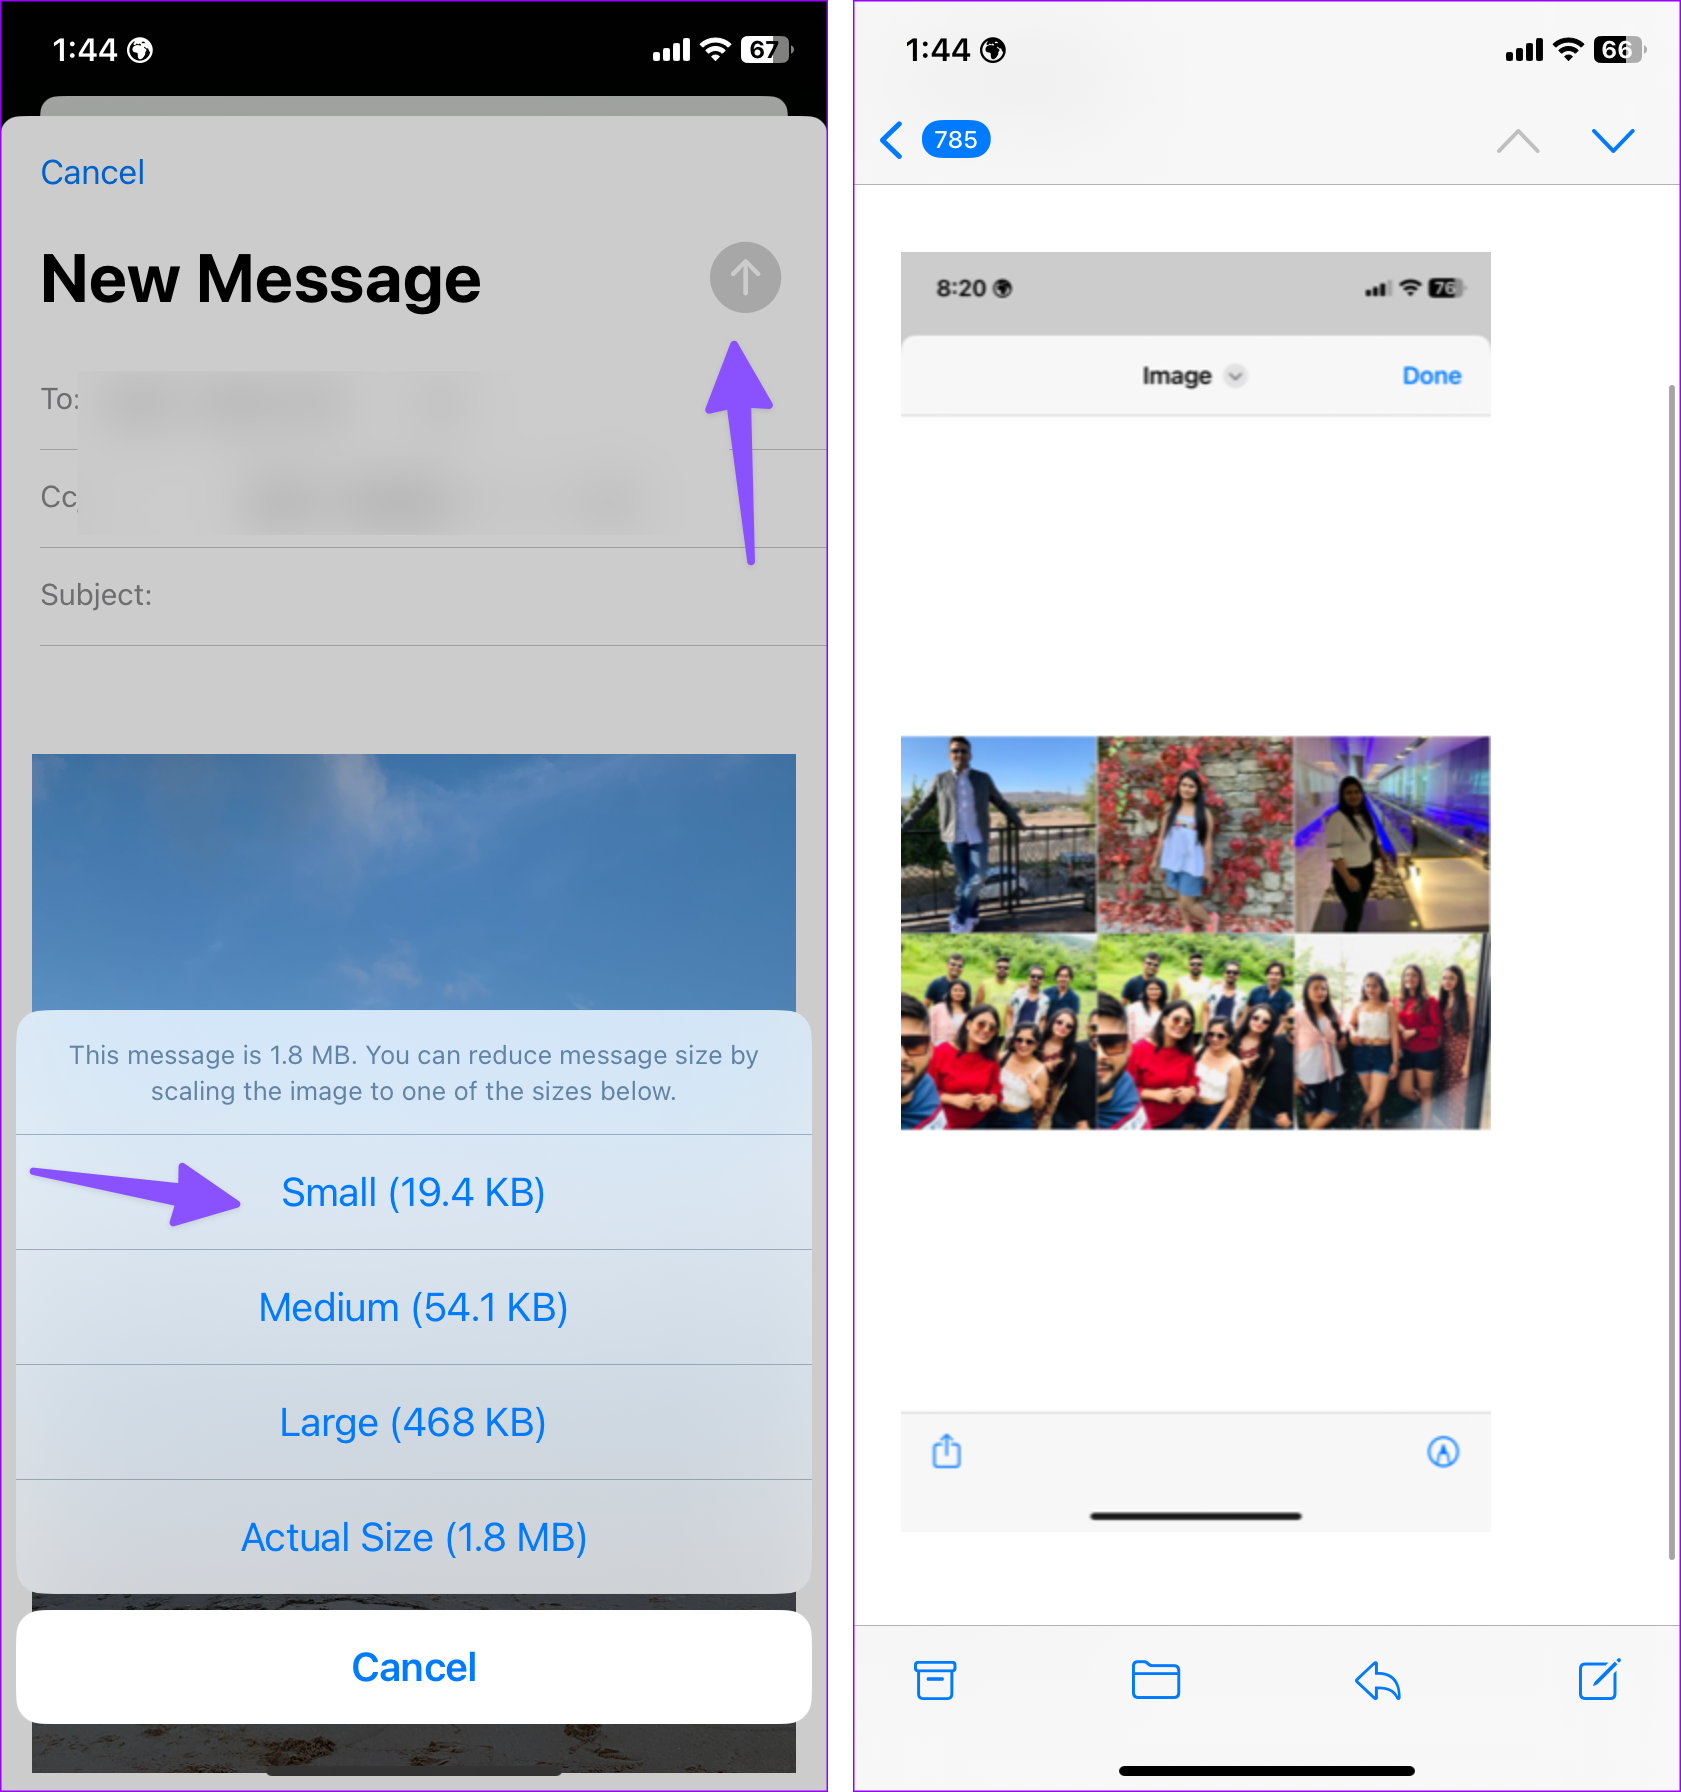
The default Mail app is another handy trick to make iPhone pictures smaller in size. Step 1: Open an image in the Photos app. Tap Share and select Mail. Step 2: Enter your email address and hit send. Mail offers an option to reduce message size by scaling the image. Step 3: Tap Small, Medium, or Large. Open the Mail app and download the resized image to your phone
5. Compress Photos Using Instant Messaging Apps
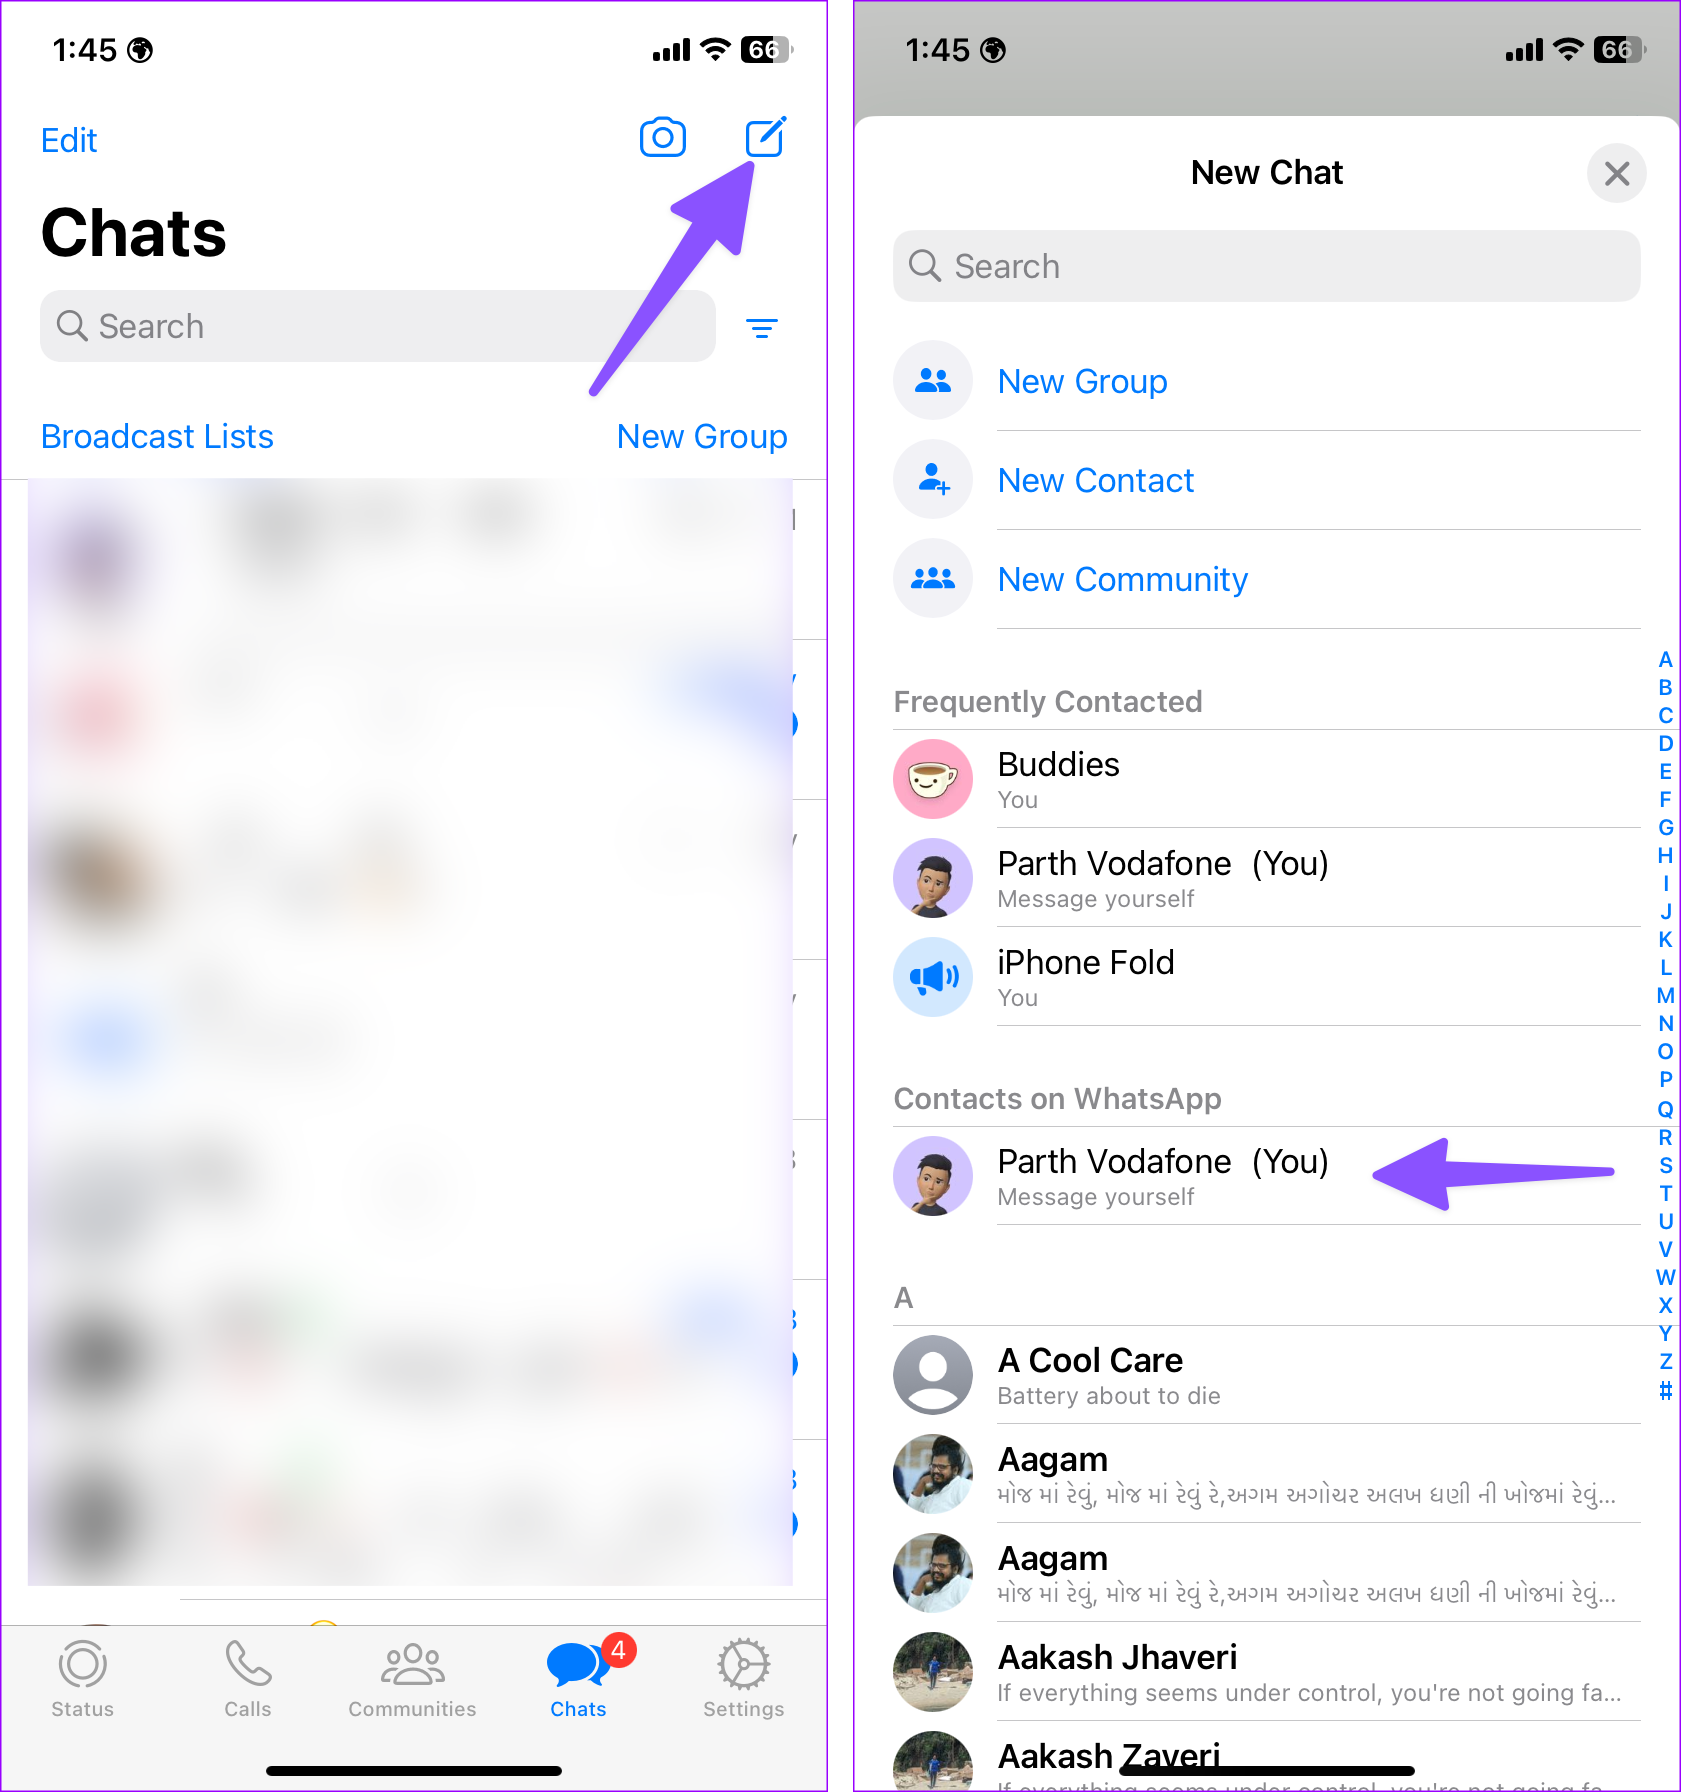
Have you noticed how most social media file sizes are smaller than typical files? When you upload a picture on social media and re-download it, the size reduces drastically. You can apply this method to both photos and videos to reduce their size on your iPhone. Let’s take WhatsApp as an example. Step 1: Open WhatsApp and tap the compose button at the top. Message yourself from the following menu. Step 2: Tap + and send photos and videos on WhatsApp. Step 3: Open a photo, hit share, and select Save to download the compressed file.
6. Check Third-Party Apps
Image Size app allows you to resize an image to whatever size you like quickly and easily. You can specify the output format using one of the following four measurement units: pixels, millimeters, centimeters, and inches. Go through the steps below. Step 1: Download the Image Size app from the link below. Download Image Size on iPhone Step 2: Open the app and permit it to access the library. Select the Photo from the Photos app. Step 3: Select Pixel from the above menu and enter desired Width and Height for the photo.
Step 4: Use the bottom Save, Share, Email, or Print option to export the image. We like how to app offers live data on reduced file size before you save the image. Compress Photos is another effective third-party app to reduce image file size on iPhone. Download Compress Photos
How to Compress Photos on Mac
You don’t need to deal with third-party apps to compress photos on Mac. The built-in methods should be enough for most Mac users.
1. Use Preview to Compress Pictures on Mac
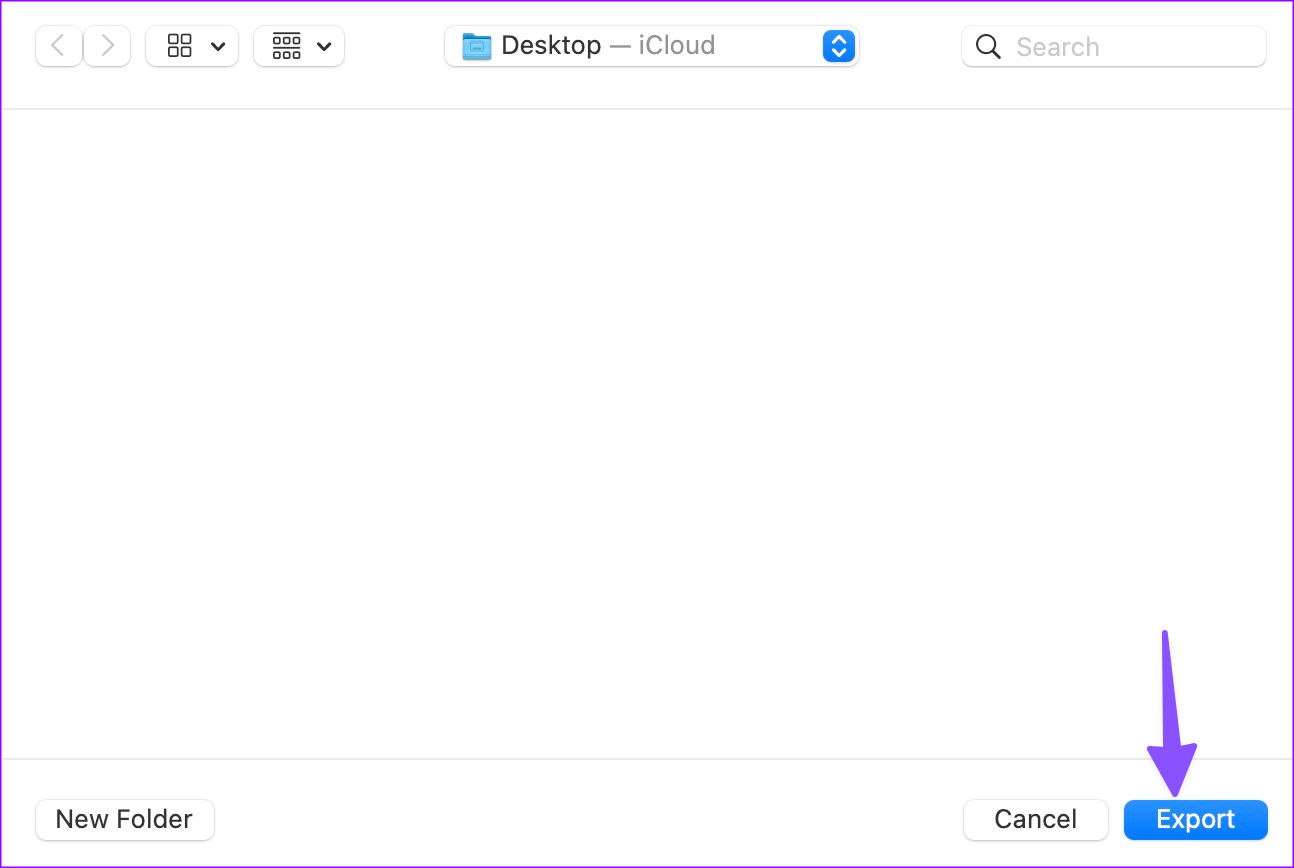
You can use the built-in Preview app to reduce one or several images simultaneously. Compress One Image You can also change the image file type using the default image viewer app on Mac. Go through the steps below. Step 1: Send photos from iPhone to Mac using AirDrop or opt for iCloud, Google Photos, or OneDrive. Step 2: Open the image using the default Image preview on Mac. Step 3: Go to File on the menu bar. Step 4: Select Export from the following menu. Step 5: macOS will ask you to select the location and file type. Below the file type option, you will have a slider to reduce image size.
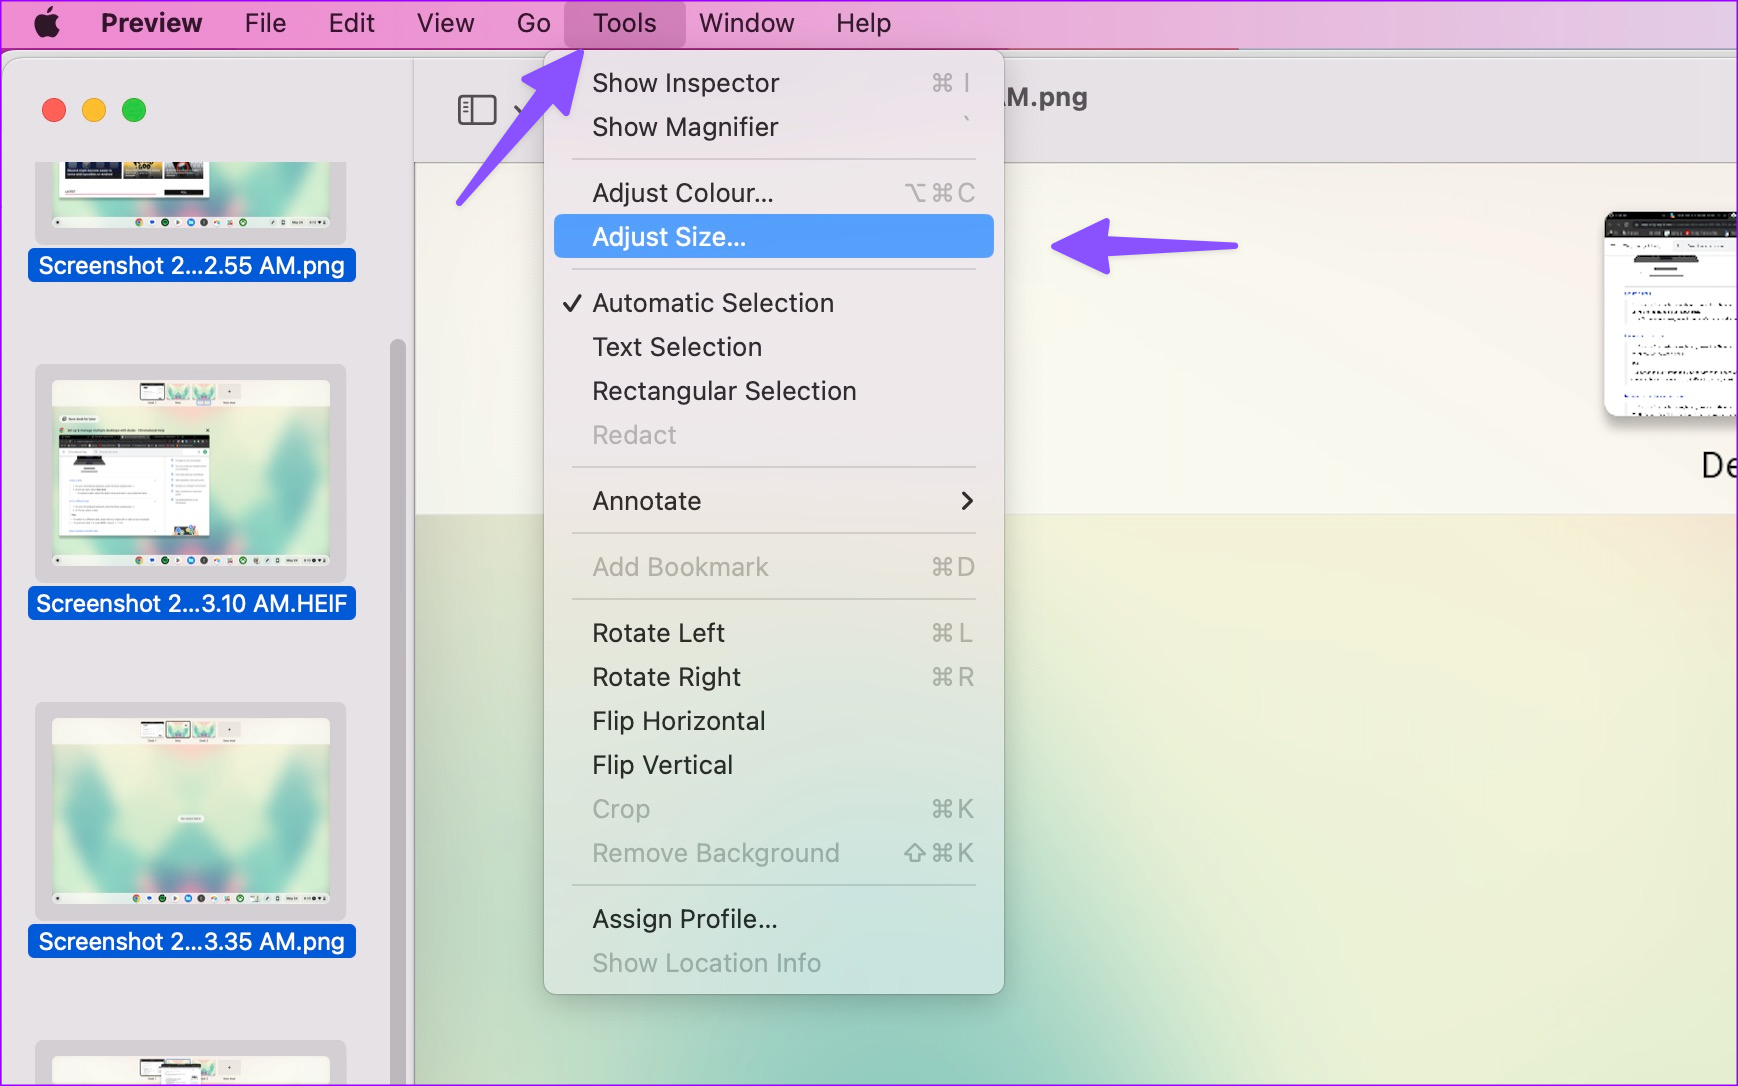
Step 6: Slide it down based on your requirements, and the OS will calculate the approximate file size for you. Compress Bulk Images Step 1: Select several images in Finder and open them in the Preview app. Step 2: Press Command + A keys and select all photos. Click Tools and open the Adjust Size menu. Step 3: Change width, and height, check the resulting size, and hit OK.
2. Use Mac’s Photos App
The Photos app comes with an Export tool that helps you reduce the photo size in quick steps. Step 1: Launch the Photos app on Mac and select an image. Click File at the top. Step 2: Expand Export and select Export a photo. Step 3: Expand the Size menu and select a relevant size. You can also select Custom and set a specific width. Step 4: Hit Export and pick a specific folder in Finder to save the image.
3. Use Image Resizer Shortcut
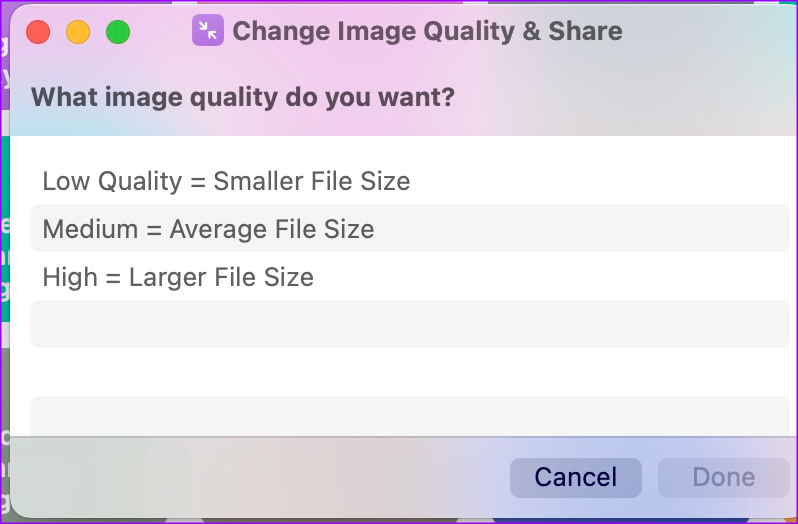
The above-mentioned Siri shortcut is available on Mac too. You can use the same link to open the shortcut and click Get Shortcut. Select ‘Add Shortcut’. Step 1: Open the Shortcuts app on Mac. Select ‘Change Image Quality & Share’ shortcut. Step 2: Select a picture from the Photos app and hit Add. Step 3: Select image quality size and hit Done. Step 4: Allow the app to save the image to the Photos app on Mac.
4. Check Online Tools
There is no shortage of online tools to reduce image size on Mac. Photostack is one such tool to compress bulk images with a single click. Step 1: Visit Photostack on the desktop. Visit PhotoStack Step 2: Drag and drop images from the Finder app. Step 3: Set the image width, add a border if you prefer, change the image format, and set quality. Step 4: Hit Export to download compressed images on Mac.
5. Try Third-Party Apps
PhotoScape X is a capable image editor to compress pictures on Mac. It’s free to download and use. Download PhotoScape X on Mac Step 1: Open PhotoScape X on Mac. Give necessary permission to access the device storage. Step 2: Select Batch at the top. Drag and drop images from Finder or the side menu. Click Save. Step 3: Use the slider to reduce the photo size, confirm the output folder, and click OK. You can also add a filter, change the width, and make other necessary changes before saving the photos to Mac.
Compress Images on iPhone and Mac
You can go with Mac’s default Preview app to reduce image size. It works flawlessly and requires no third-party app intervention to get things done. iPhone users can master the Shortcuts app to compress bulk images in a minute. You can also read our separate post to reduce PDF size on your iPhone. If you have moved from iPhone to Android, check our guide to compress photos on Android. The above article may contain affiliate links which help support Guiding Tech. However, it does not affect our editorial integrity. The content remains unbiased and authentic.