Aside from the Windows Search tool, several apps, including File Explorer, Photos, Outlook, Edge, and others, use the search index to provide search results for files and other content. Hence, it’s vital to address issues with the search index promptly. In this post, we’ll show you how to rebuild the Windows 11 search index and discuss the outcomes of doing so. So, let’s start.
How to Rebuild the Search Index Using Indexing Options
The most commonly used method for rebuilding the search index is via the Indexing Options panel. Note that you can only do this if you have administrative rights on your Windows computer. To rebuild the search index using Indexing Options, follow these steps: Step 1: Right-click on the Start icon and select Settings from the list. Alternatively, press the Windows key + I keyboard shortcut to achieve the same.
Step 2: Select Privacy & security from the left sidebar.
Step 3: Click on Searching Windows.
Step 4: Scroll down to Related settings and click on Advanced indexing options.
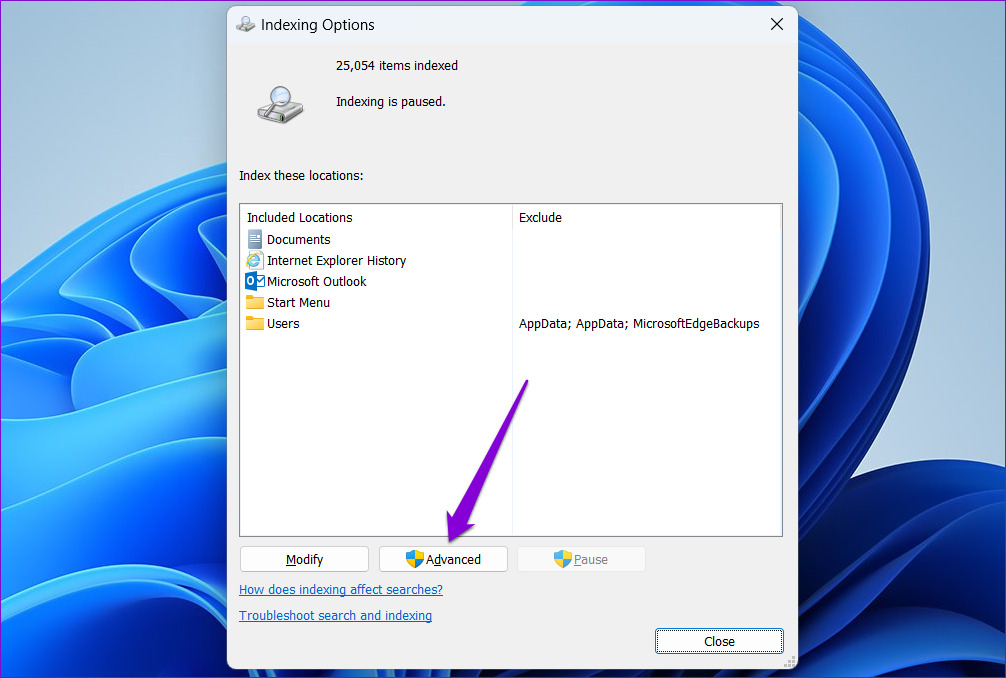
Step 5: In the Indexing Options window that appears, click the Advanced button.
Step 6: Select Yes when the User Account Control (UAC) prompt shows up.
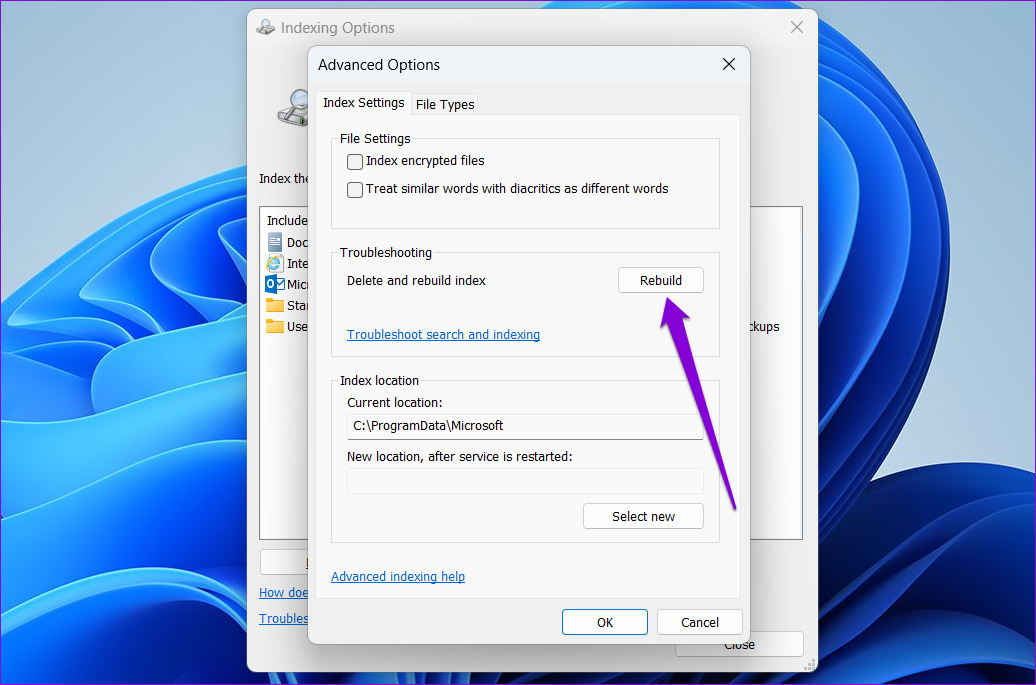
Step 7: Under the Index Settings tab, click the Rebuild button next to ‘Delete and rebuild index.’
Step 8: Click OK to confirm.
After completing the above steps, wait for Windows to rebuild the search index. You can continue using your PC as usual while Windows rebuilds the search index. However, the Windows search feature may not function properly once the process is complete.
How to Rebuild the Search Index With a Batch File
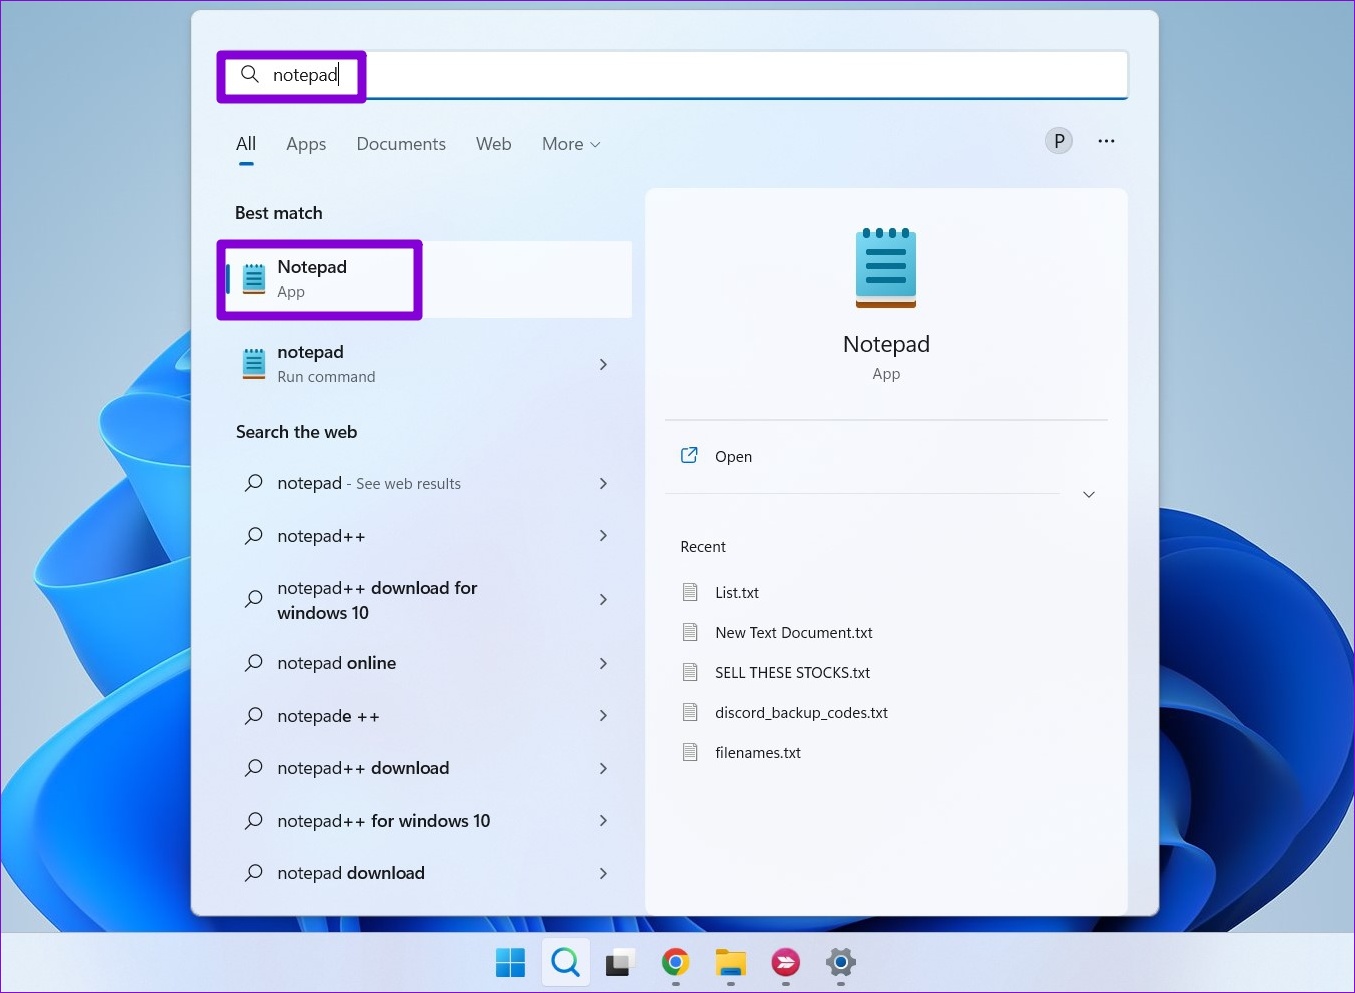
Running batch files on your computer can help you execute a series of commands in sequence. You can also set up a batch file to rebuild the search index in Windows. This approach eliminates the need to navigate through menus whenever you want to rebuild the search index, making the process more efficient and convenient. To create a batch file for rebuilding the search index in Windows, use these steps: Step 1: Press the Windows key + S keyboard shortcut to access the search menu. Step 2: Type notepad and select the first result that appears.
Step 3: Paste the following batch file code in the Notepad window.
Step 4: Click the File menu at the top and select Save as.
Step 5: Select the All files option in the Save as type drop-down menu. Enter Rebuild index.bat in the File name box.
Step 6: Click the Save button.
Step 7: Locate the Rebuild index.bat file on your PC. Right-click on it and select Run as administrator.
Step 8: Select Yes when the User Account Control (UAC) prompt appears to initiate the search index rebuilding process on Windows.
After you are familiar with rebuilding a search database, let’s understand what happens during the process.
What Happens When You Rebuild the Search Index on Windows
When you rebuild the search index, Windows deletes the existing search database and scans your system to generate a new index database of all the files and other content. Since this process resets all indexing preferences to their default settings, you will need to re-configure any custom indexing options on your PC that you want to be applied. Also, you might notice higher CPU usage as Windows attempts to rebuild the index from scratch.
The duration of the search index rebuilding process in Windows depends on several factors, such as the number of files Windows is indexing, the processing power of your PC, and other variables.
Get Lightning-Fast Search Results
Windows Indexing is an incredibly useful feature that lets you quickly locate your files and folders. Sometimes, you may have to rebuild the search index to fix any issues and restore its functionality. Thankfully, the process is simple if you follow the steps correctly. If the indexing process suddenly pauses in Windows 11, don’t fret. There are several ways to get the Indexing tool back up and running again. The above article may contain affiliate links which help support Guiding Tech. However, it does not affect our editorial integrity. The content remains unbiased and authentic.