Word often gets far less credit than it deserves. While Microsoft has not made it easy to place and move images inside Word, it does offer ways to do so. The only trouble is finding the correct tools for the job. These options are not so obvious and can be hard to see if you don’t know where to look. That is where we come in. I will show you how you can place images in Word without having to curse Microsoft while pulling your hair out or biting your nails off! Let’s begin.
1. Set It Right
Before you begin adding images, you will have to configure Word to play nice with pictures. There are two settings to make it easier for you to add images that don’t act and look like text because it’s not. Ideally, you should be able to drag it to wherever you want inside Word. The Word comes with anchor points that by default are not visible. To make anchor points visible, open Word and click on File button. Then click on Options at the bottom of the screen in the sidebar. Under Display, you will see Object anchors option that should be toggled on. You will now see the anchor symbol whenever you insert an image. One more thing you need to do is change how Word places the image after adding it. Inside Word Options above, there is another tab called Advanced. Under Cut, copy, and paste, you will find Insert pictures as an option. Change it to Square. Don’t forget to click OK every time you change a setting. That will tell Word to stop treating pictures as text but instead as images.
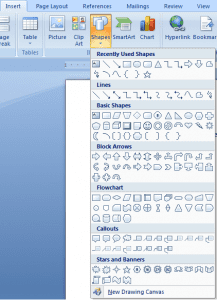
2. Add Them Correctly
Let’s begin with adding an image now. You can either drag and drop the image directly from your hard drive or use the Insert function. To do the later, click on Insert and select Pictures to launch a pop-up. Navigate to the folder where you have saved the photo and double-click on it to add it to Word. Word will treat the image as an object now instead of text, and you will see how the text flows around the picture now. Here is how Word would have handled the image if you had not made the changes above. You can now drag and move the image wherever you want in Word, and the text will adjust and wrap itself around it. You will also notice an anchor symbol appear on the left. This anchor symbol marks the location (paragraph to be more precise) associating to the image. This is more of a visual cue for beginners and is removable by changing the settings in Step 1.
3. Format It Right
More often than not, when you insert an image, it ends up appearing somewhere else. You will notice that dragging images around Word document is a lot easier now, but it is still not perfect. This is where the Layout options come into the picture. Just click once on the image you want to format to reveal resize and movable buttons around the image. Under the Layout tab, you will find the Position option. Click on it to find More Layout Options at the bottom. The difference here is that you can be more precise about the layout and positioning of the image rather than selecting from a bunch of presets. There are three tabs. The first one is Position where the image is set to the Absolute position to the right of Column horizontally, and below the paragraph vertically. By default, Word documents are preset to be one column, but the above idea and the settings will work with two or more column layout too. The second tab is Text Wrapping which you can use to place the image behind the text or front, and determine whether the text is wrapped from on sides or only left/right. The last tab, Size, will let you resize the image so you can fit it in areas that can be otherwise difficult to manipulate. While you can also use the resize and angle handles we saw above, this tab will let lock aspect ratio and keep it relative to the original picture size. At this point, I would suggest you play around with all the different Layout options to understand better how they work. While the resize and angle option that appears upon selecting the image can also be used, Layout formatting options will let you be more precise with your input values.
Words Matter
Word is a pretty document editor, and though it is not the best word processor in the world, it still gets the job done. It also comes pre-installed with all Windows machines. Learning to work with it will go a long way in helping you get things done. Next up: Do you want to learn how to remove image background using MS Word? Click on the link below to learn how you can do it without having to use an advanced image editor. The above article may contain affiliate links which help support Guiding Tech. However, it does not affect our editorial integrity. The content remains unbiased and authentic.