After all, it’s an AI-based recognition in Google Photos and it can go wrong at times. By fixing those mistakes, you can help the Google Photos app to tag people in photos correctly. Being a responsible tech company, Google offers several options to improve face recognition in Google Photos. That way, you fix the wrong faces detected by Google Photos and improve the overall algorithm for better results in the future.
Use Google Photos Mobile Apps
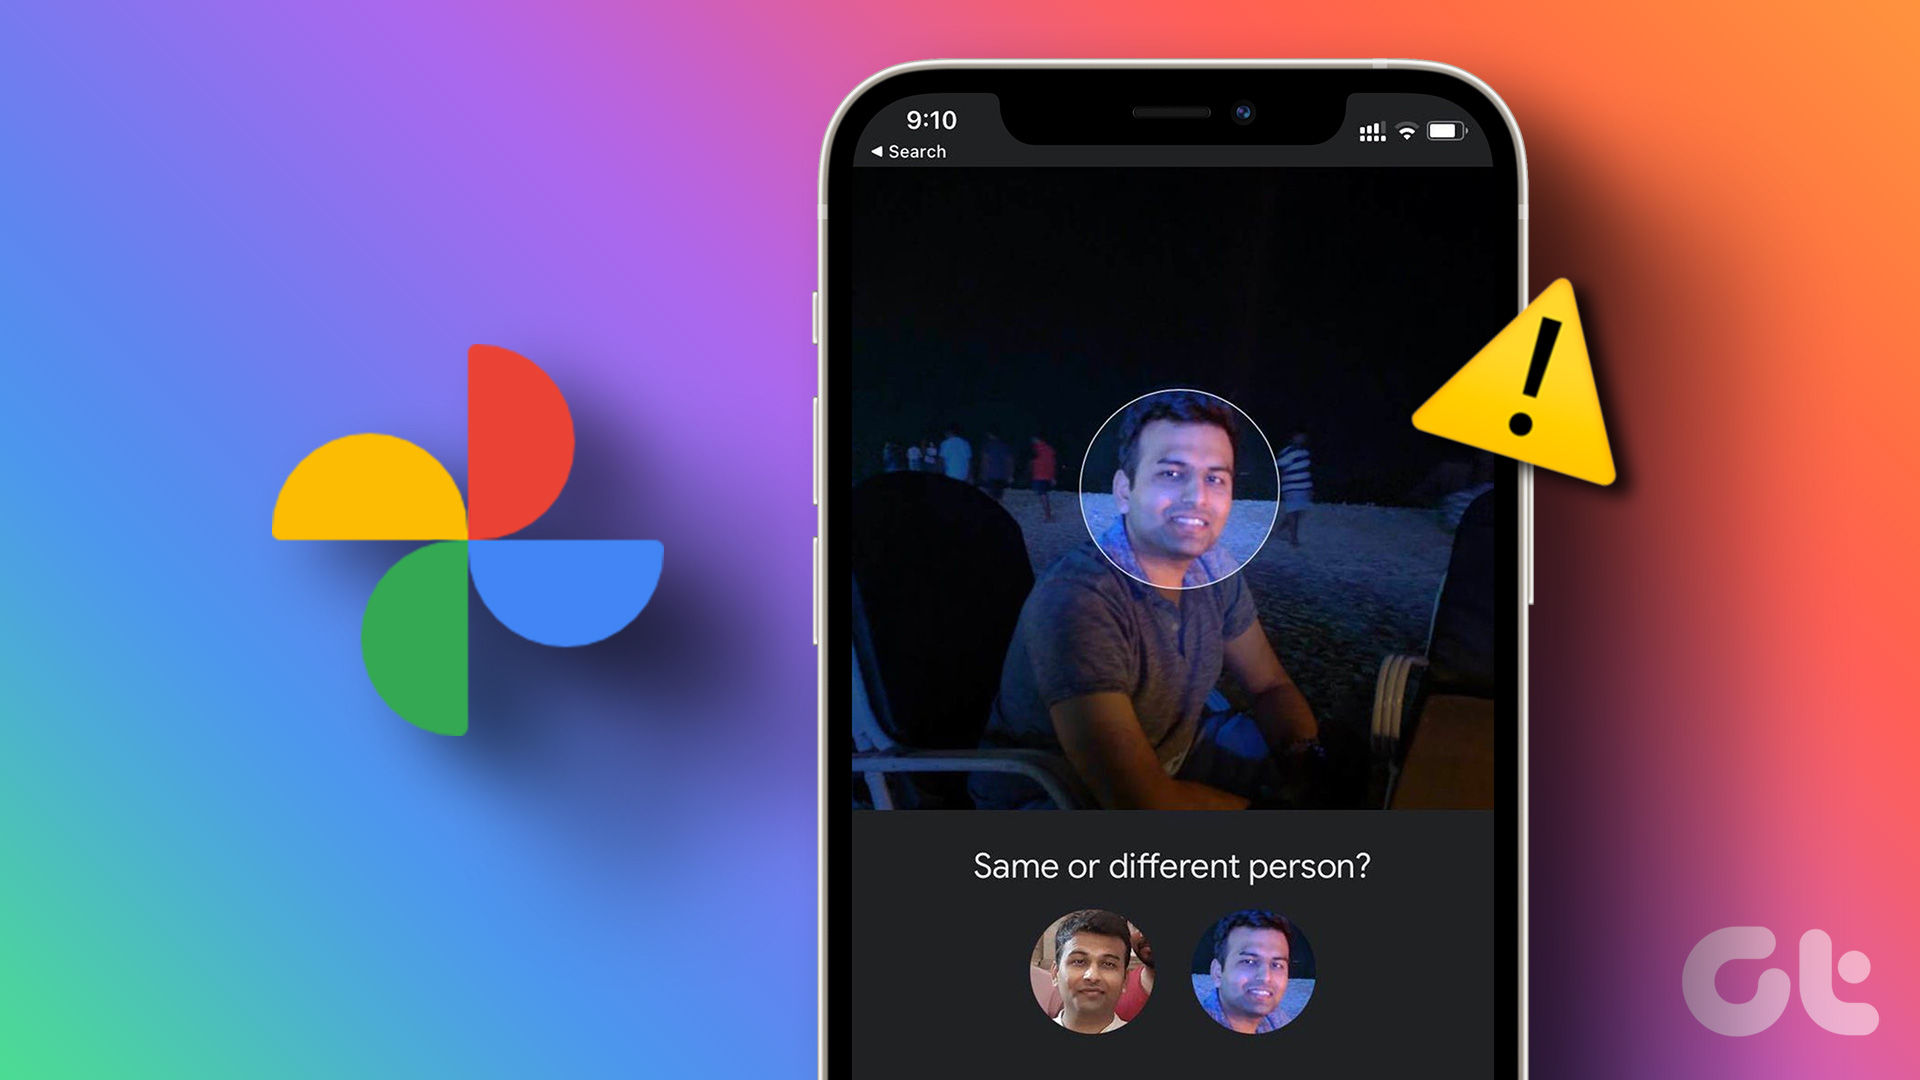
Google Photos for Android and iPhone carry the same UI/UX. The steps to improve facial recognition are identical on both platforms. In the example below, we will use the Google Photos iPhone app, but you can follow the same steps on Android to get better results. Step 1: Open the Google Photos app on your mobile. Step 2: Tap on the Search icon at the bottom. Step 3: Select the people face that need to be fixed. Step 4: You will see all the photos of the user that Google Photos has identified over the years. Step 5: Select the problematic photos and tap on the three-dot menu at the top. Step 6: Tap on Remove results. Step 7: Google Photos will ask you, ‘Why are these results for ‘x person’ incorrect? Select a relevant result and tap on Submit at the bottom. Most users will mark the Wrong person as a reason for incorrect facial recognition. To improve the facial recognition further, Google will ask you to ID if this is the same person in other pictures or not. Tap on it and select Same or Different or Not sure from the following menu. Google Photos will keep asking for your input from different types of pictures of the person to do a better job at facial recognition. This is very helpful for the photos of your kids. The facial shape and style change dramatically for them compared to adults. Google Photos will learn how your child used to look like at two years, four years, and so on. It can create a complete profile for the little one and you can find all the photos with a single tap from the Search menu.
Use Google Photos Web
You can perform the same actions from the Google Photos web version as well. Those sitting at the desk will find this method more useful. It’s easier to view all the photos on a bigger canvas than on a small screen on mobile. Step 1: Visit Google Photos on the web. Step 2: Sign in using your Google account credentials. Step 3: It will take you to the Photos menu on the home screen. Step 4: Click on Explore from the left sidebar. Step 5: Click on the person’s face that you want to correct, and Google Photos will showcase all the identified results from the Google Photos library. Step 6: Select the problematic photos that you want to remove. Step 7: Click on the three-dot menu at the top and select Remove results. Similarly, on Google Photos for mobile, it will ask for the reason for removal. Select the Wrong face and move on. Like Google Photos on mobile, you have an option like Same or different person from Google Photos. Click on it, and it will take you through a photos survey and ask you to submit feedback. Google Photos will save your input in the database and use them to deliver astute face recognition in the future. Another way you can improve face recognition is by uploading more photos to the Google Photos cloud. The more data Google has, the better it can improve the facial recognition results for you. Try to upload different kinds of photos of a person. Some images with straight faces, some in group shots, some in dark scenes, and more. Try to train the algorithm from your side by feeding more data.
Use Google Photos Like a Pro
Google Photos’ facial recognition is one of the best we have ever seen. Unfortunately, both iCloud and OneDrive remain far behind in terms of delivering relevant results. You can further improve facial recognition by following the steps above and be amazed at what Google Photos is capable of. The above article may contain affiliate links which help support Guiding Tech. However, it does not affect our editorial integrity. The content remains unbiased and authentic.