For editing screenshots, we will use the built-in Preview app. Though third-party screenshot apps may offer more features, the Preview app packs enough punch to tackle your needs.
Capture Screenshots on Mac
Just like Windows, even macOS comes with a built-in screenshot capturing tool that you can summon with keyboard shortcuts. While you might be capturing screenshots, keep on reading to know how to crop, resize, or even annotate them. To take a screenshot of the entire screen, use Cmd+Shift+3 keyboard shortcut. If you want to capture a portion of the screen, use Cmd+Shift+4 keyboard shortcut. You will notice that your cursor has changed into a crosshair. Drag it on the part you want to capture.
To take a screenshot of an app window, use the Cmd+Shift+4 keyboard shortcut. Then, tap the space bar to turn your cursor into a camera icon and highlight the app window. Hit Enter or tap anywhere on the trackpad to capture the screenshot.
To summon the screenshot capture tool, press the Cmd+Shift+5 keyboard shortcut. It launches the screenshot interface to let you capture entire screen or a part of it with a visual interface.
Crop and Delete Parts of Your Screenshots
Before sharing a screenshot, sometimes you might want to crop it to remove unnecessary content or delete a portion of the screenshot to hide personal information. Here’s how to do it. Step 1: Double-click on the screenshot to open it in Preview. Click on the Markup tool in the top-right corner.
Step 2: To crop or delete a portion of the screenshot, click on the selection tool. Then choose the shape of the selection tool, which is rectangular by default.
Step 3: Hold and drag the cursor to select the screenshot area that you want to either crop or delete.
Step 4: Hit the Cmd+K keyboard shortcut to keep the cropped area and delete the rest.
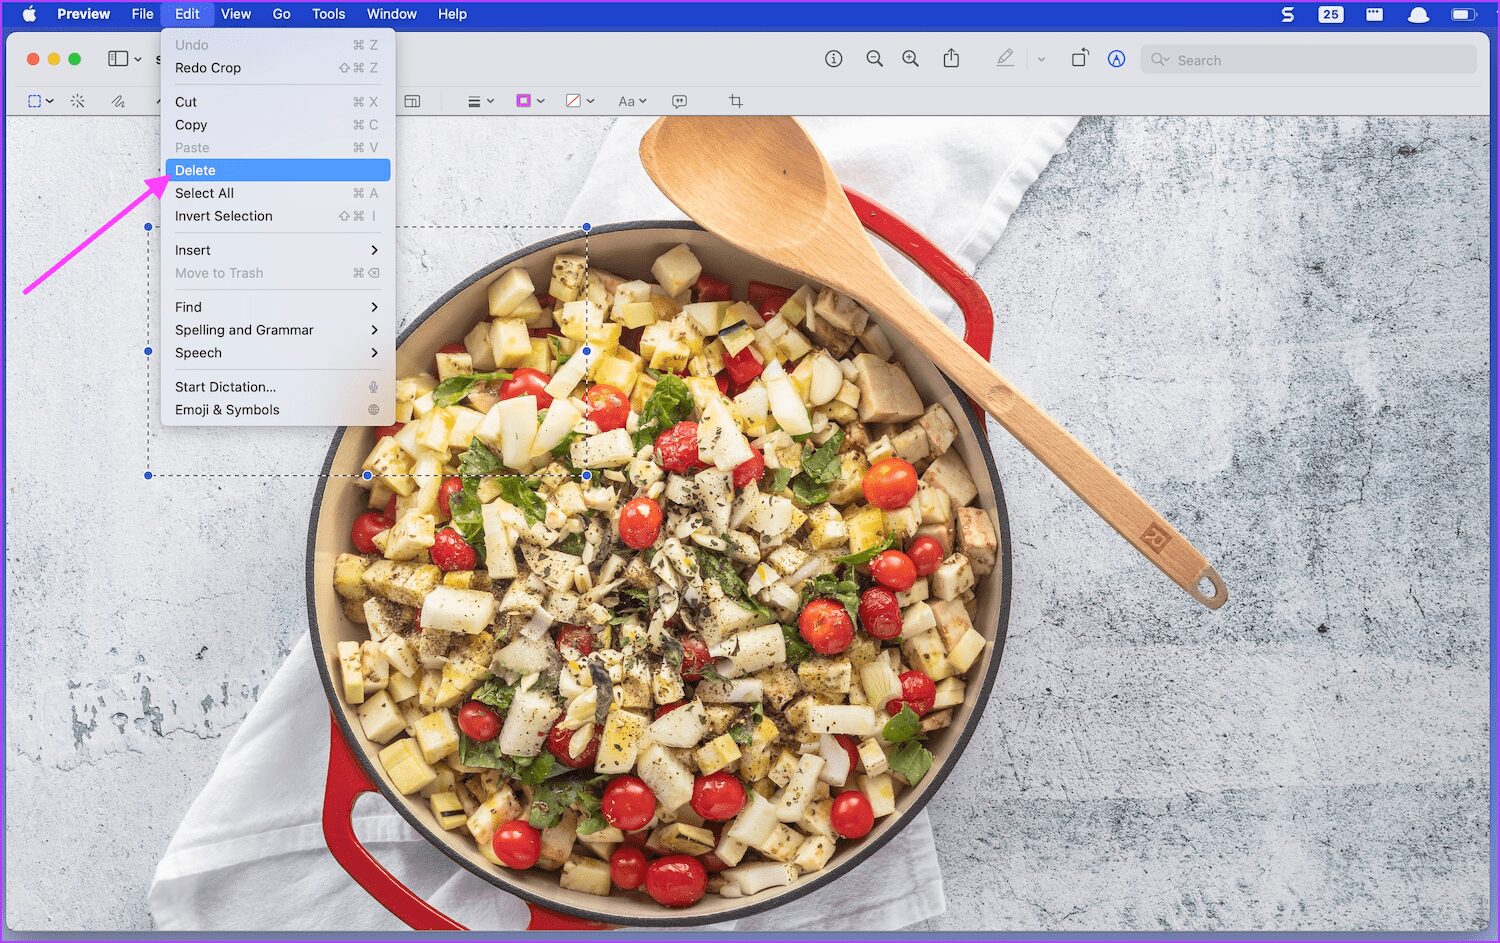
Step 5: To delete a selected area, you can either use the keyboard shortcut Cmd+Delete or click on the Edit menu and select Delete.
Step 6: Here’s how a typical screenshot looks after deleting the select area.
Markup Your Screenshots Using Shapes
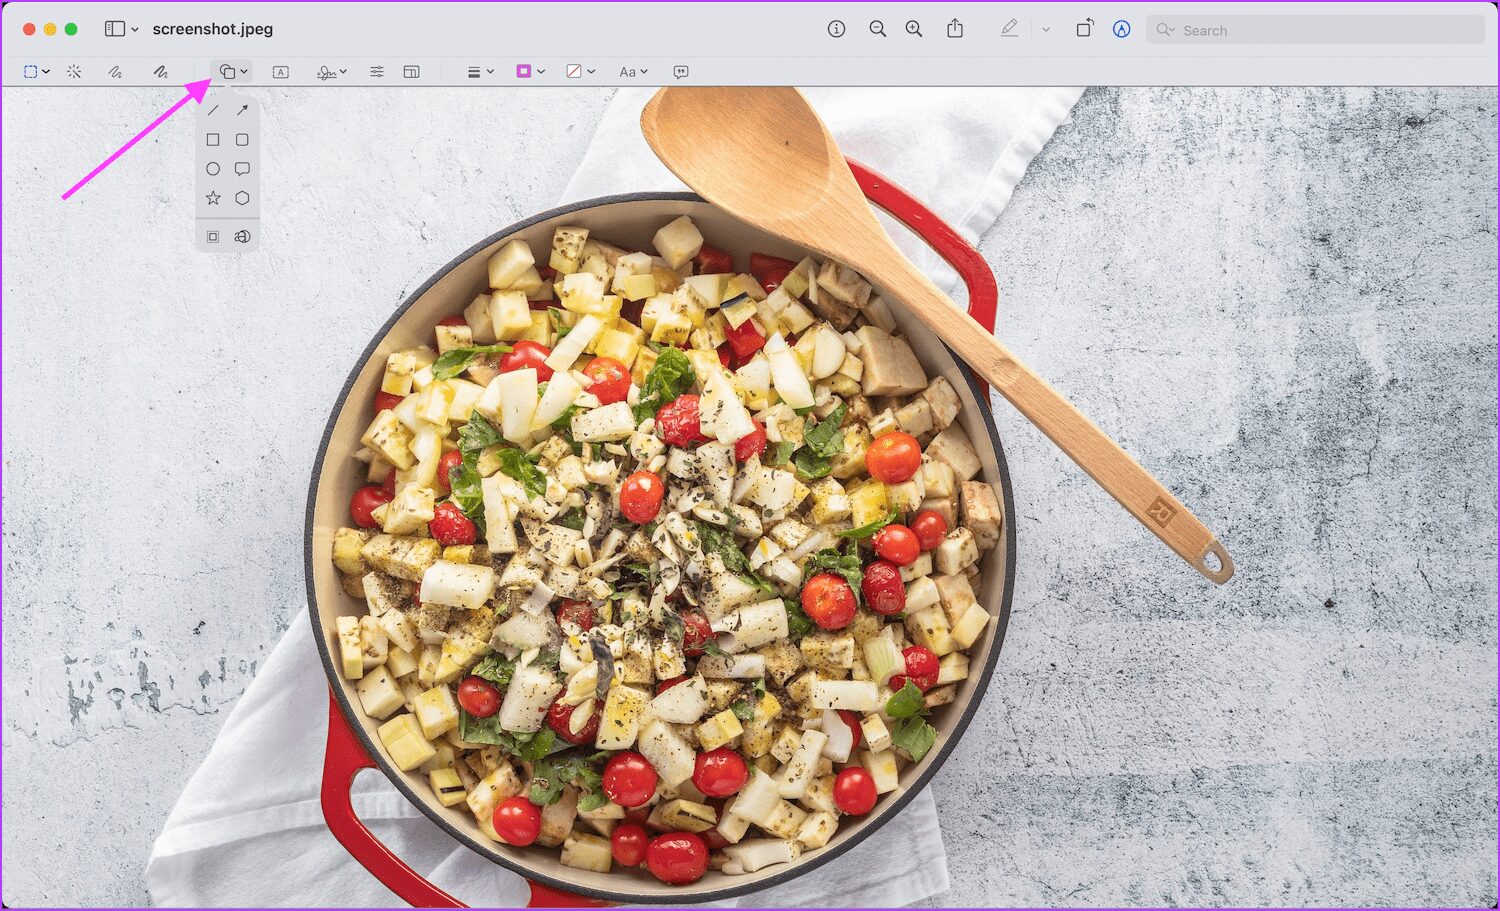
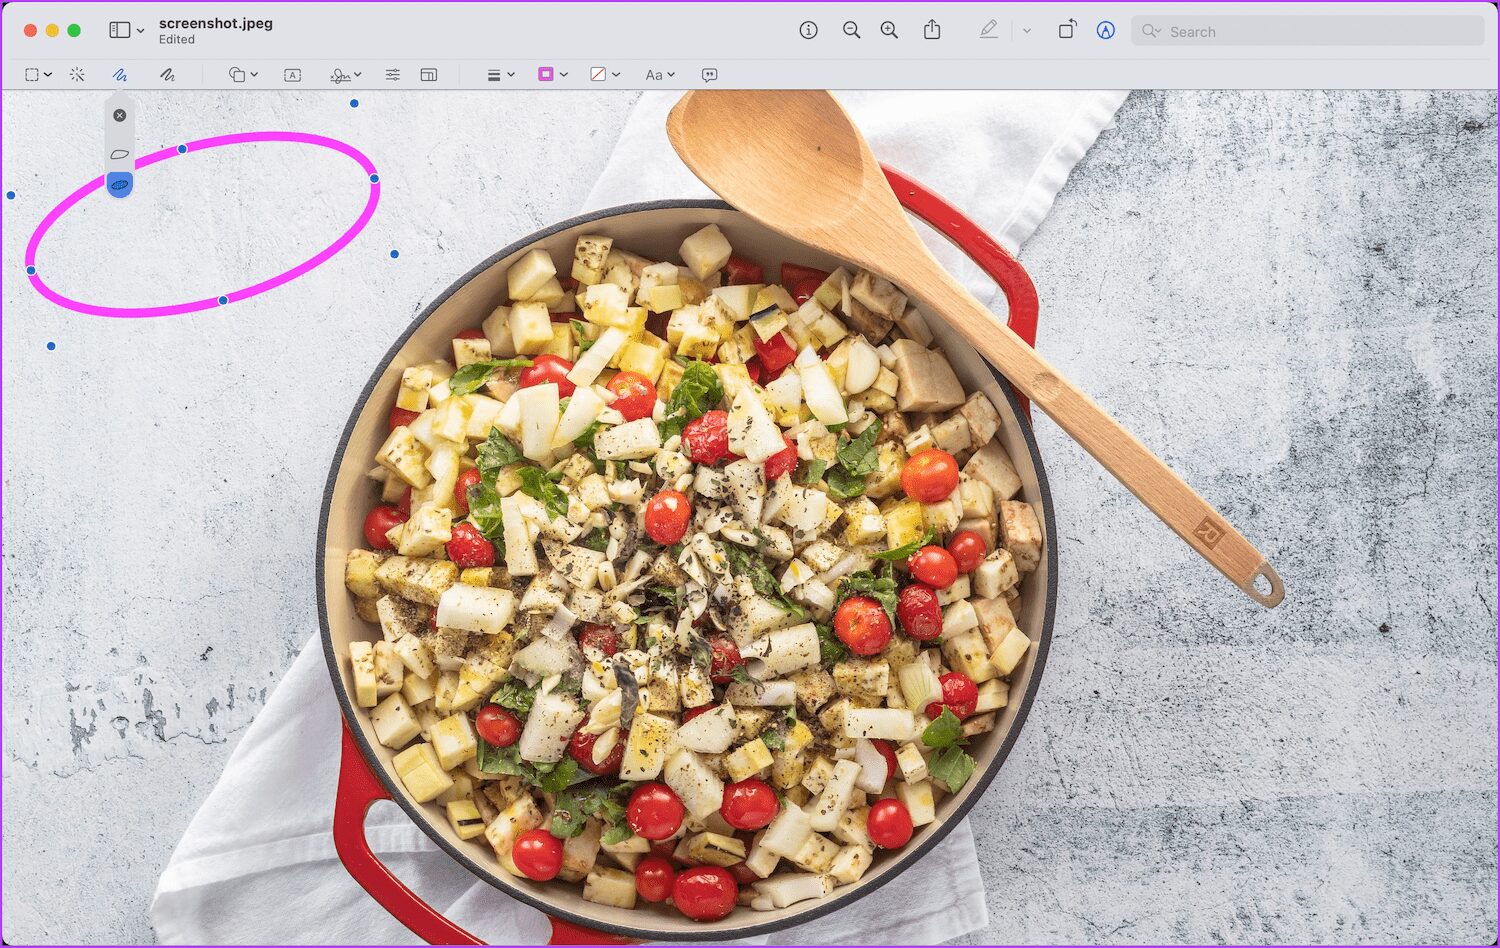
If you want to draw the viewer’s attention to specific areas of screenshots, you can use shapes to do so. You can access arrows, squares, circles, and many more shapes in Preview. Step 1: Open the screenshot in the Preview app and click on the Markup tool.
Step 2: Click on the Shapes tool, and you will see the list of shapes that you can use. Let us choose a square for now.
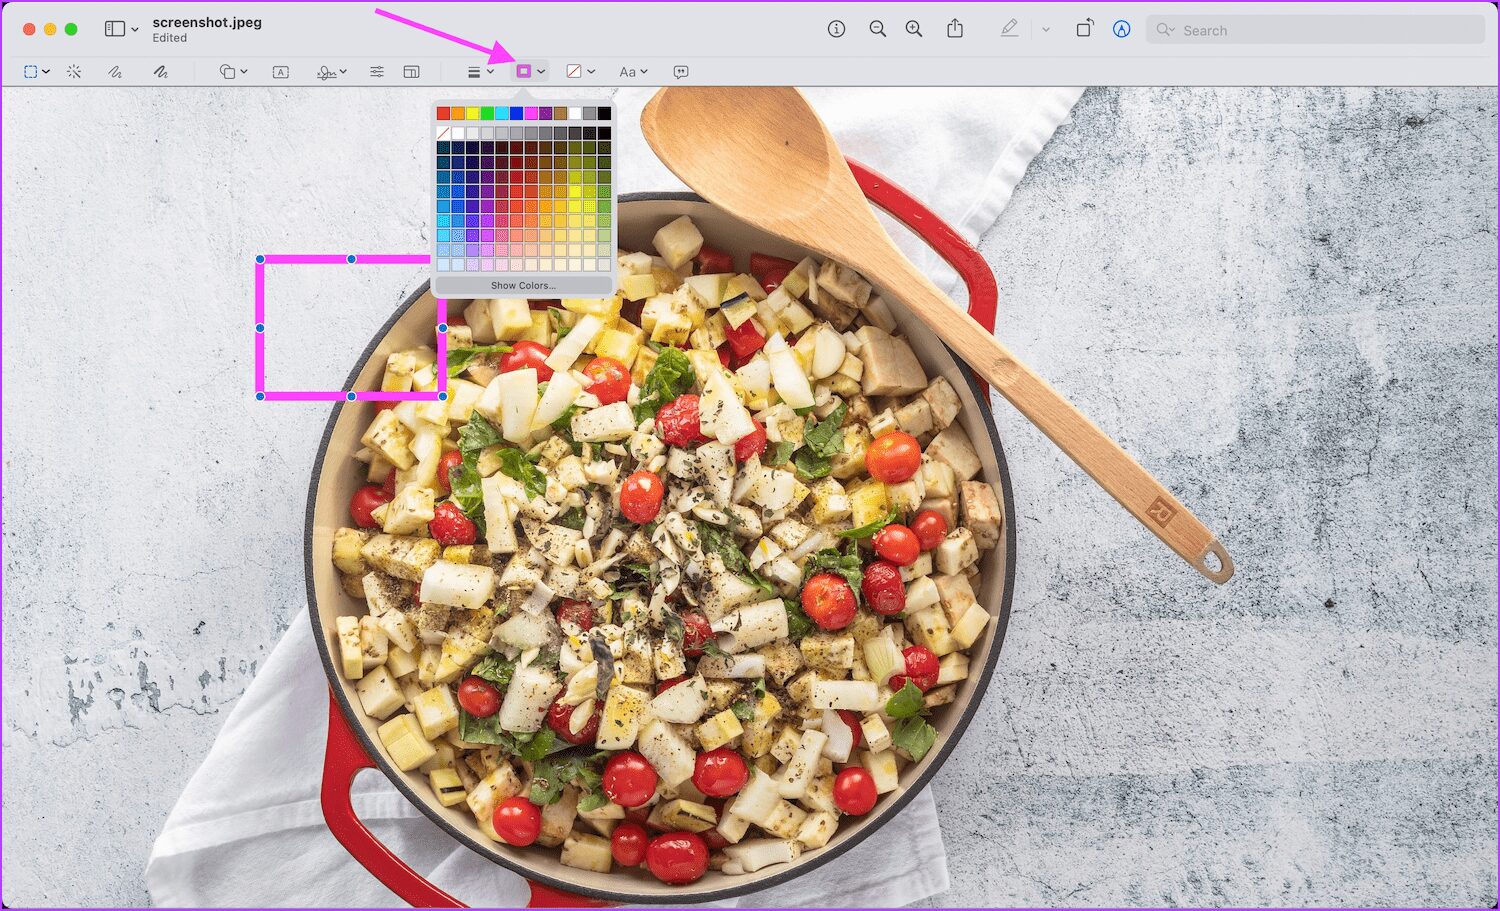
Step 3: The Border Color tool will let you add a color to the shape’s border.
Step 4: Click on the Shape Style tool to change the shape’s look and width.
Step 5: You can click and drag the blue dots on the shape to resize it. Click and drag anywhere else on the shape to reposition it.
Add Text Blocks to Screenshots
If you want to add your thoughts before sharing a screenshot, you can use a text block to add text to your screenshots. Step 1: Open the screenshot in Preview and enable the Markup tool.
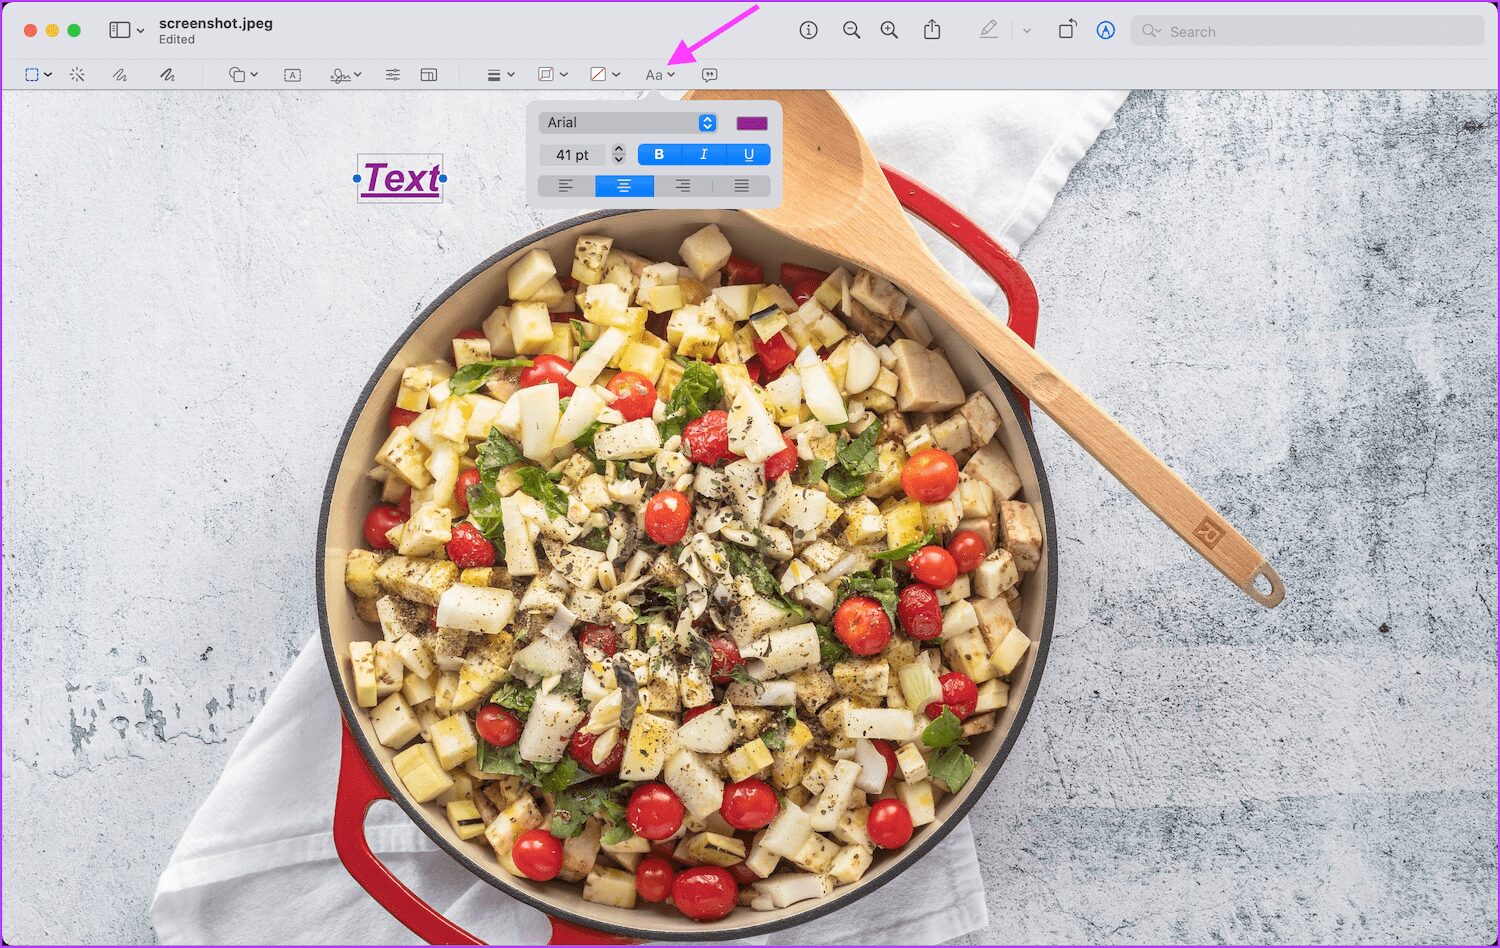
Step 2: Click on the Text tool to add a text box.
Step 3: Click on the Text Style tool to change fonts, font size, and color of the text box.
Step 4: Click inside the text box and write what you want.
Step 5: Like with shapes, you can click and drag the blue dots to resize. Then, click and drag elsewhere to reposition the text box.
Draw and Sketch on Screenshots
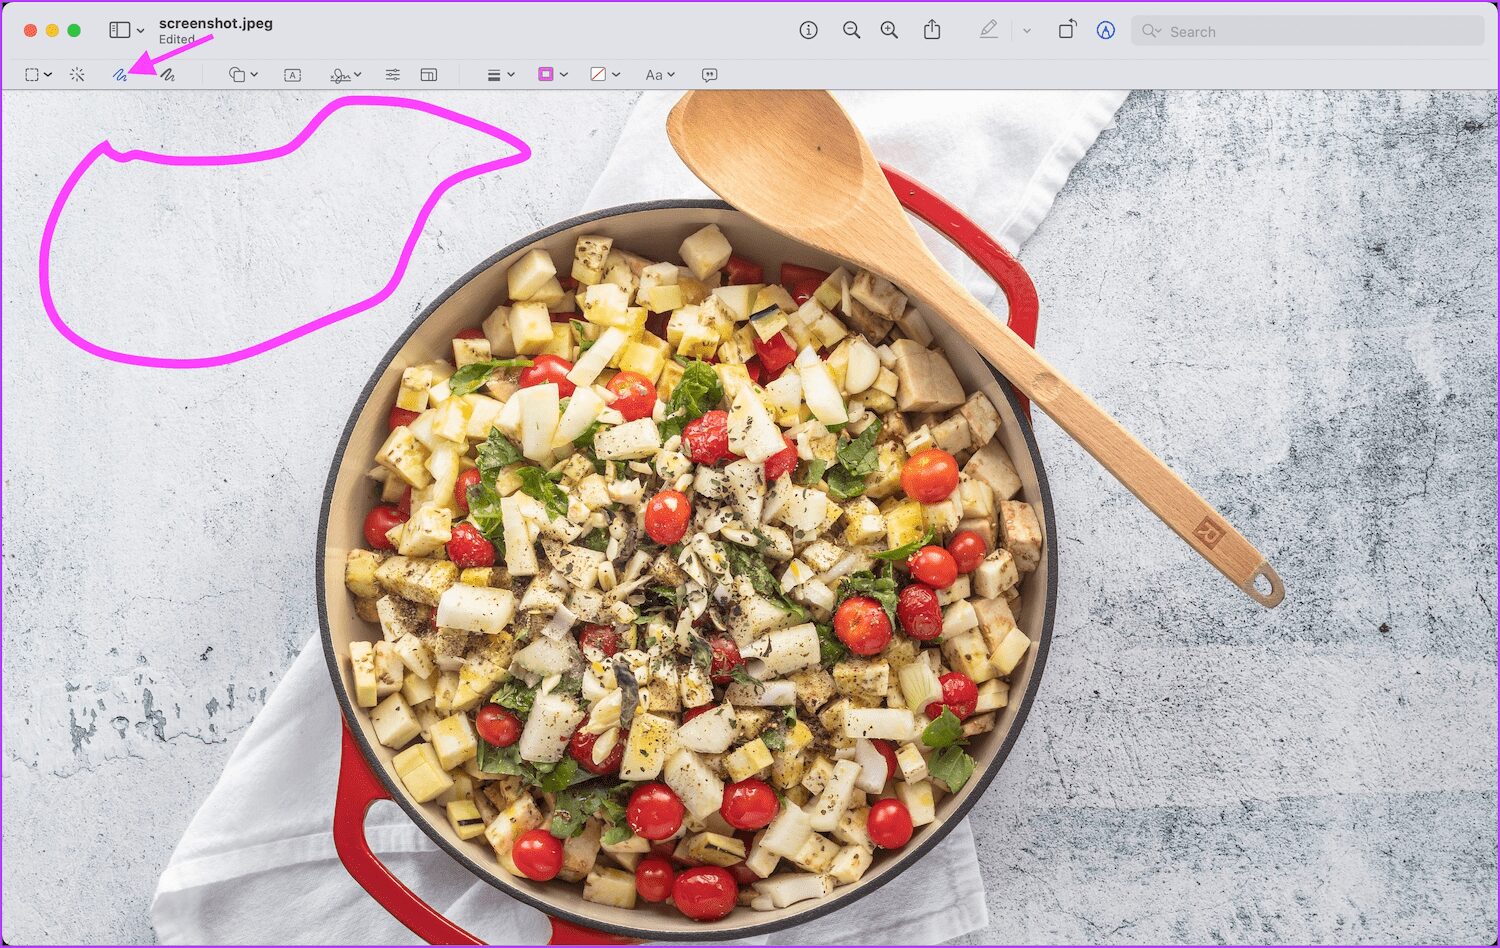
While drawing and sketching are not as intuitive on Mac as it is when editing screenshots on iPhones, you can use these tools to markup your screenshots. Step 1: Double-click on the screenshot to open it in the Preview app and click on the Markup tool.
Step 2: Click on the Sketch tool and you can sketch on any part of the screenshot.
Step 3: You can change the sketch’s color with the Border Color tool.
Step 4: Similarly, click on the drawing tool to draw on your screenshots.
Step 5: The main difference between the draw and sketch tools is that the sketching tool automatically recognizes a standard shape and converts the sketches into it.
Resize Screenshots
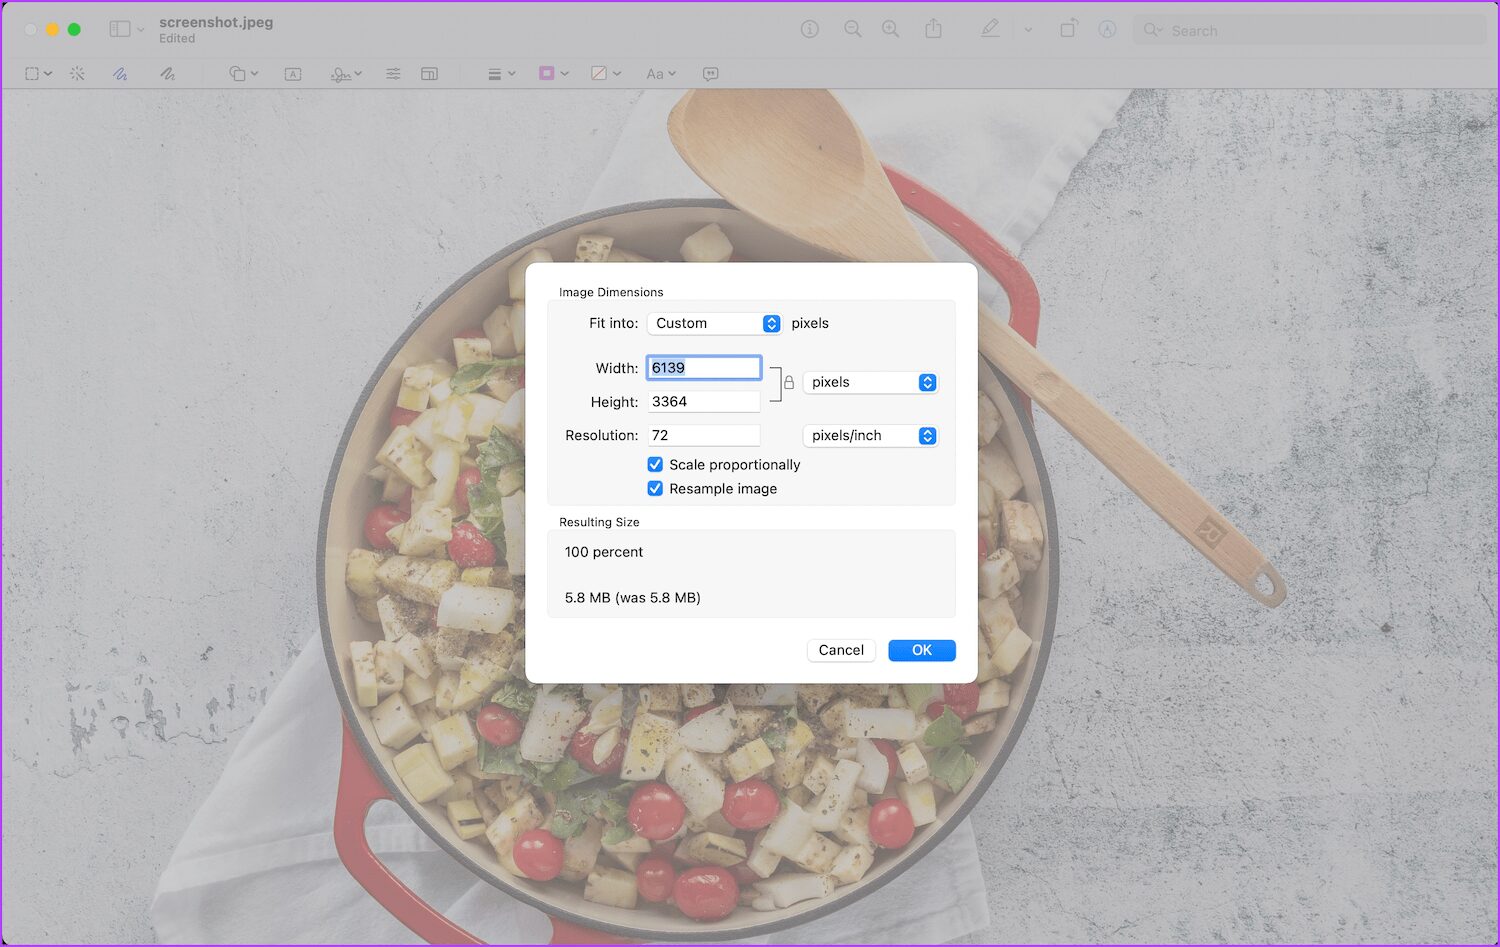
Once you have marked up your screenshots, it’s time to share it. But, depending on the file size, you might want to consider resizing the screenshots before sharing. Step 1: Like before, open the screenshot in the Preview app and click on the Markup tool.
Step 2: Click on the Resize tool.
Step 3: You can then change the screenshot dimensions and resize it as per your needs.
Edit Screenshots on Mac Like a Pro
The Preview app makes it easy to edit screenshots. It also gives you access to powerful editing tools, including drawing, sketching, crop, shapes, and more. Next time you share a screenshot with someone, try out these functions and send a screenshot that will wow others. The above article may contain affiliate links which help support Guiding Tech. However, it does not affect our editorial integrity. The content remains unbiased and authentic.