We will cover the steps for both disabling and re-enabling your Wi-Fi and ethernet network adapters. Additionally, we will also include methods using the graphical interface and commands. Let’s begin.
1. Disable Network Adapter Using Settings
Step 1: Press the Windows key on your keyboard, type Settings, and press Open. Note: Alternatively, you can press the ‘Windows key + i’ on your keyboard to open the Settings app.
Step 2: Click on ‘Network & internet’ from the sidebar. Step 3: Scroll down and click on ‘Advanced network settings.’
Step 4: In ‘Advanced network settings,’ under Network adapters, click on the Disable button for the adapter you want to disable. Note: You can disable Ethernet, Wi-Fi, or Bluetooth.
Once done, depending on which adapter you have disabled, the connection will go offline. You can click on Enable to establish the connection again. If you don’t want to do it through the Settings app, you can check out the old way in the next method.
2. Turn off Ethernet Adapter Using Control Panel
Here’s how to disable your Windows 11 Ethernet or Wi-Fi network adapter using the network connection option. Step 1: Press the Windows key on your keyboard, type View network connections, and click Open.
Step 2: In the Network Connection window, right-click on the network adapter you want to disable and select Disable.
With this, the selected adapter will turn off, and the icon will turn grey. In the future, if you wish to enable the adapter you disabled, right-click on the adapter and select Enable.
3. Disable Network Adapter Using the Device Manager
It is yet another method that has been in use for some time. Follow the instructions below to disable the adapter using Device Manager is easy. Step 1: Press the Windows key on your keyboard, type Device Manager, and click Open. Note: Alternatively, press ‘Windows key + X’ and select Device Manager.
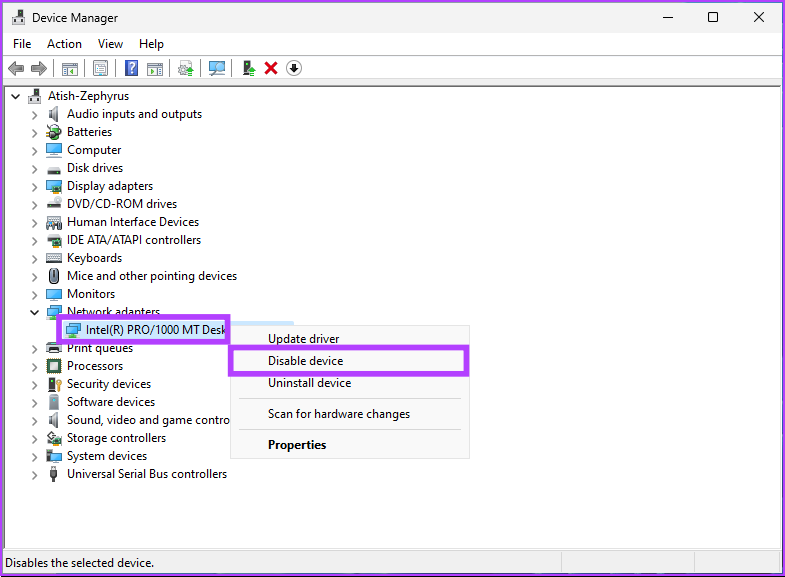
Step 2: Double-click the Network adapters to expand the section.
Step 3: Find the adapter you want to disable, right-click the adapter, and select Disable device.
That’s it. You have successfully disabled the selected network adapter on your Windows 11 PC. You can confirm it by checking if the adapter has turned grey. If you want to do the same slightly untraditional way, jump to the next method.
4. Disable Network Adapters With Command Prompt
Step 1: Press the Windows key on your keyboard, type Command Prompt, and click ‘Run as administrator.’
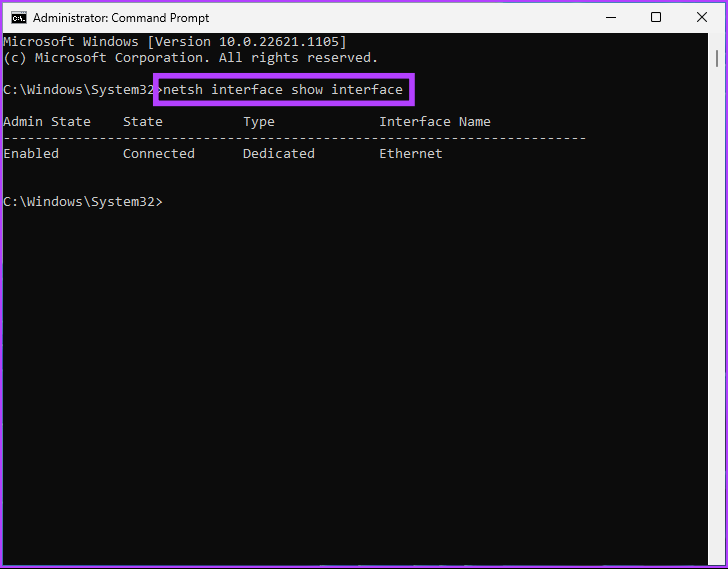
Step 2: Type the below command and hit the Enter key.
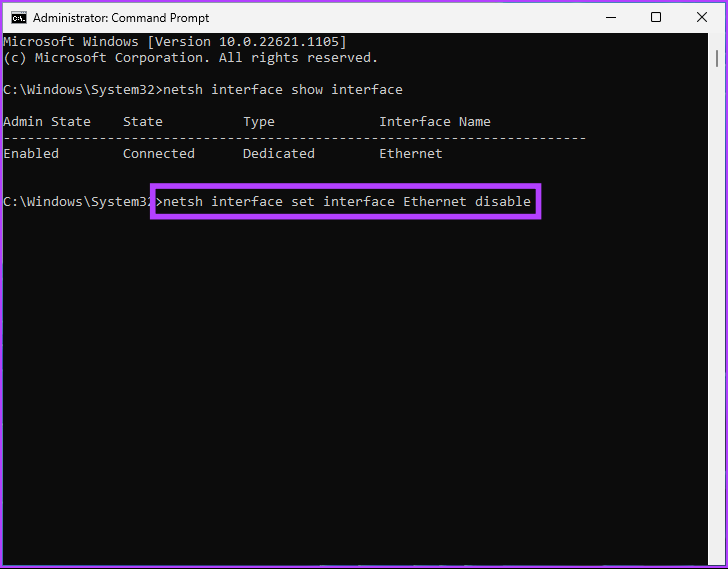
Note the Interface Name, which is the network adapter name you wish to disable. Step 3: To disable the network adapter, type the following command and press Enter. Note: Replace the Interface Name with the name you noted above.
With the above command, the network adapter you chose gets disabled. If you wish to enable it, type the below command and hit Enter. Note: Replace the Interface Name with the appropriate name you noted earlier.
There you go. You have successfully disabled and enabled a network adapter on your Windows 11 PC with Command Prompt. If you don’t want to do it through Command Prompt, you can run it through PowerShell.
5. Disable Network Adapter Using PowerShell
Follow the below steps to disable the network adapter using Windows 11 PowerShell. Step 1: Press the Windows key on your keyboard, type Windows PowerShell, and click on ‘Run as Administrator.’
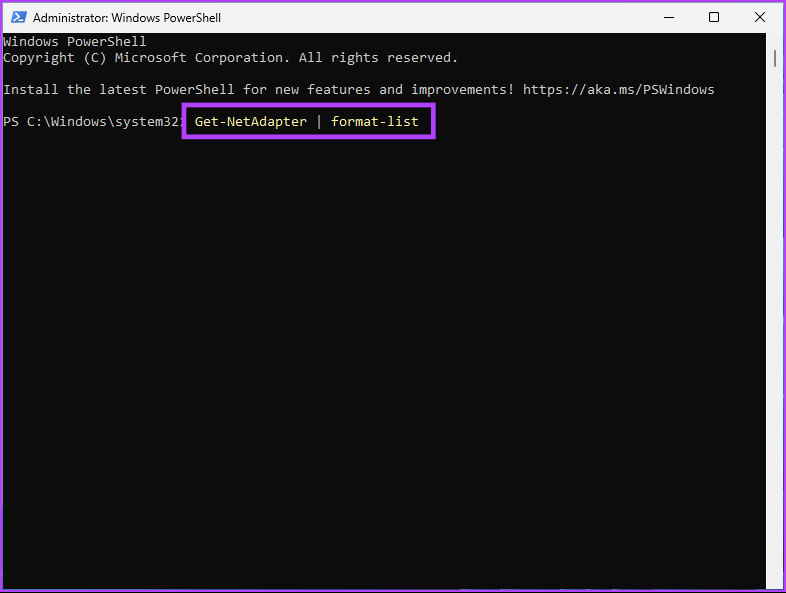
Step 2: Type the below command and hit Enter.
Note down the name of the device you want to disable. Step 3: Type the command below to disable the desired adapter. Note: Replace the ‘network adapter name’ with the actual network adapter name.
There you go. You have successfully disabled the adapter on your Windows 11 PC. If you wish to enable it, type or copy the below command. Note: Replace the network adapter name with the actual network adapter name.
Cut off Your PC’s Connection
By following the methods outlined in the article, you can easily disable and enable your network adapters as needed. Now that you know how to disable the network adapter, you may also want to read the top ways to fix the Windows could not find a driver for your network adapter error. The above article may contain affiliate links which help support Guiding Tech. However, it does not affect our editorial integrity. The content remains unbiased and authentic.