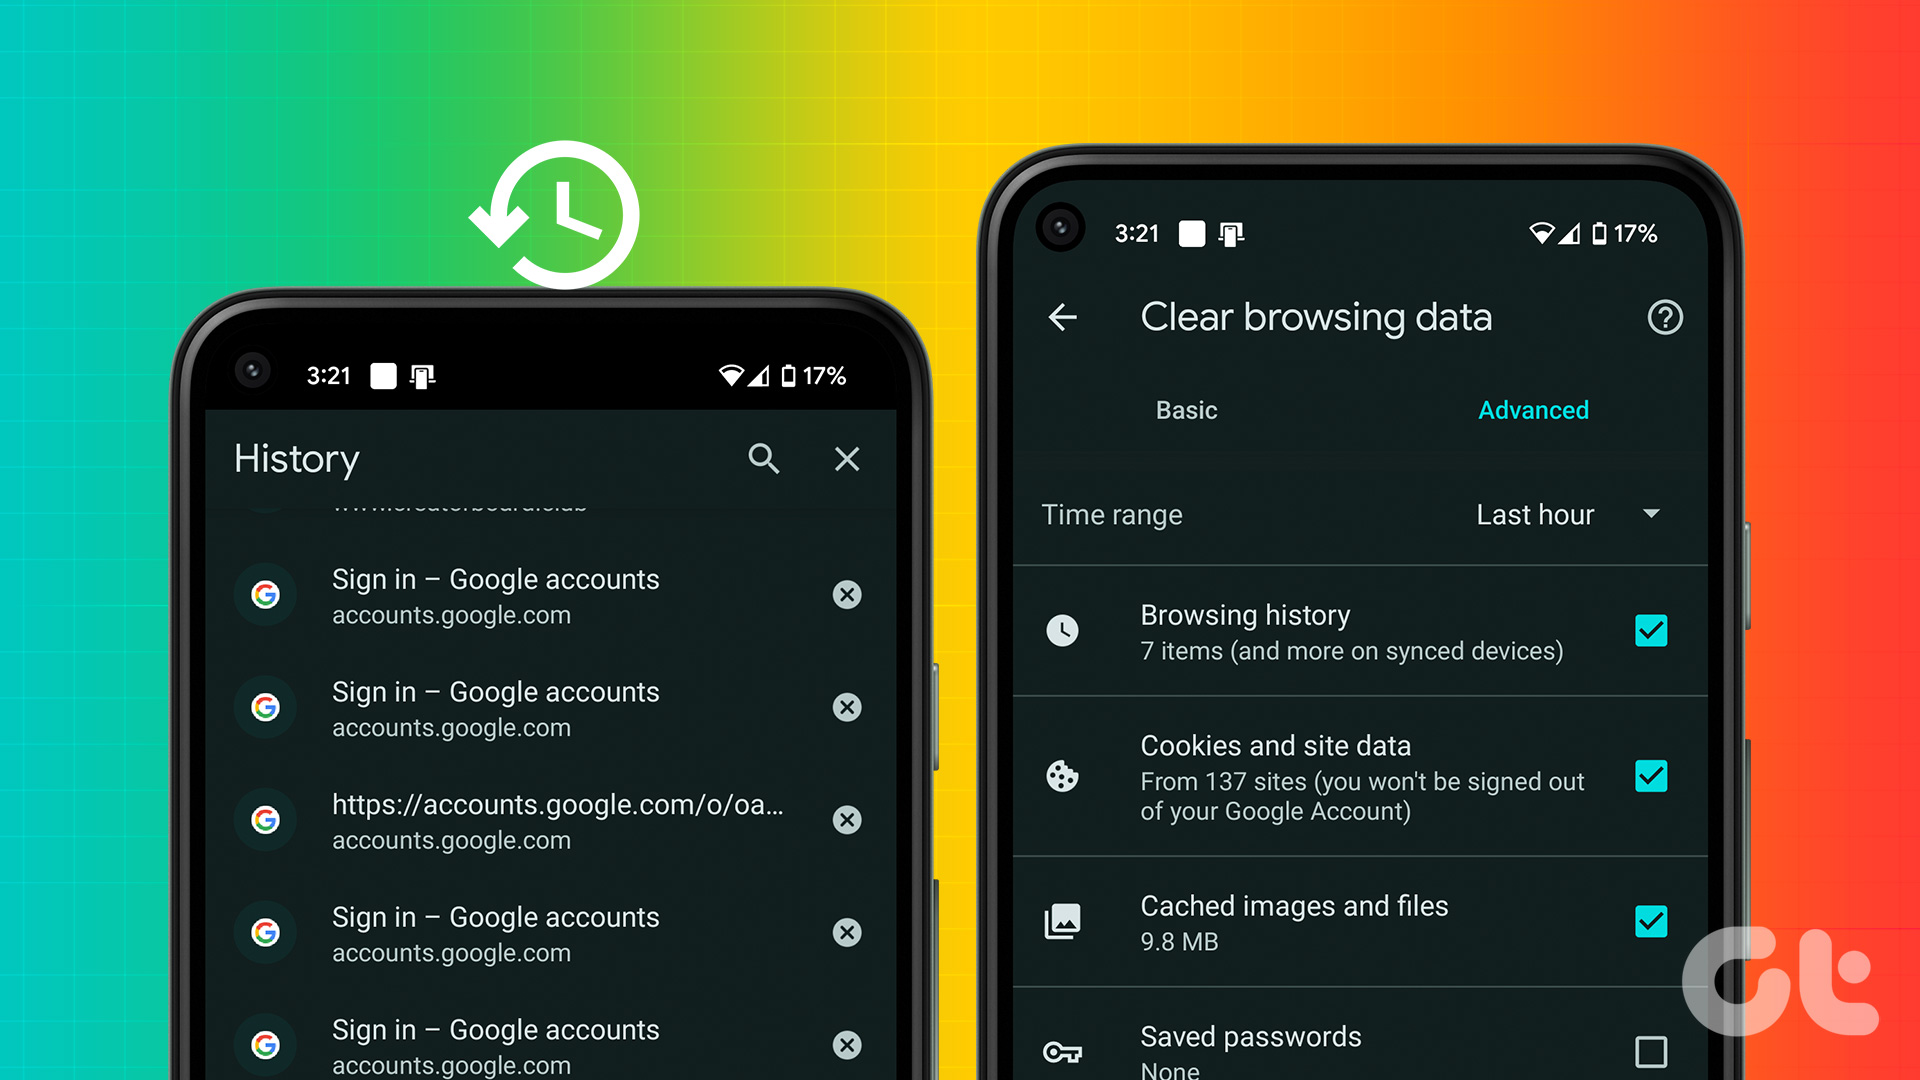
When you view and delete your Google Chrome history, you can protect your privacy and security, especially if you use a shared computer. Moreover, it also helps to keep your browser running smoothly, as clearing your cache and browsing data can improve performance. Additionally, viewing your history can be helpful if you want to revisit a website you visited before but need help remembering the URL or if you need to check what you searched for previously. With that said, let’s dive into things you should know before deleting Chrome history.
Things to Know Before Deleting Chrome History
Before deleting your Chrome browsing history, there are a few things to keep in mind. Firstly, deleting your browsing history will remove all records of the websites you have visited. If you have any critical data you don’t want to lose, back it up before deleting your browsing history. Secondly, it’s worth noting that deleting your browsing history may not completely erase all traces of your online activity. Your internet service provider, employer, or others may still be able to track your online activity through your IP address or other means. If you’re concerned about your online privacy, you may want to consider using a VPN (Virtual Private Network) or other privacy tools in addition to deleting your browsing history.
1. Using Chrome Settings
Accessing Chrome’s settings is one of the easiest and most common ways to clear its history. Irrespective of whether you are on a desktop or mobile, you can access this setting. Follow the below-mentioned steps.
On the Desktop
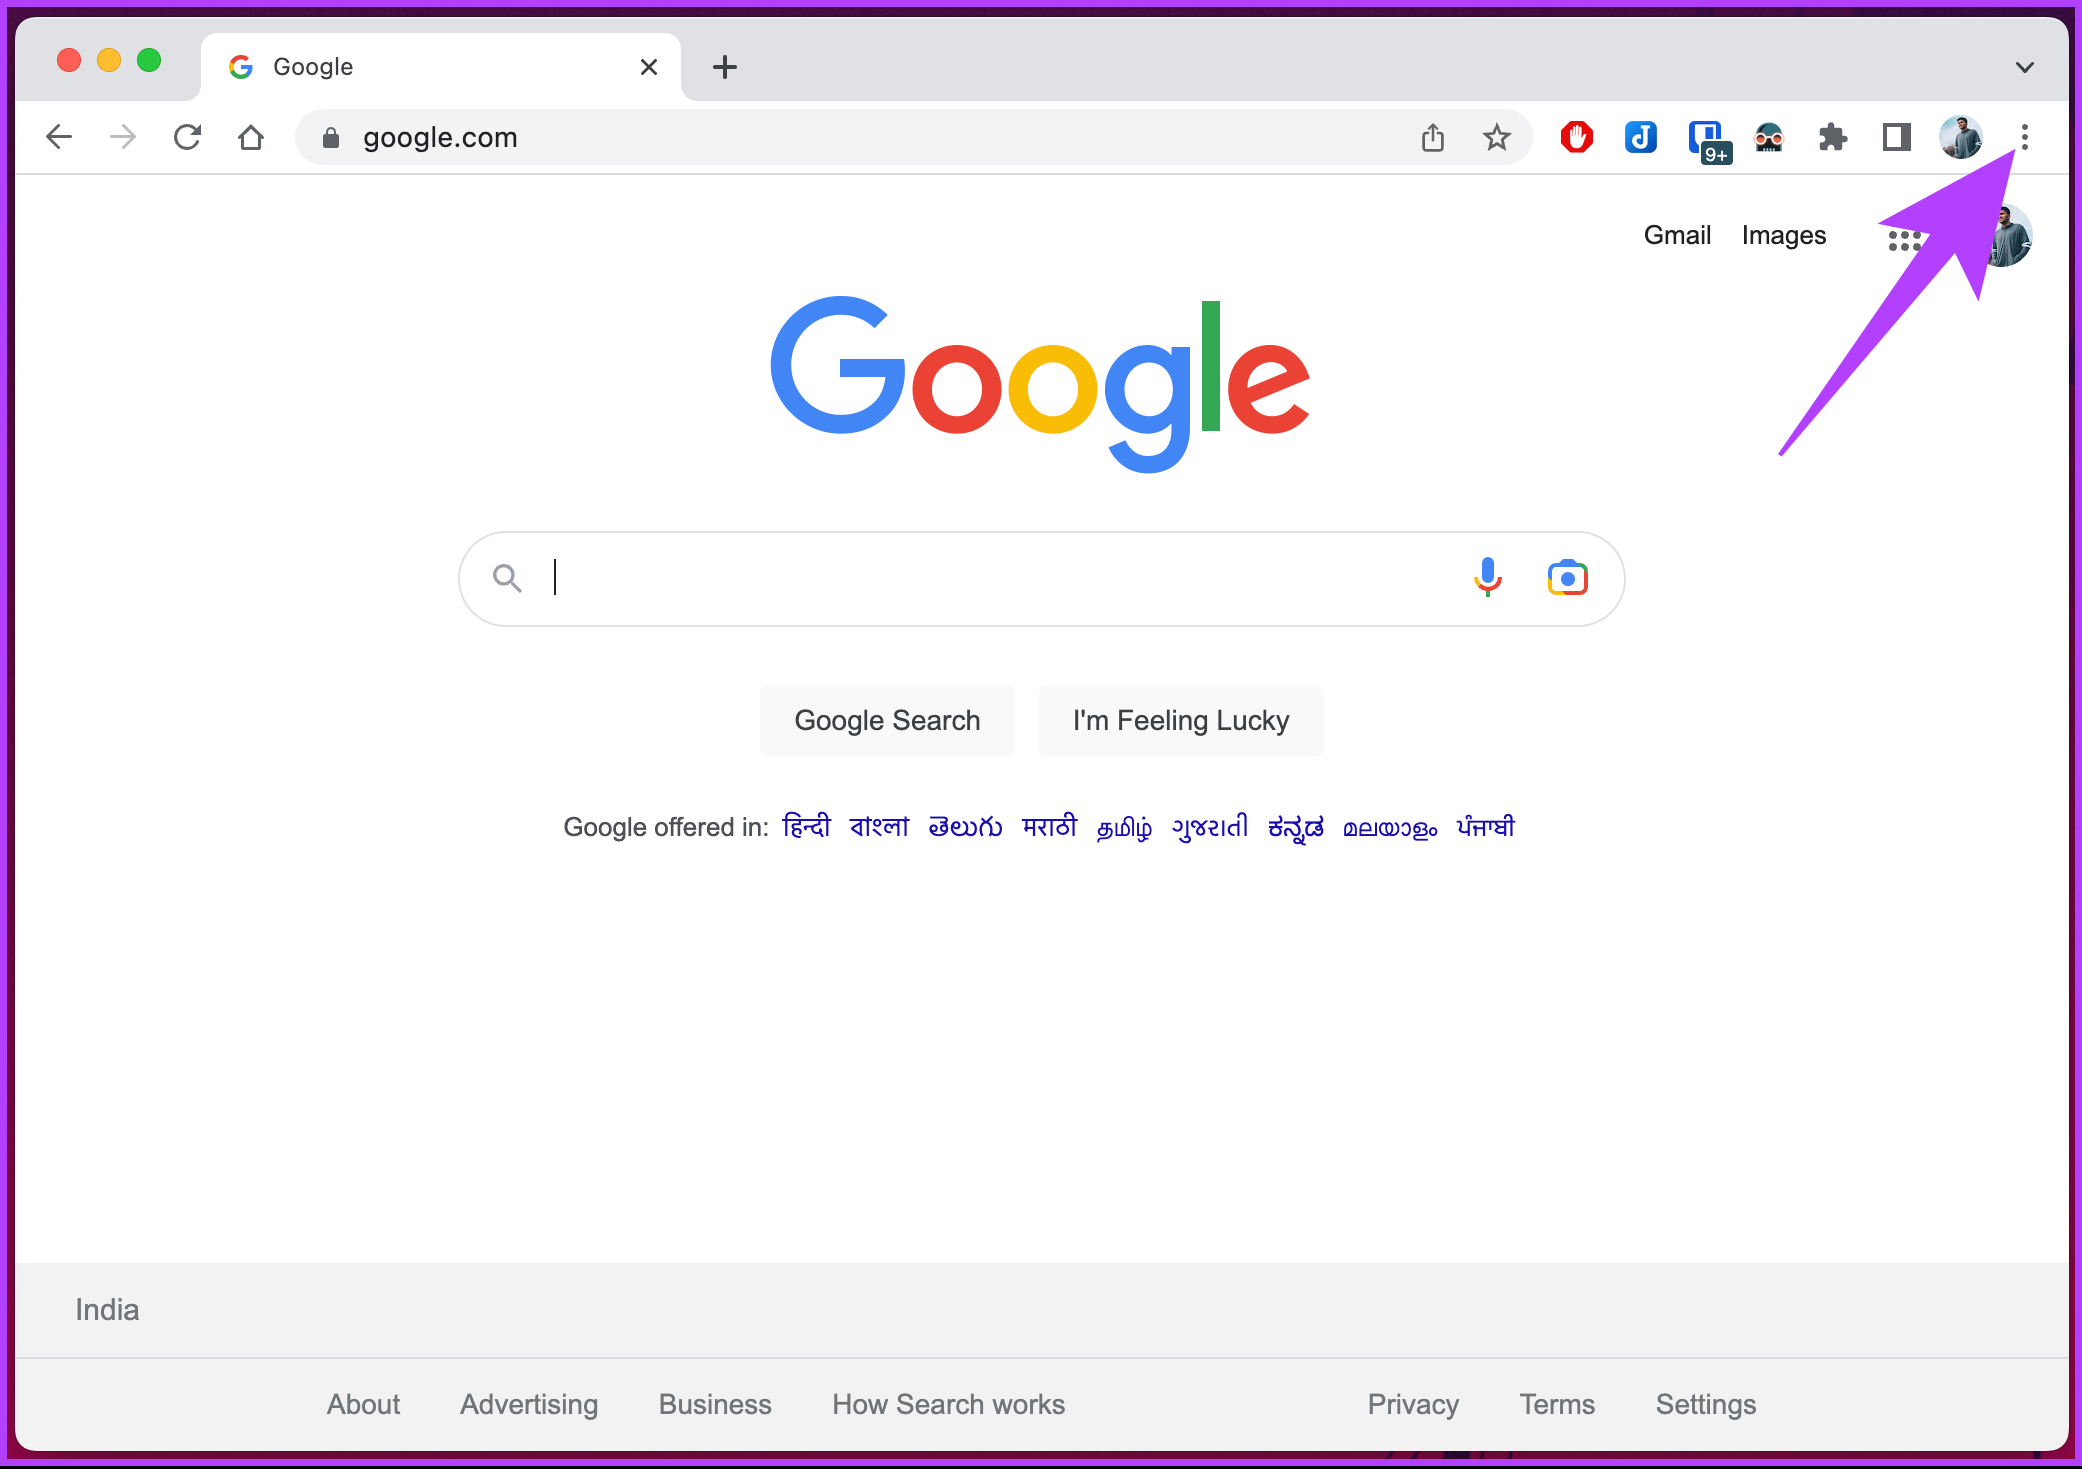
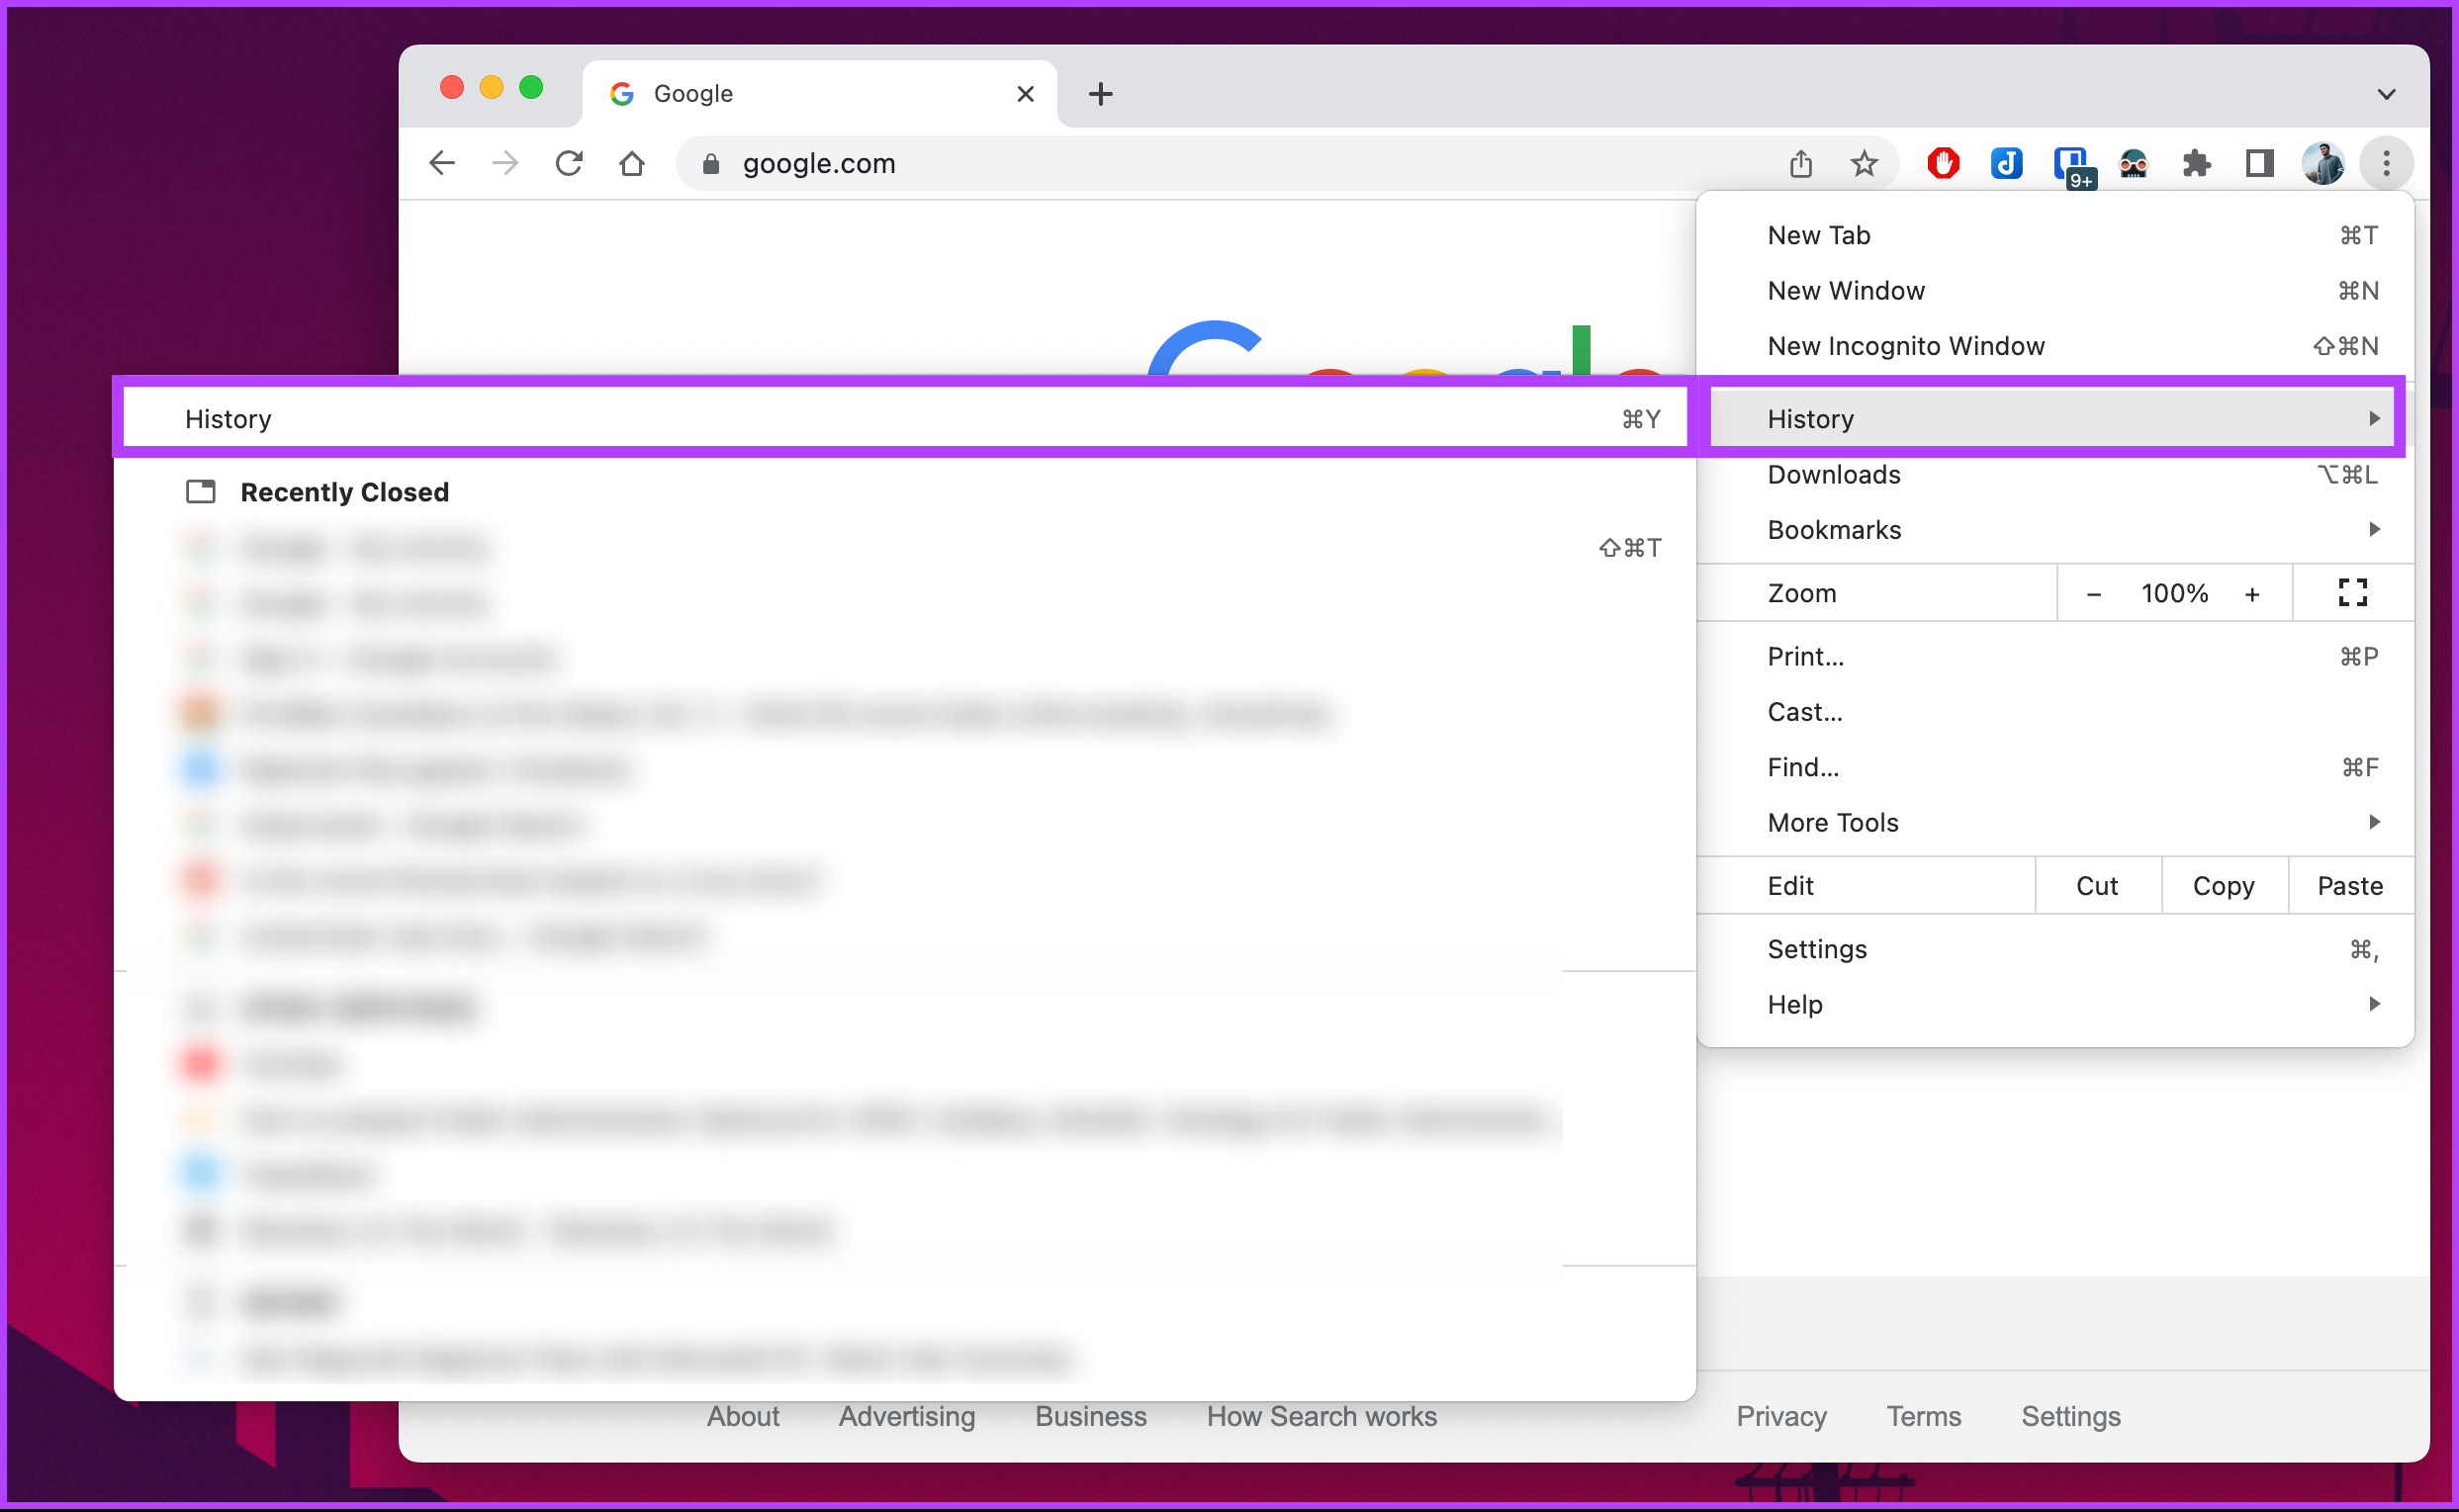
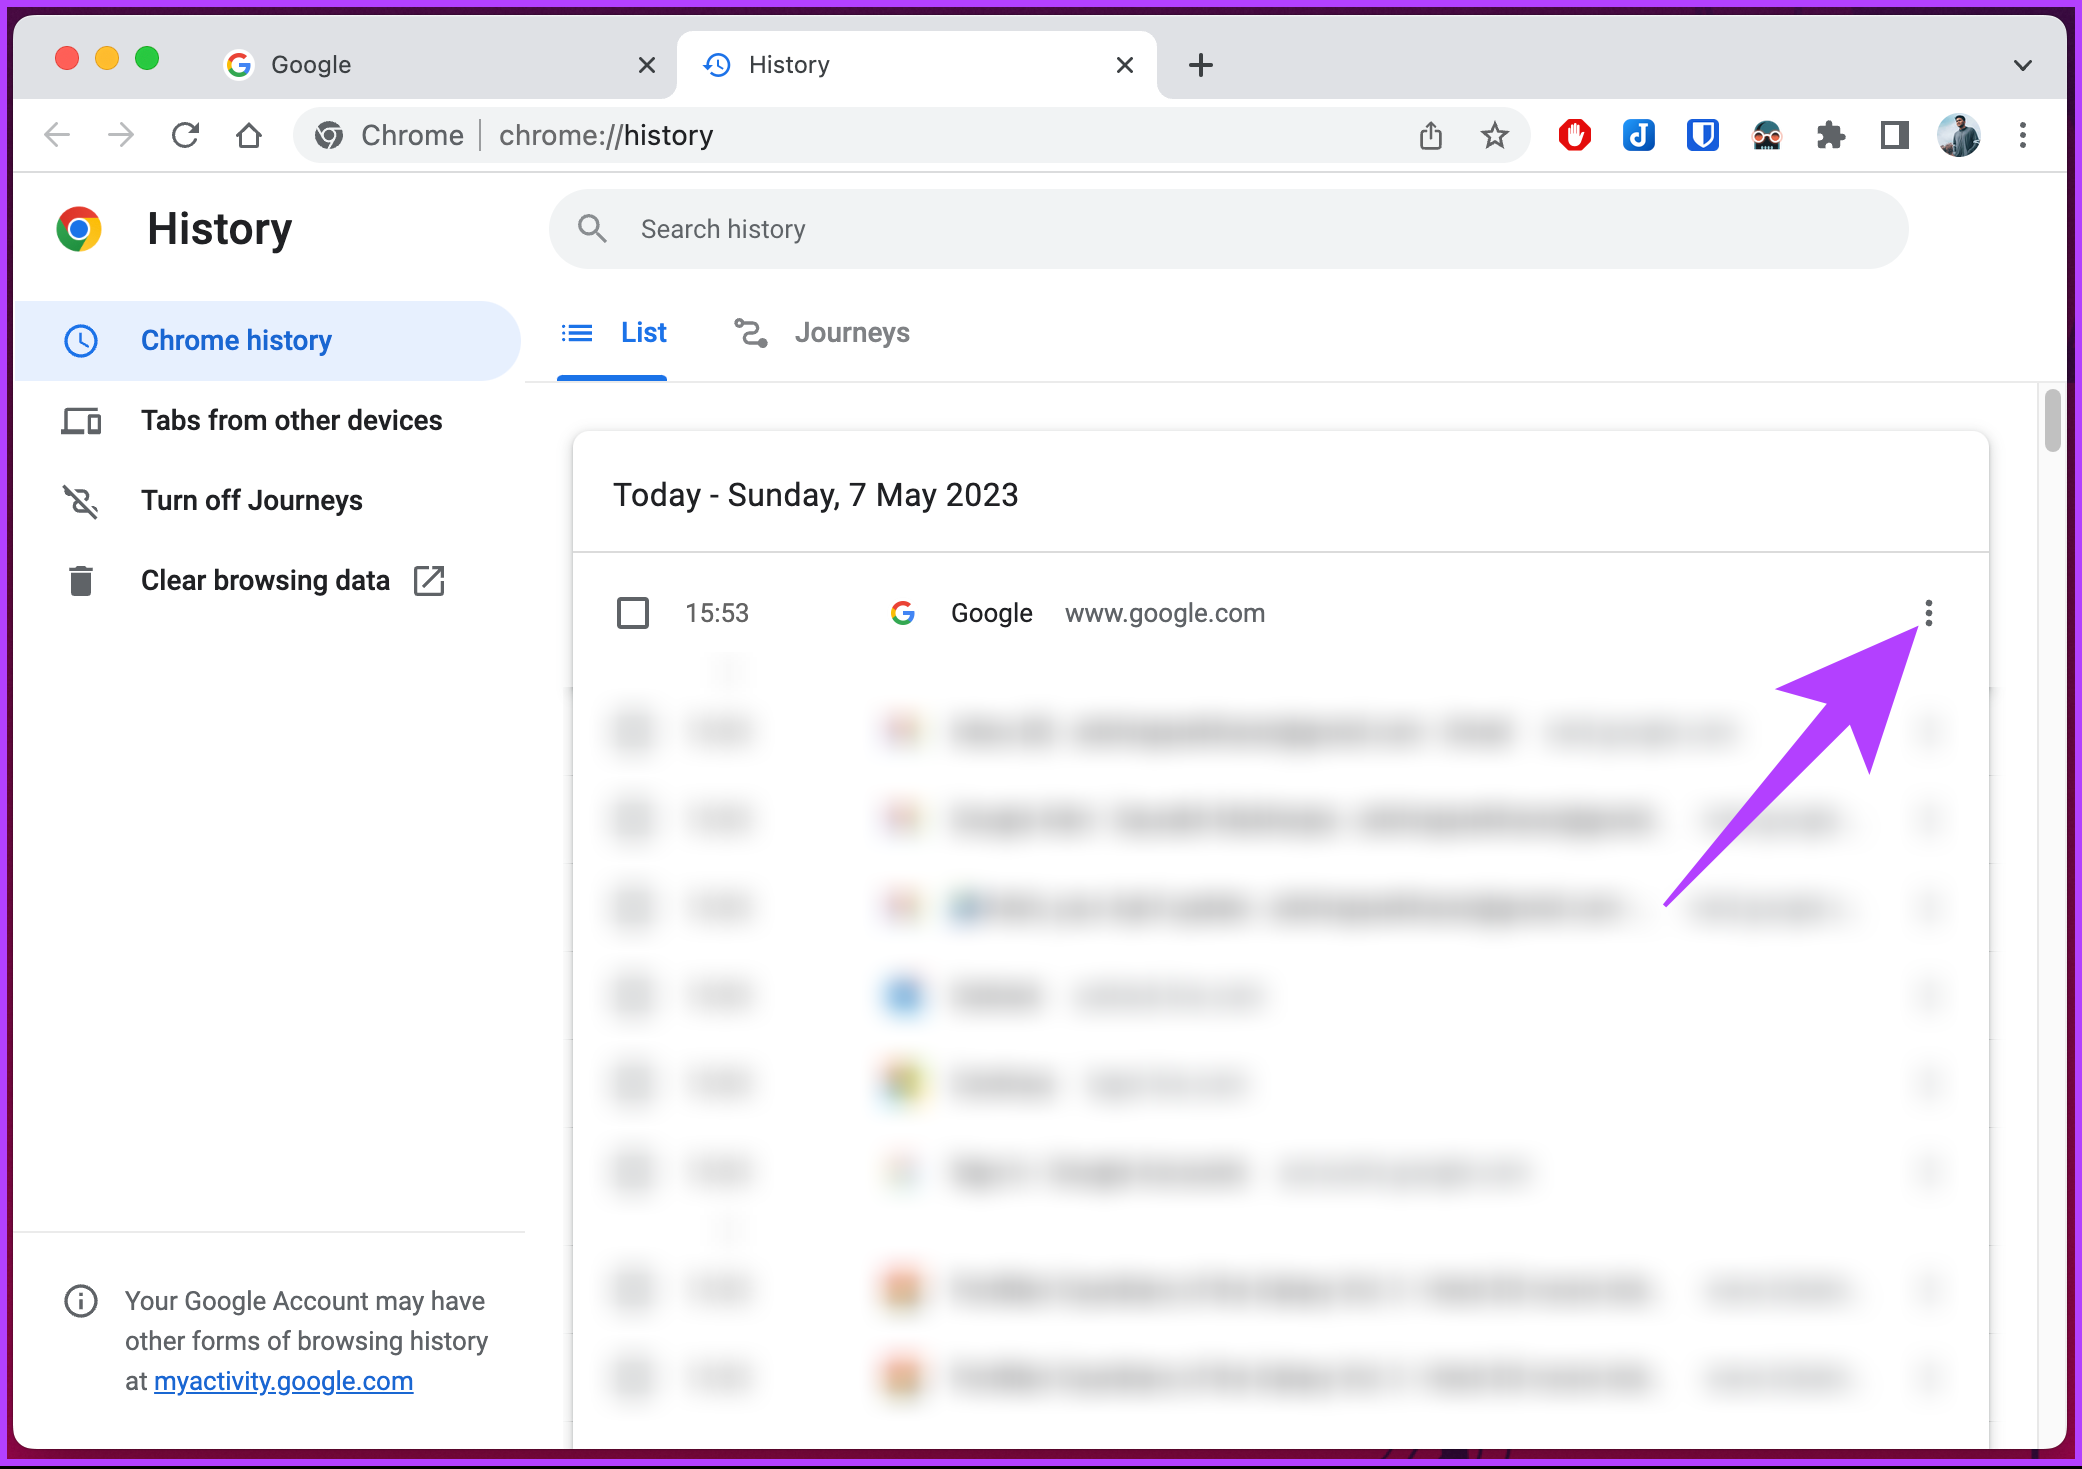
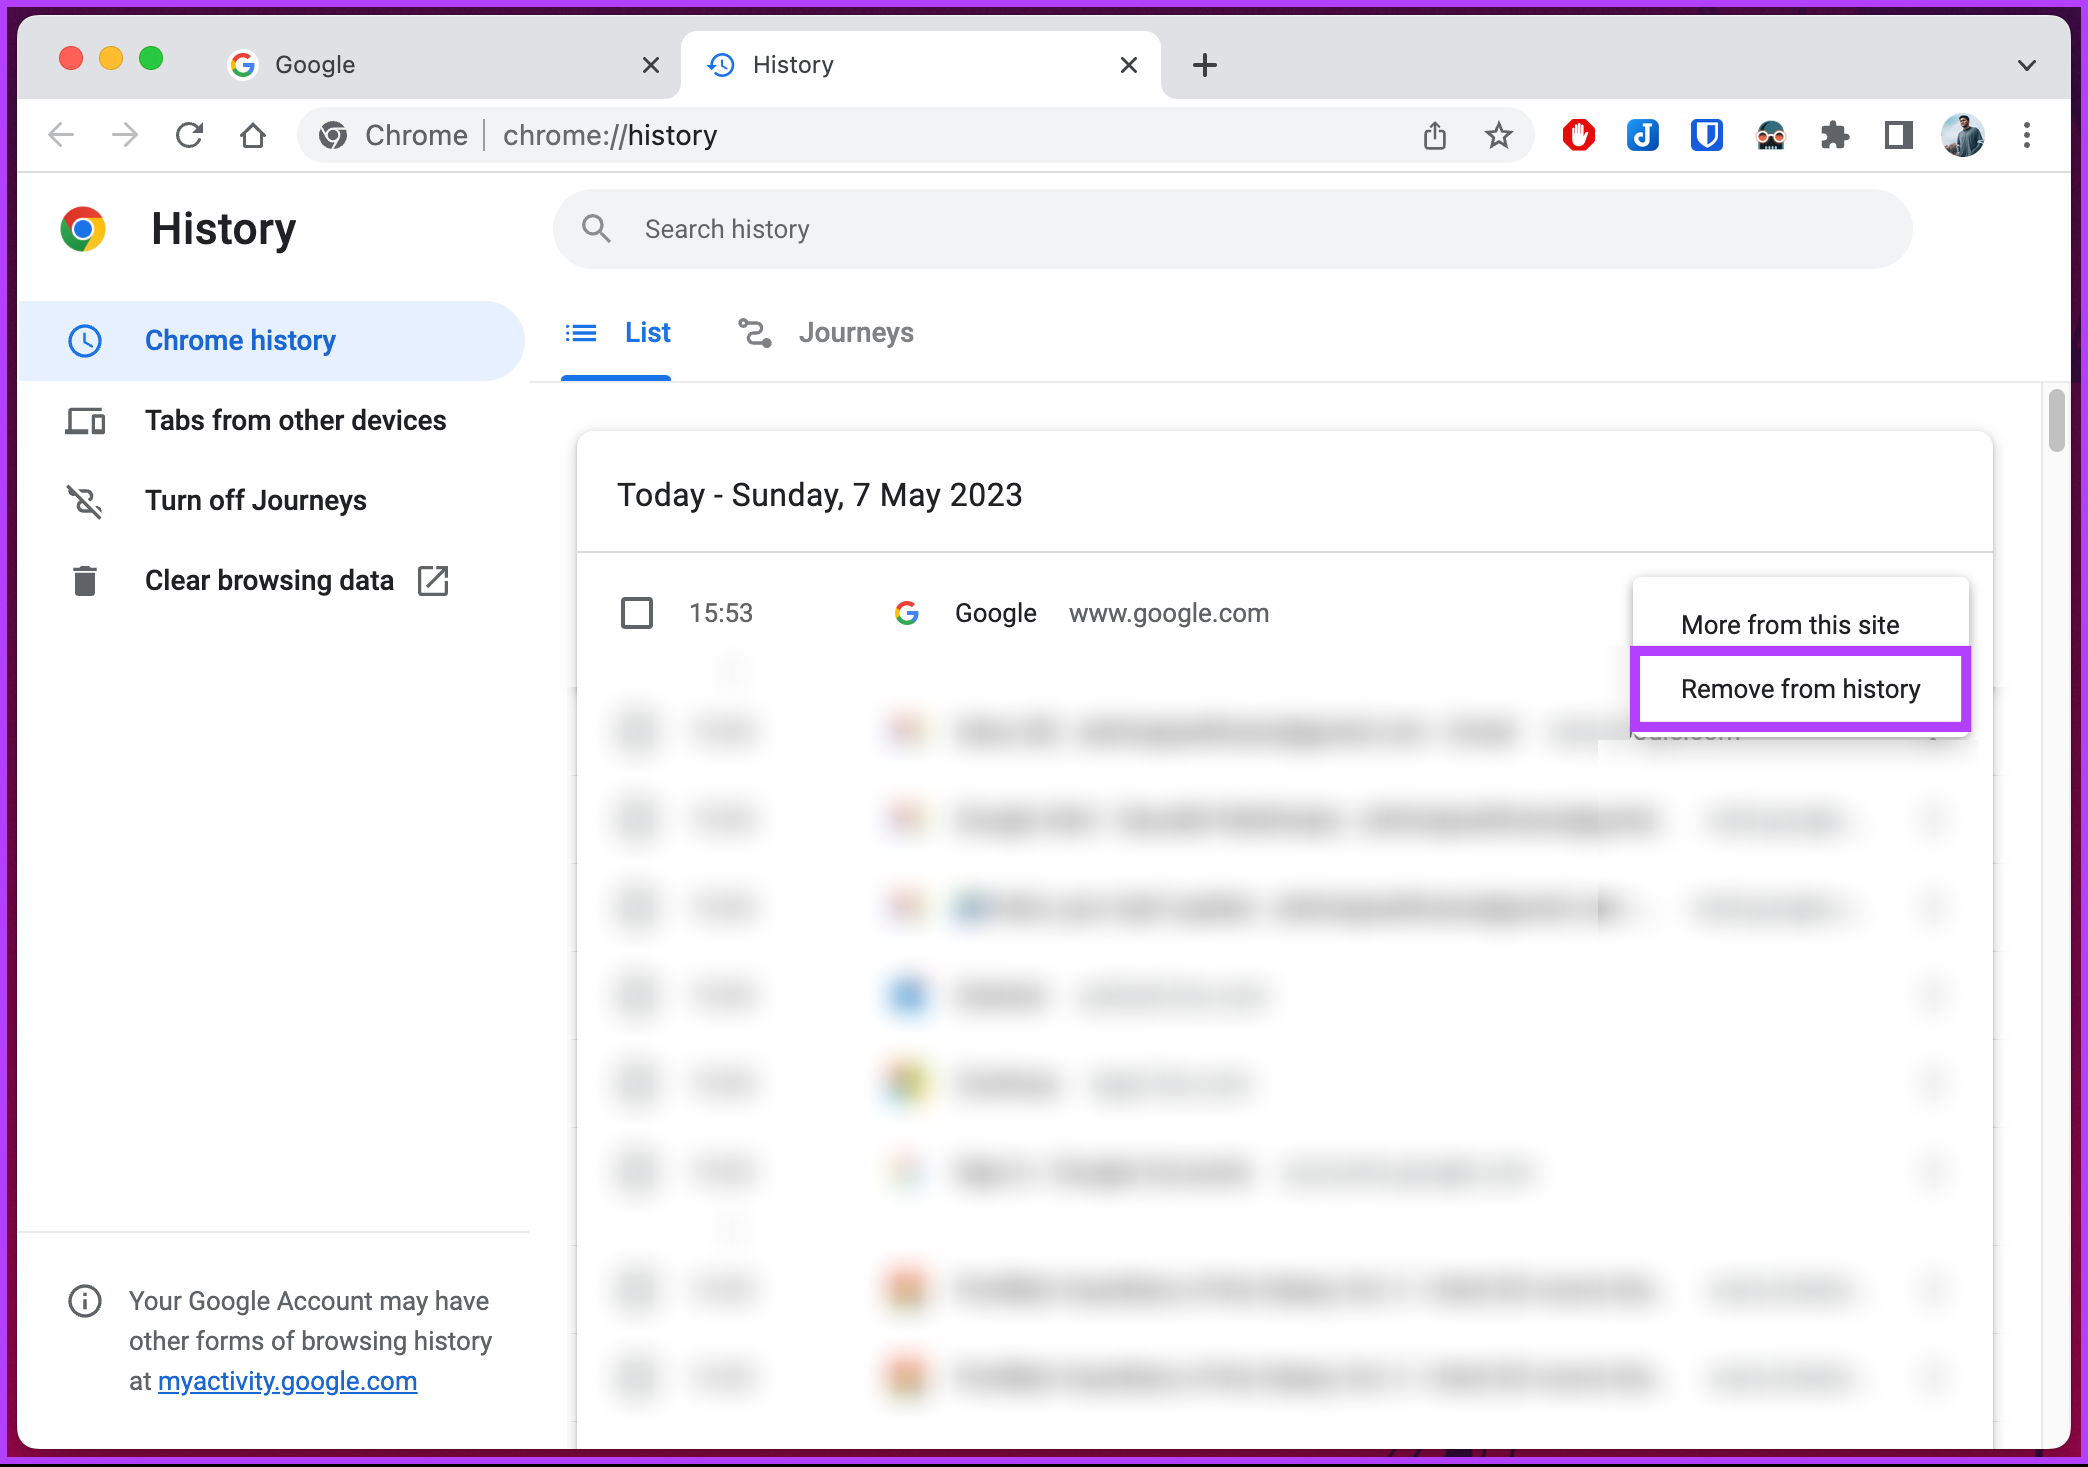
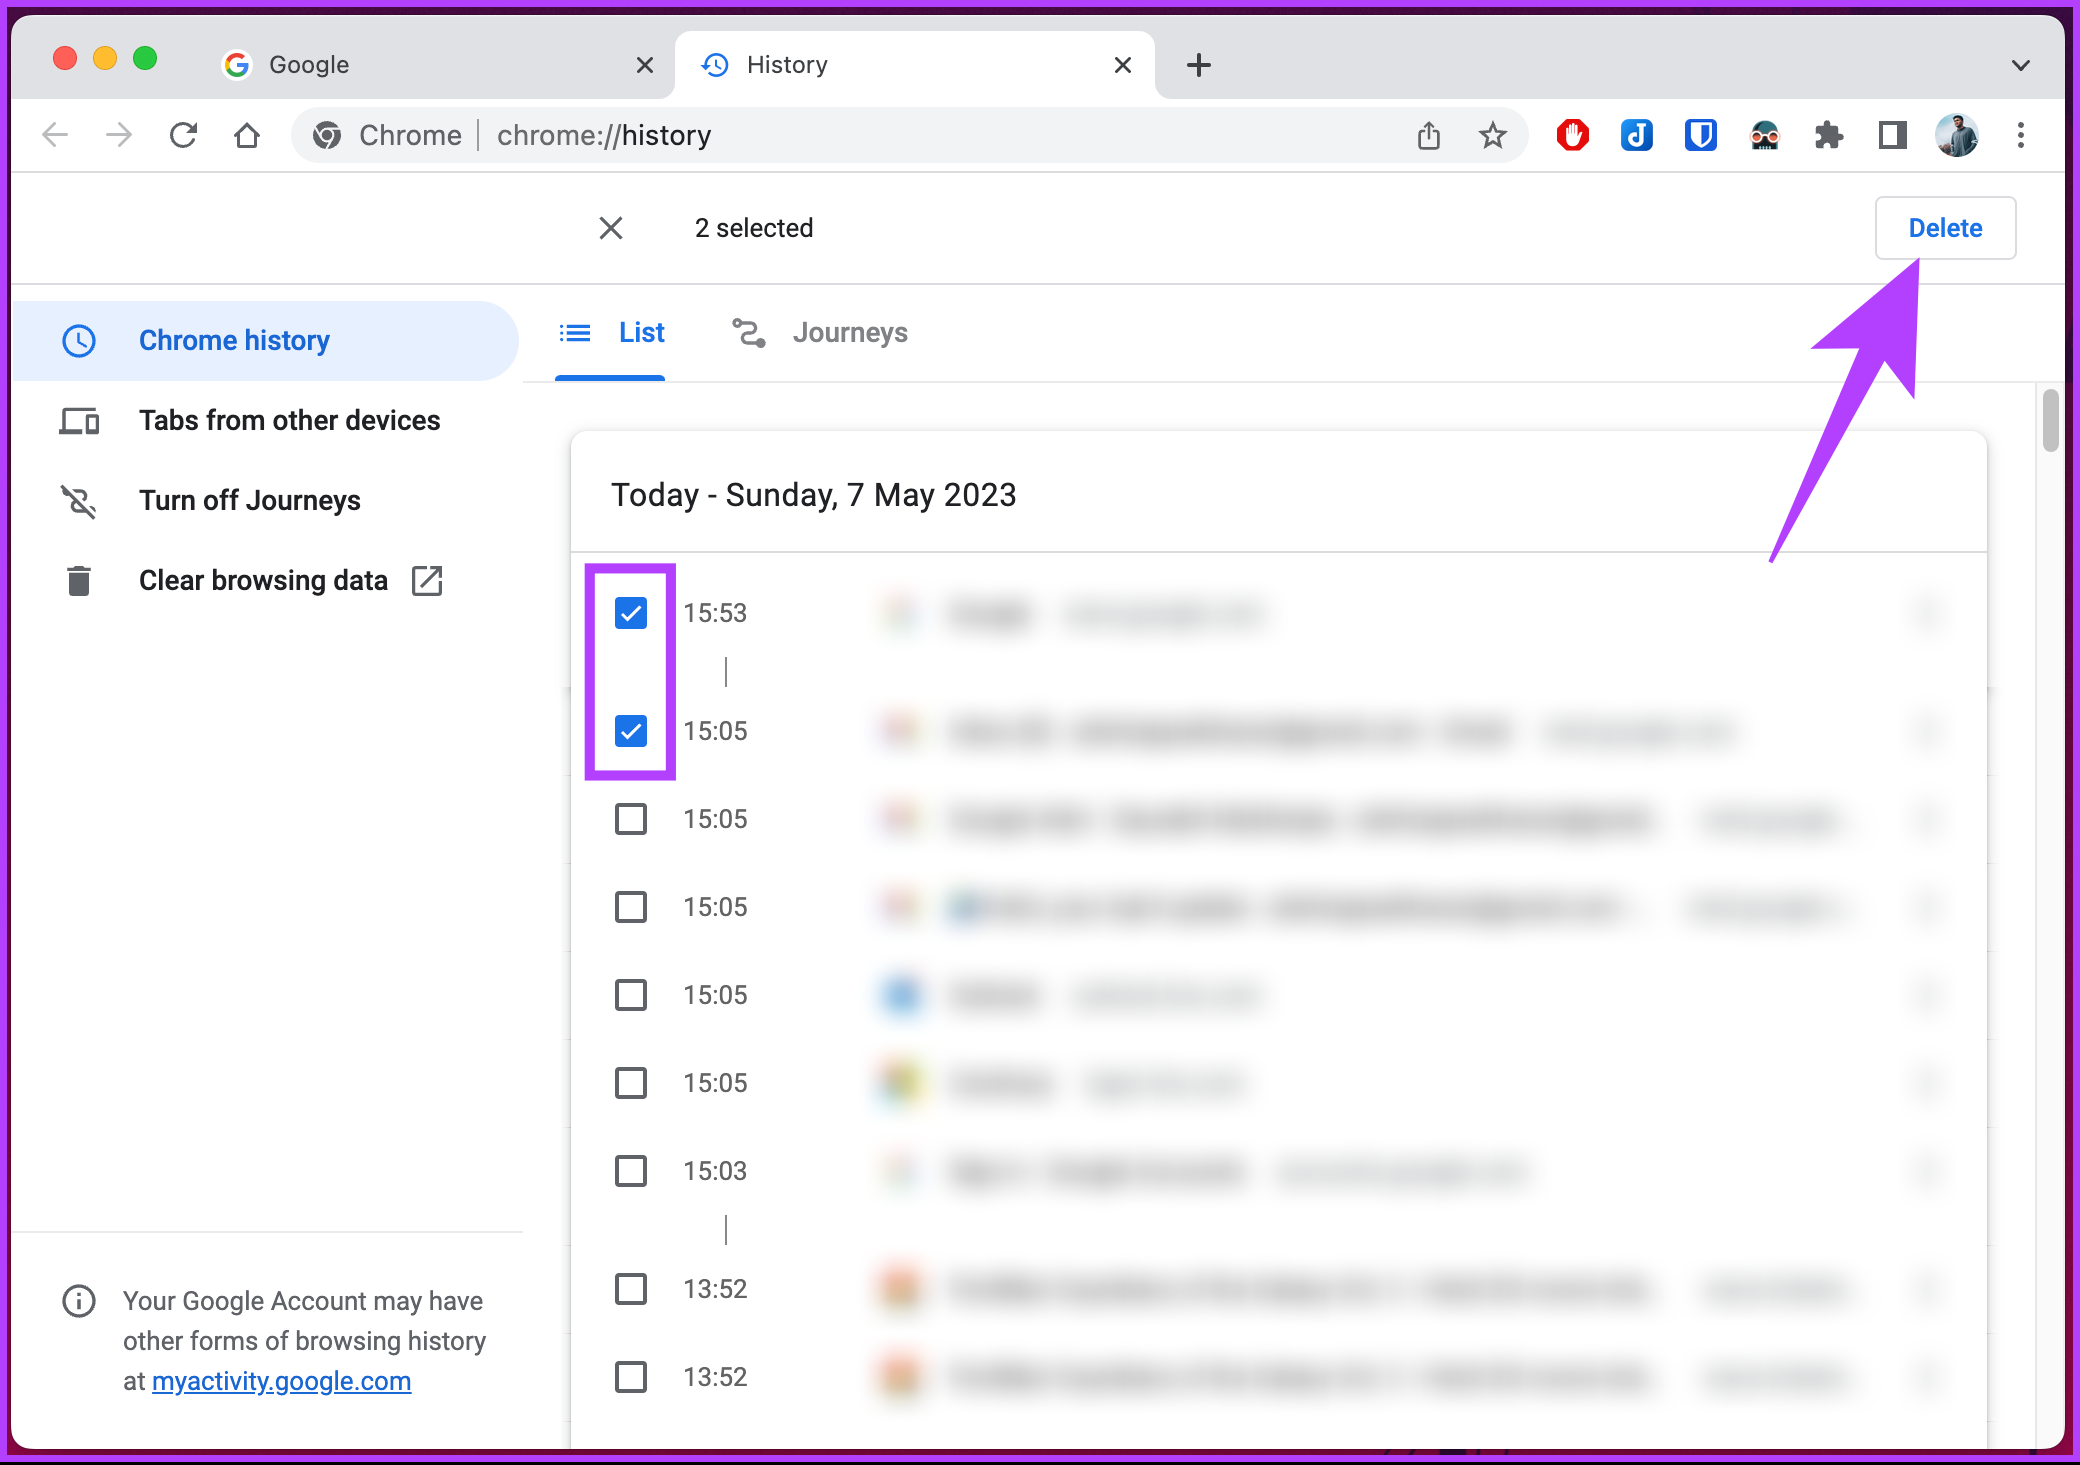
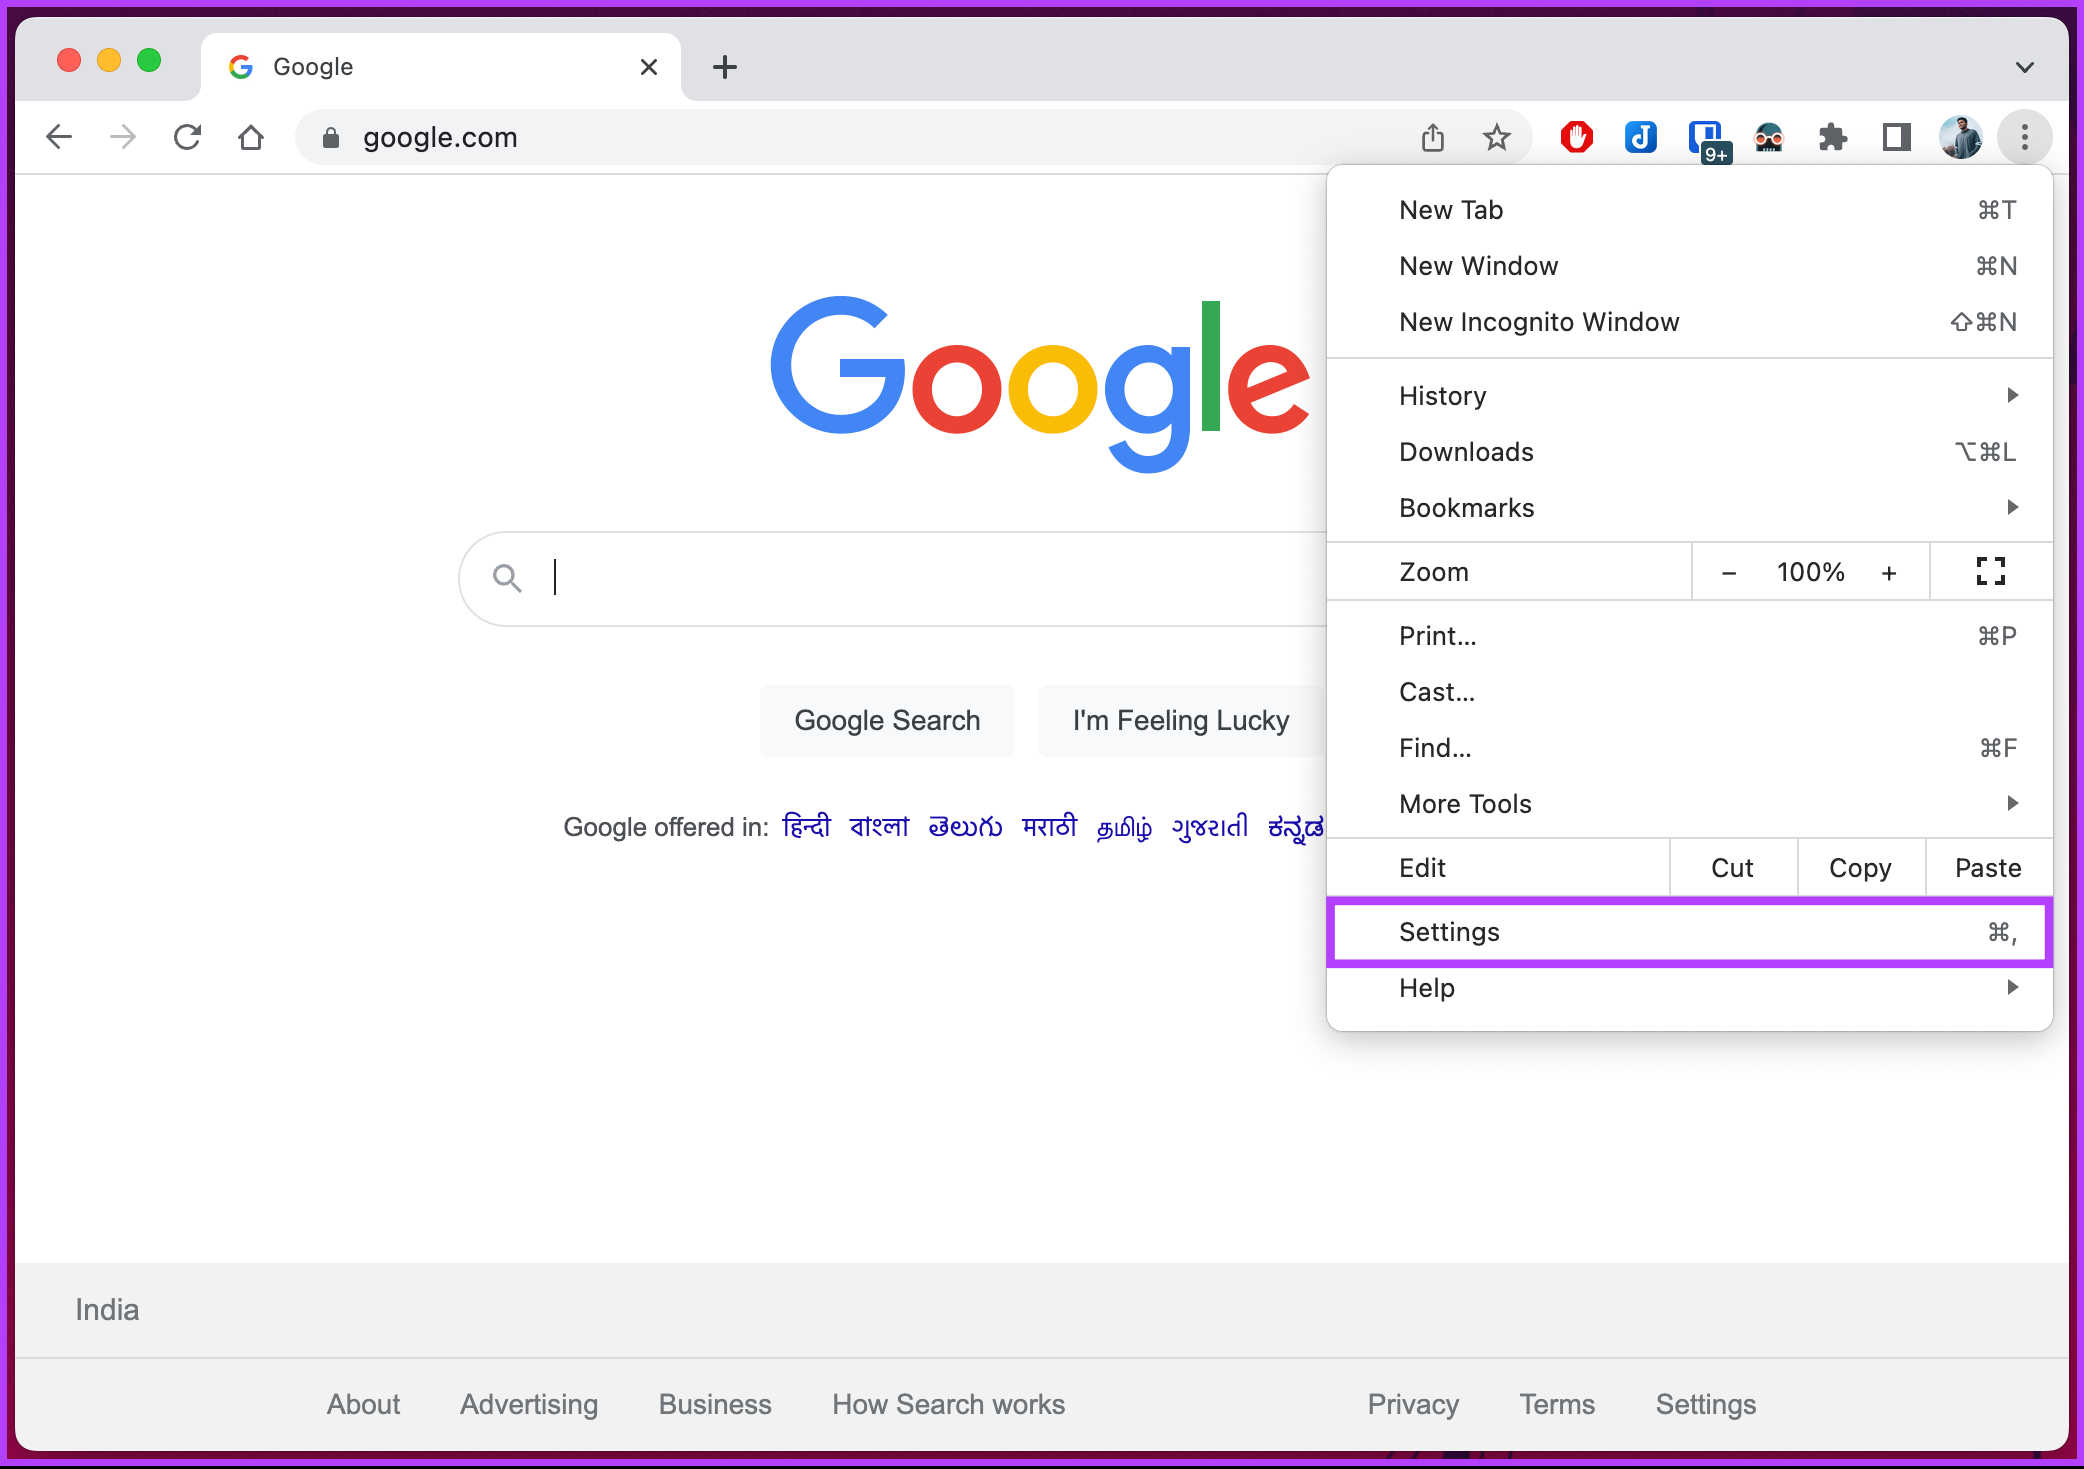
Step 1: Launch Google Chrome on your Windows or Mac computer and click on the three-dot icon at the top right corner. Step 2: From the drop-down menu, select History and choose History again. Note: Alternatively, press ‘Ctrl+H’ on Windows or ‘Command+Y’ on your Mac to open the Chrome history tab, or you can type ‘Chrome://History’ in the Chrome address bar to directly open the History section. This will open Chrome’s history, from where you can review and clear the history individually or collectively. To clear each item individually, continue with the below steps. Step 3: Click the three-dot icon at the right of the entry you want to delete. Step 4: From the menu, select ‘Remove from history.’ If you have multiple entries you want to delete, continue with the steps below. Step 5: Check the box next to each entry you want to delete and click the Delete button at the top right corner. That’s it. Your Chrome history is deleted forever from your machine. If you don’t want to select the entries individually or collectively but want to delete the whole history, check out our depth article about what happens when you clear browsing data in Chrome. If you can’t access your desktop and want to clear Chrome history on your mobile device, move on to the following method.
On Mobile
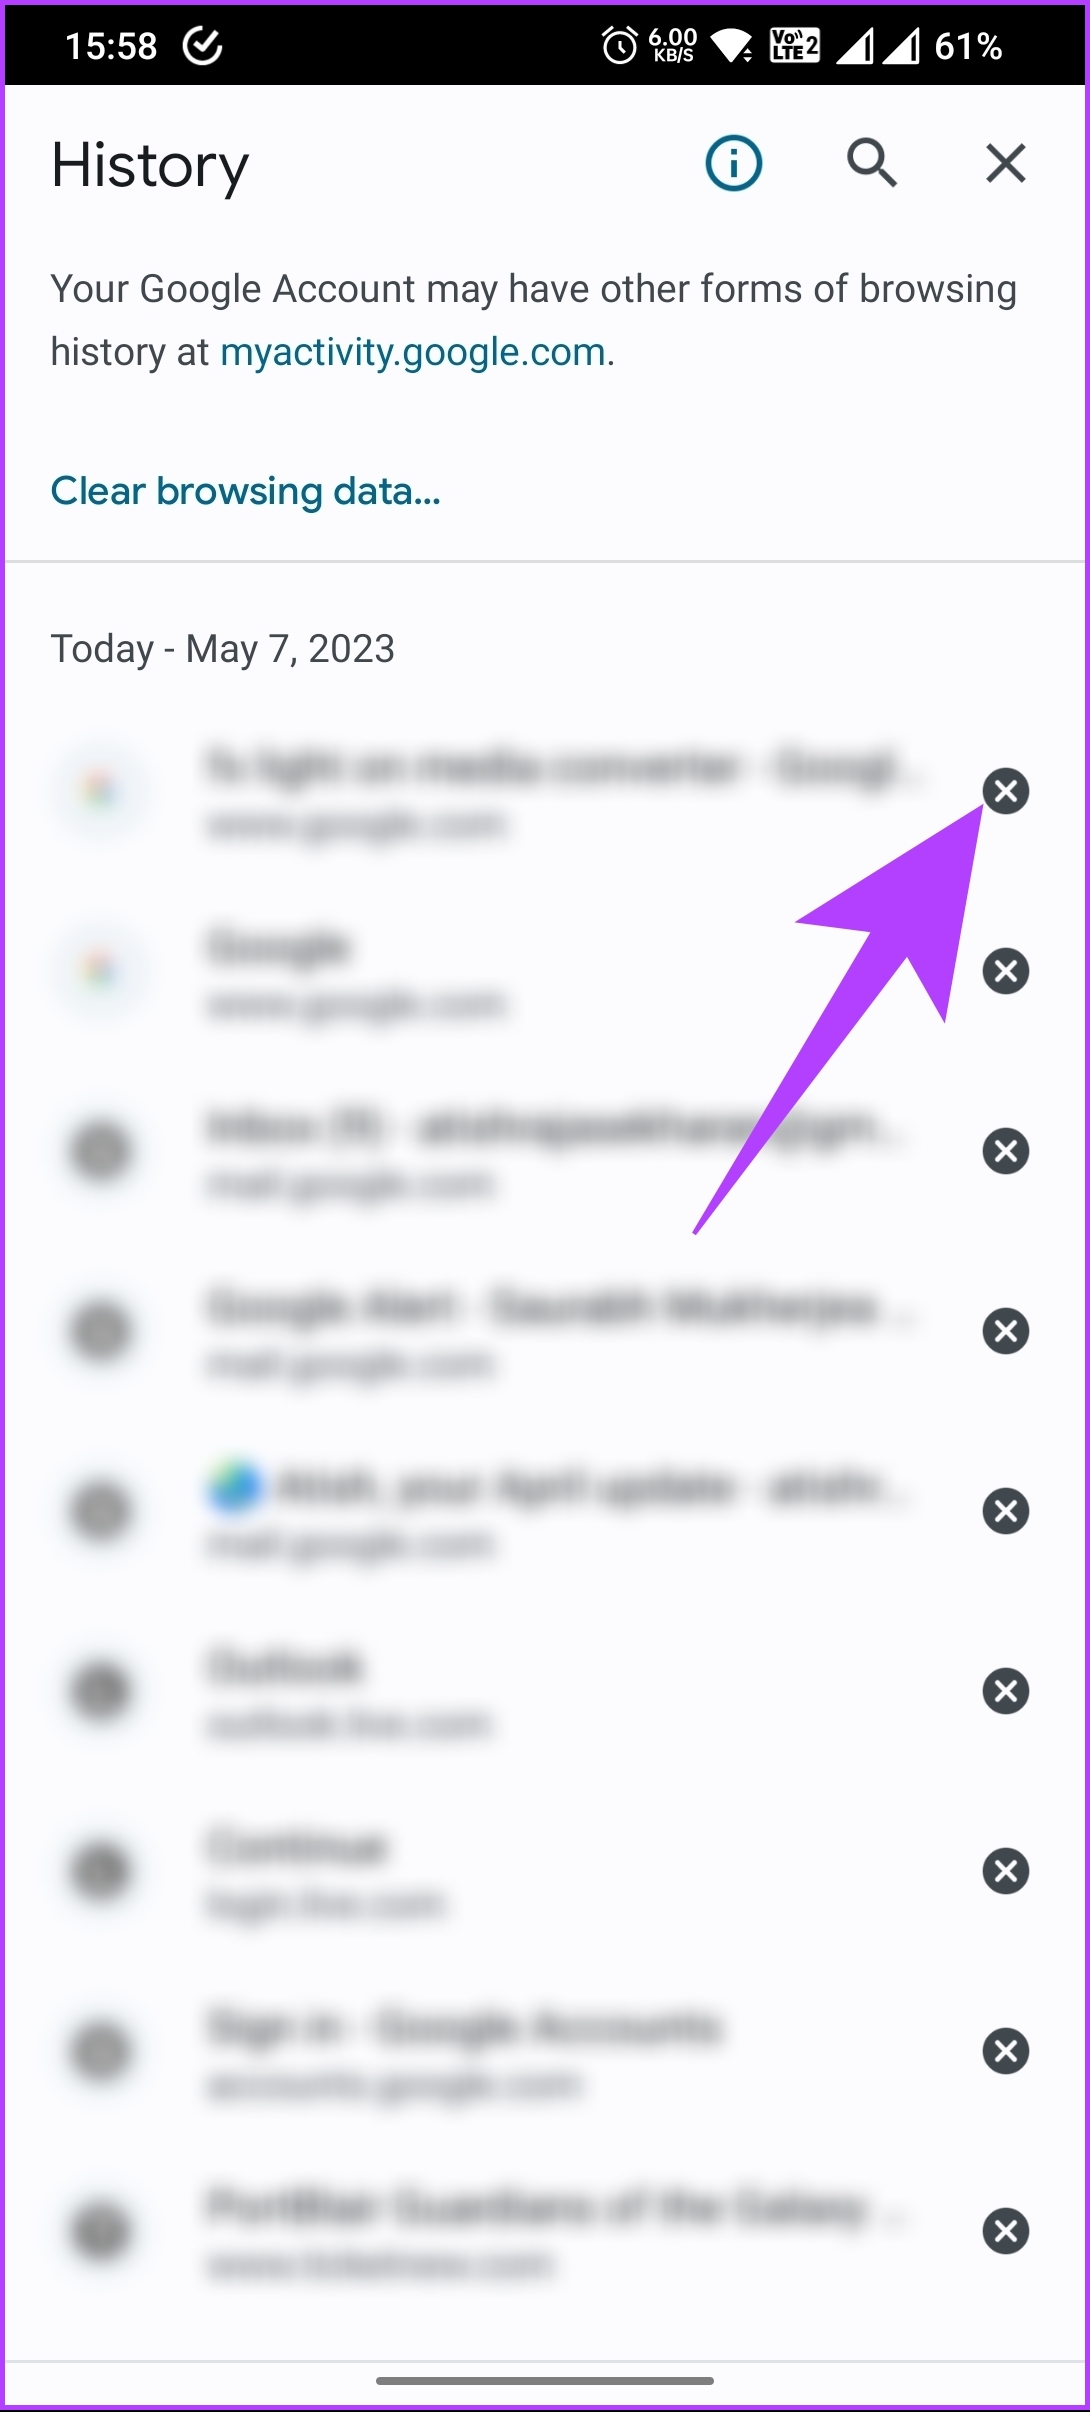
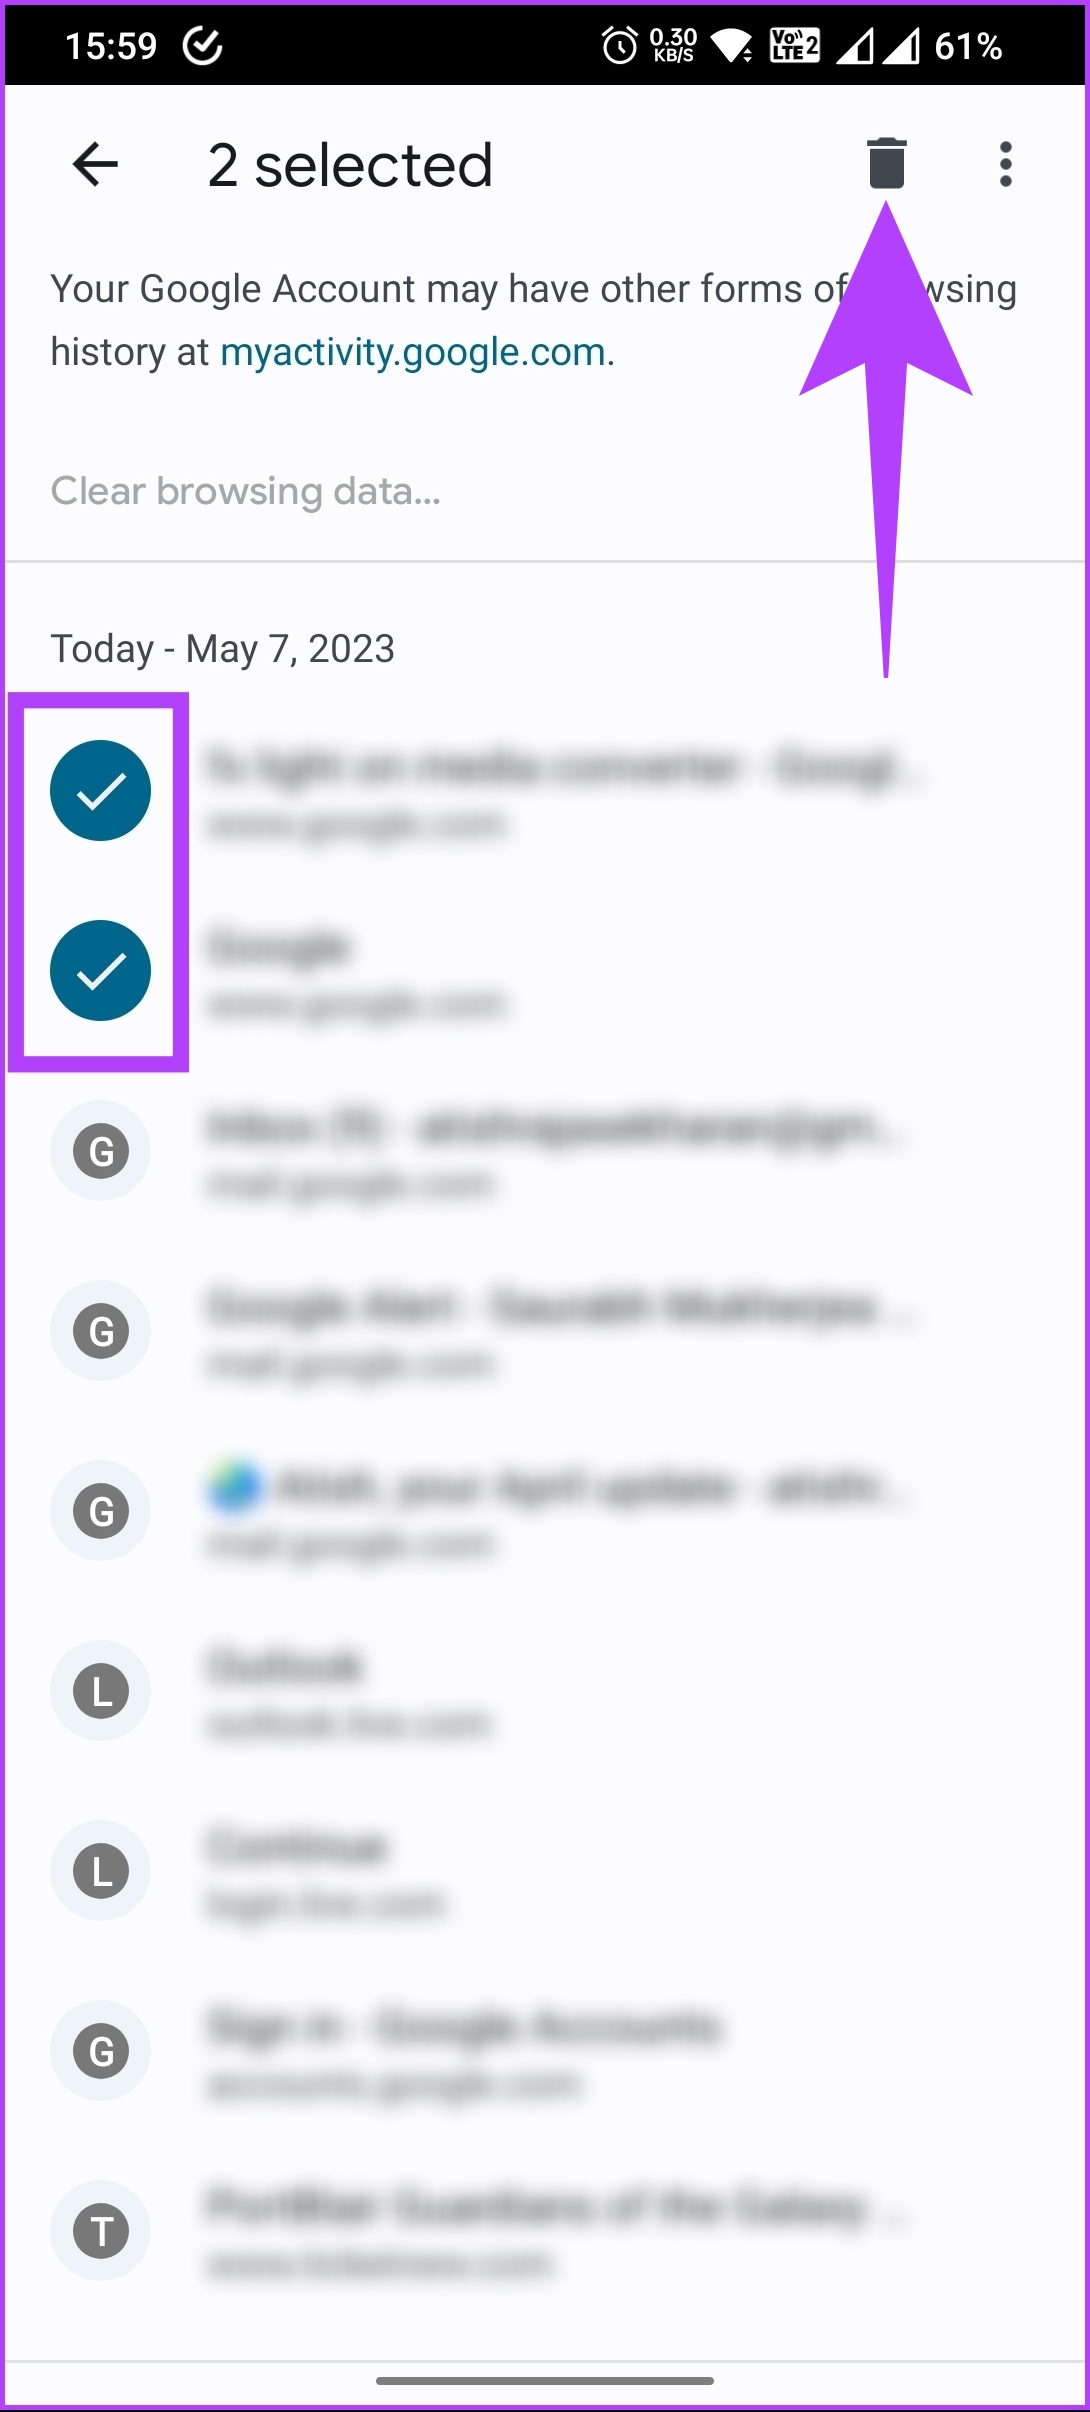
The steps may somewhat change based on the operating system and app version you use on your mobile device. However, broadly, the steps are the same. Follow the steps below. Note: For ease of demonstration, we will use an Android device. Step 1: Launch Google Chrome on your Android or iOS device and tap the three-dot icon at the top-right corner. Step 2: From the drop-down menu, select History, and from the list of entries, tap on the cross (X) to delete the entry. If you want to delete multiple entries from your Chrome history on mobile devices, continue with the below steps. Step 3: Long press any entry to select it, and tap on the trashcan icon at the top to delete it. Note: You will not get a prompt, so decide before clearing the data. If you don’t want to select the entries individually or collectively but want to delete the whole history, continue the below steps. Step 4: On the History page, tap ‘Clear browsing data,’ and select the time range of the history to be deleted on the next screen. Step 5: Once selected, choose Browsing history, and tap Clear data. There you go. Your Chrome history is deleted forever from your mobile device. If you don’t want to do it through Chrome, there’s another way to achieve the same thing. Keep reading.
2. Using Google’s My Activity
This is another way to access your Chrome history. In addition, with this method, you can also access other Google Services such as Search, Maps, YouTube, and so on. With that, let’s begin with the steps. Note: Considering you have logged into your Google account on Chrome, move on to the steps below.
On the Desktop
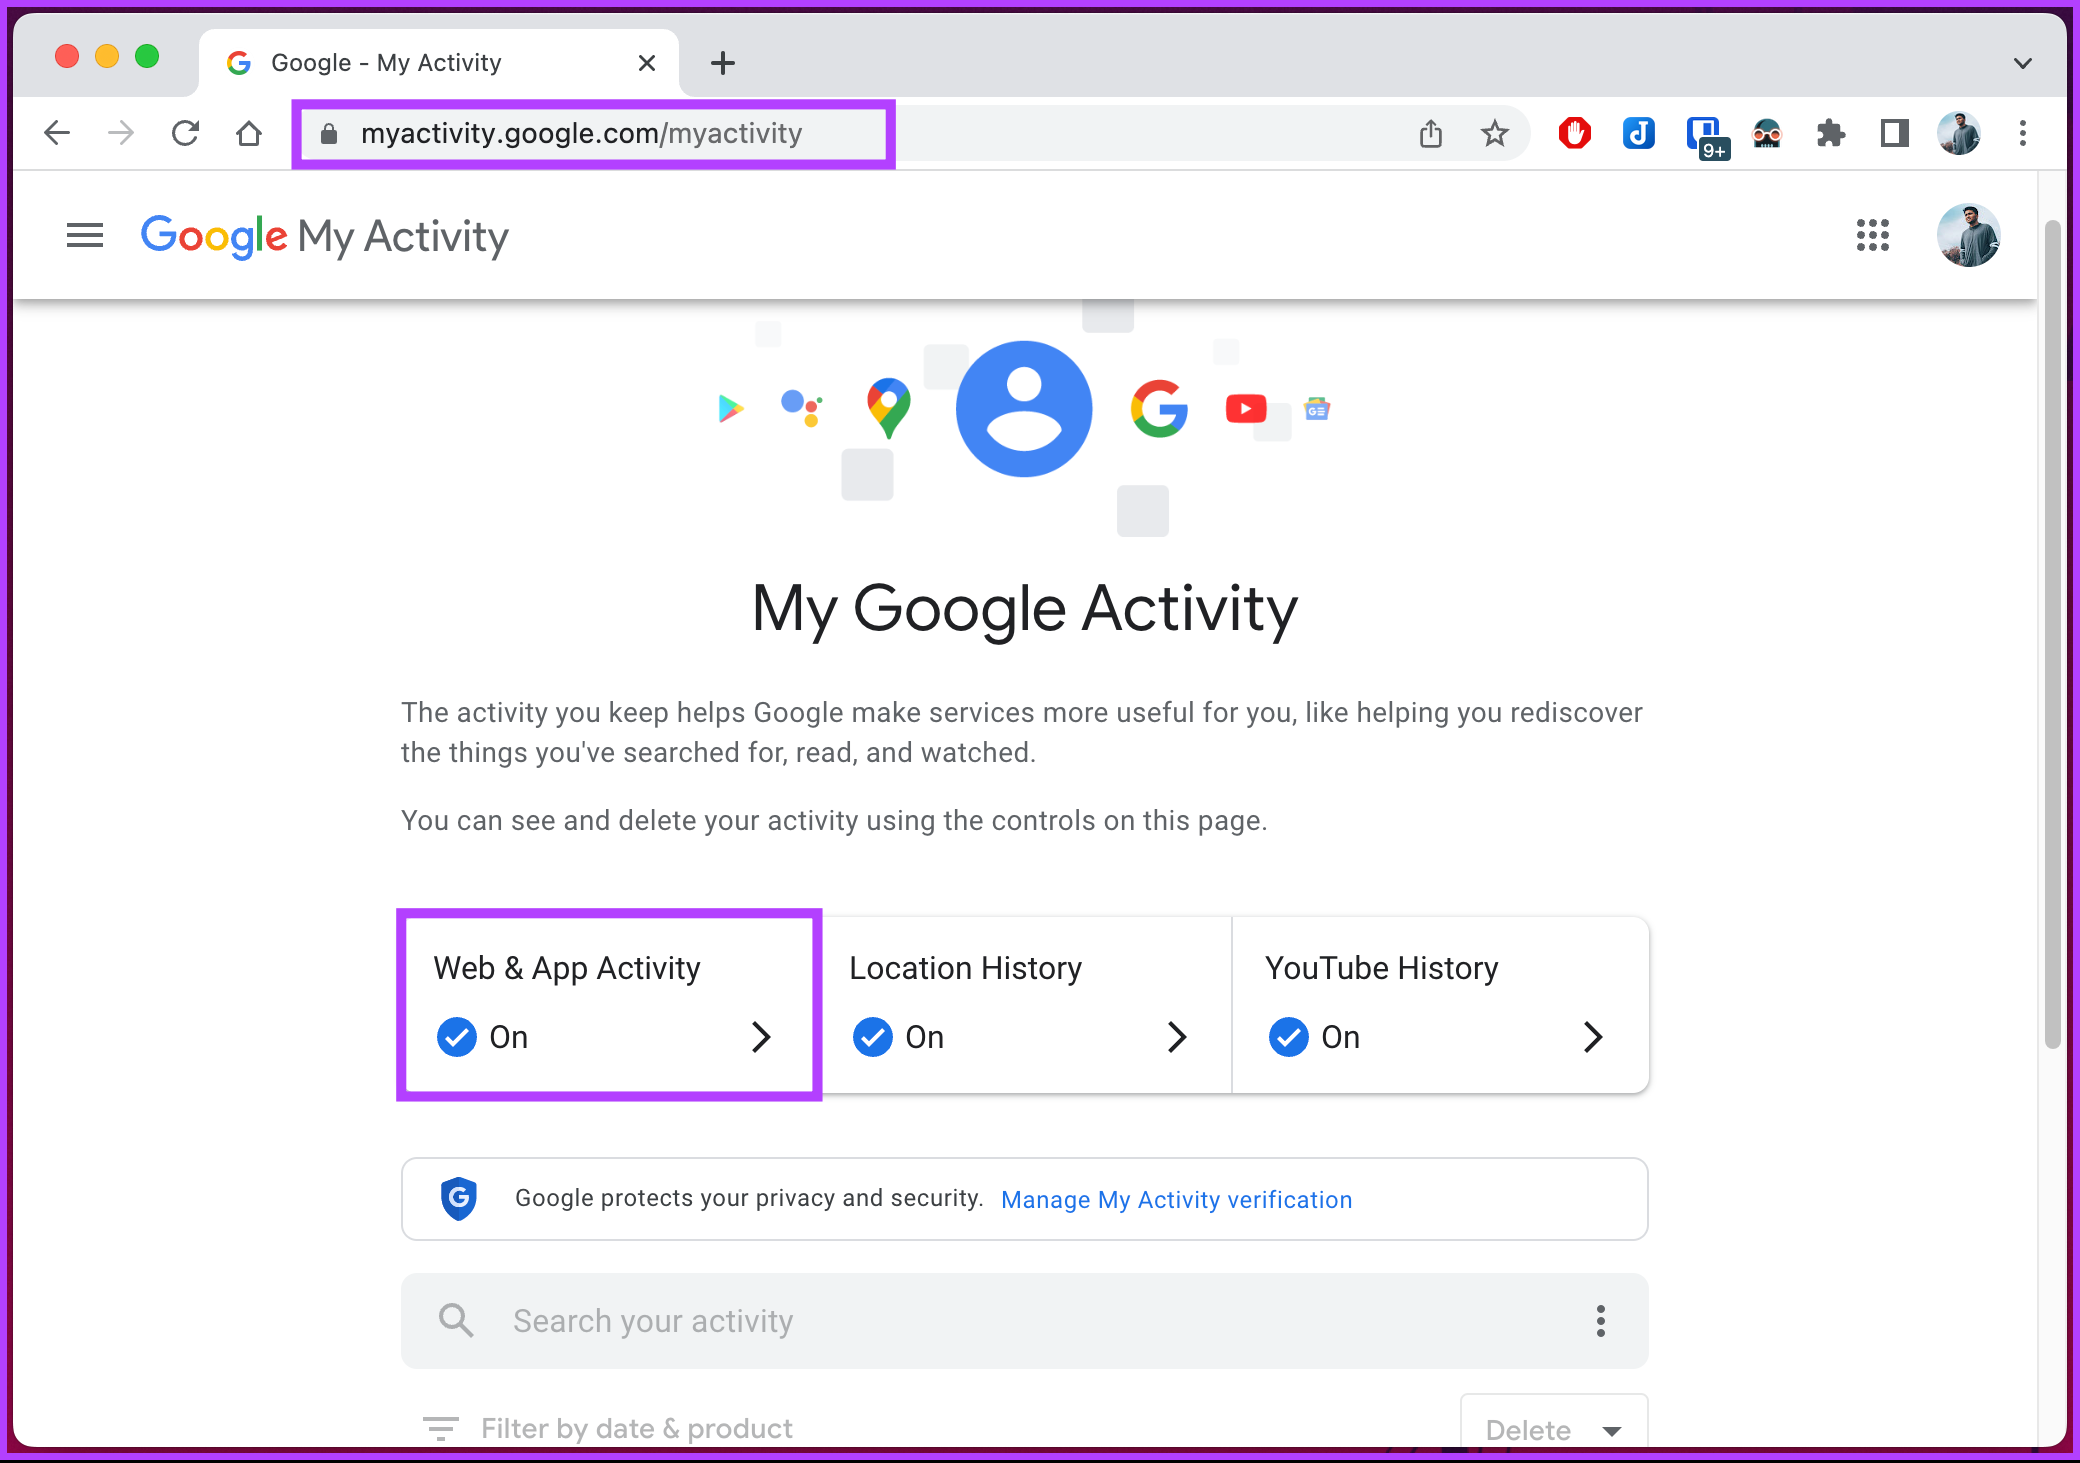
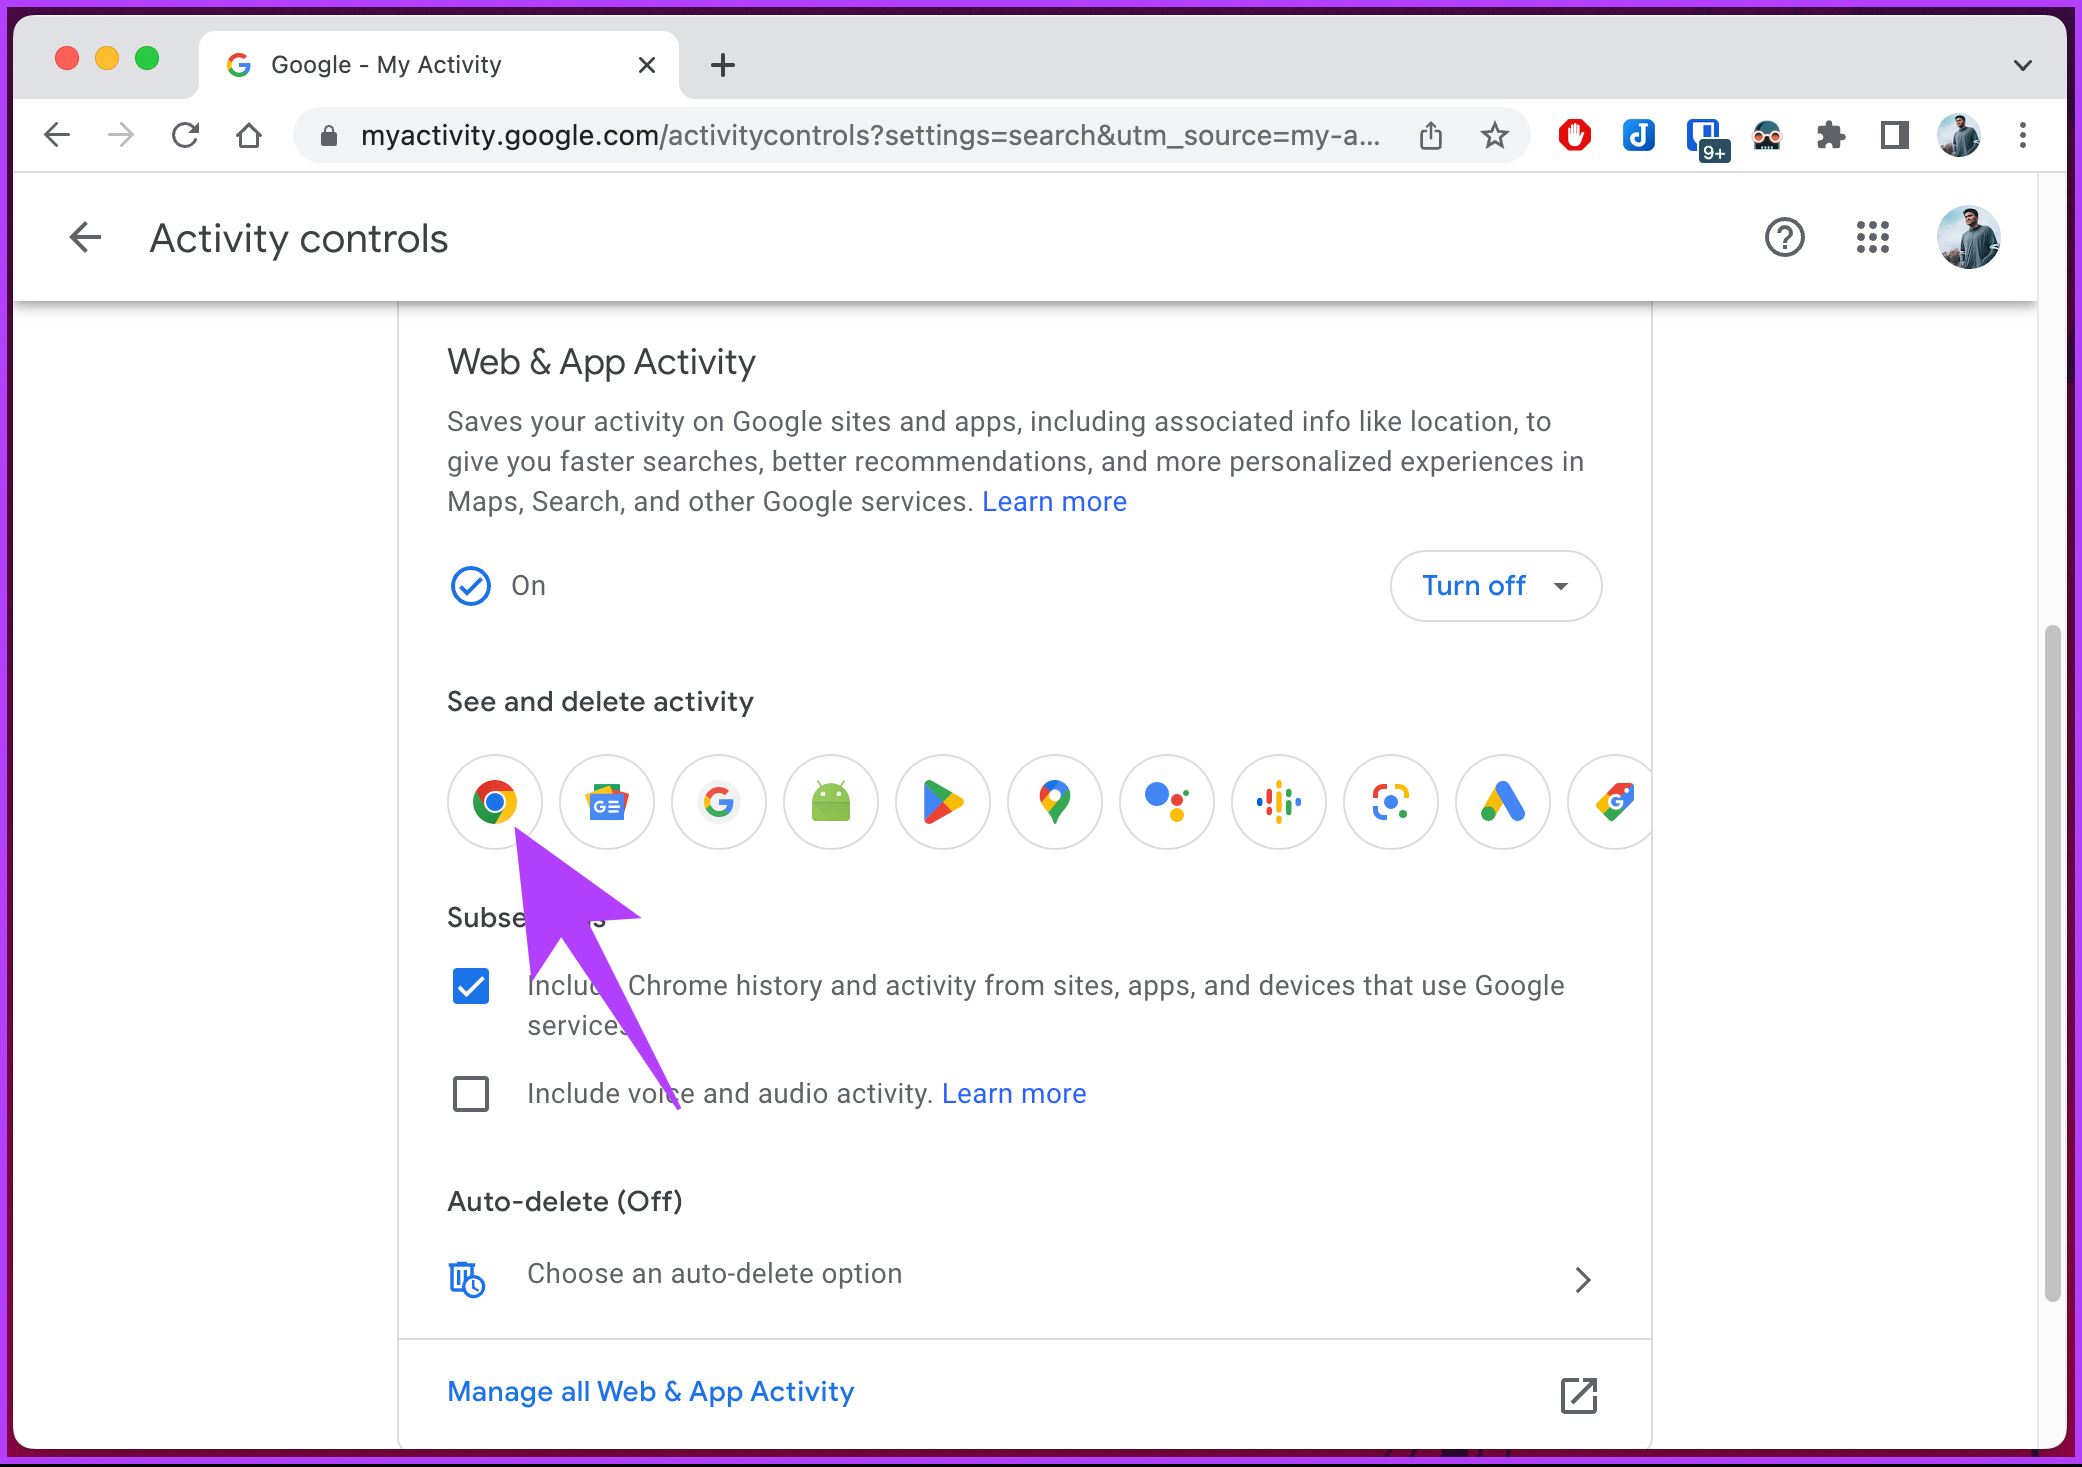
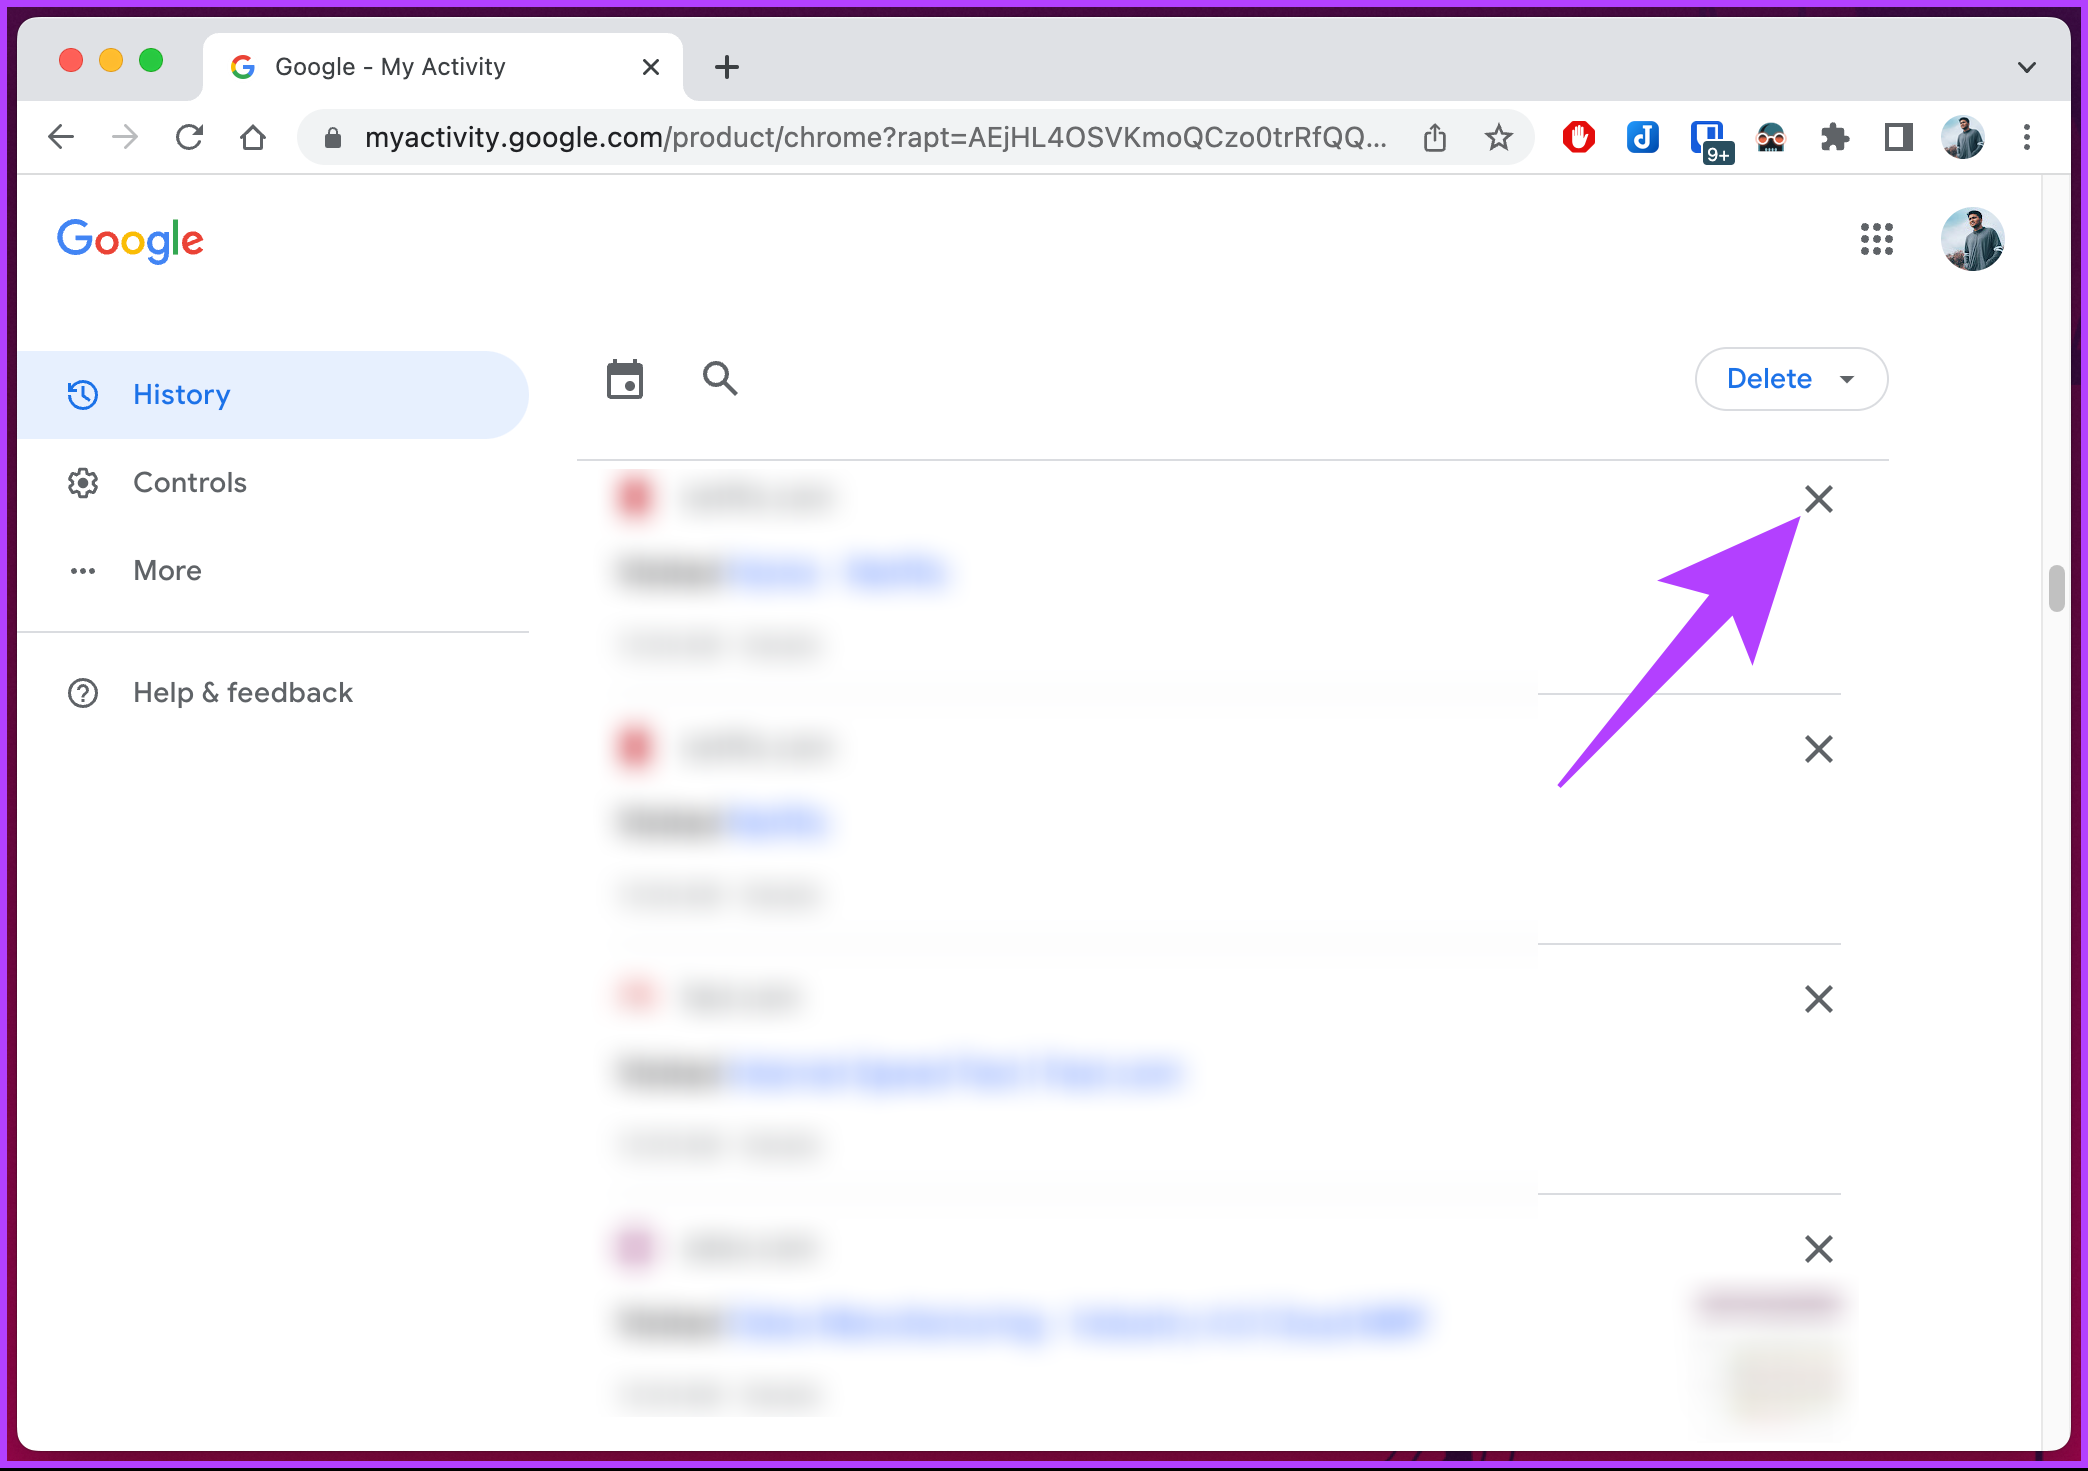
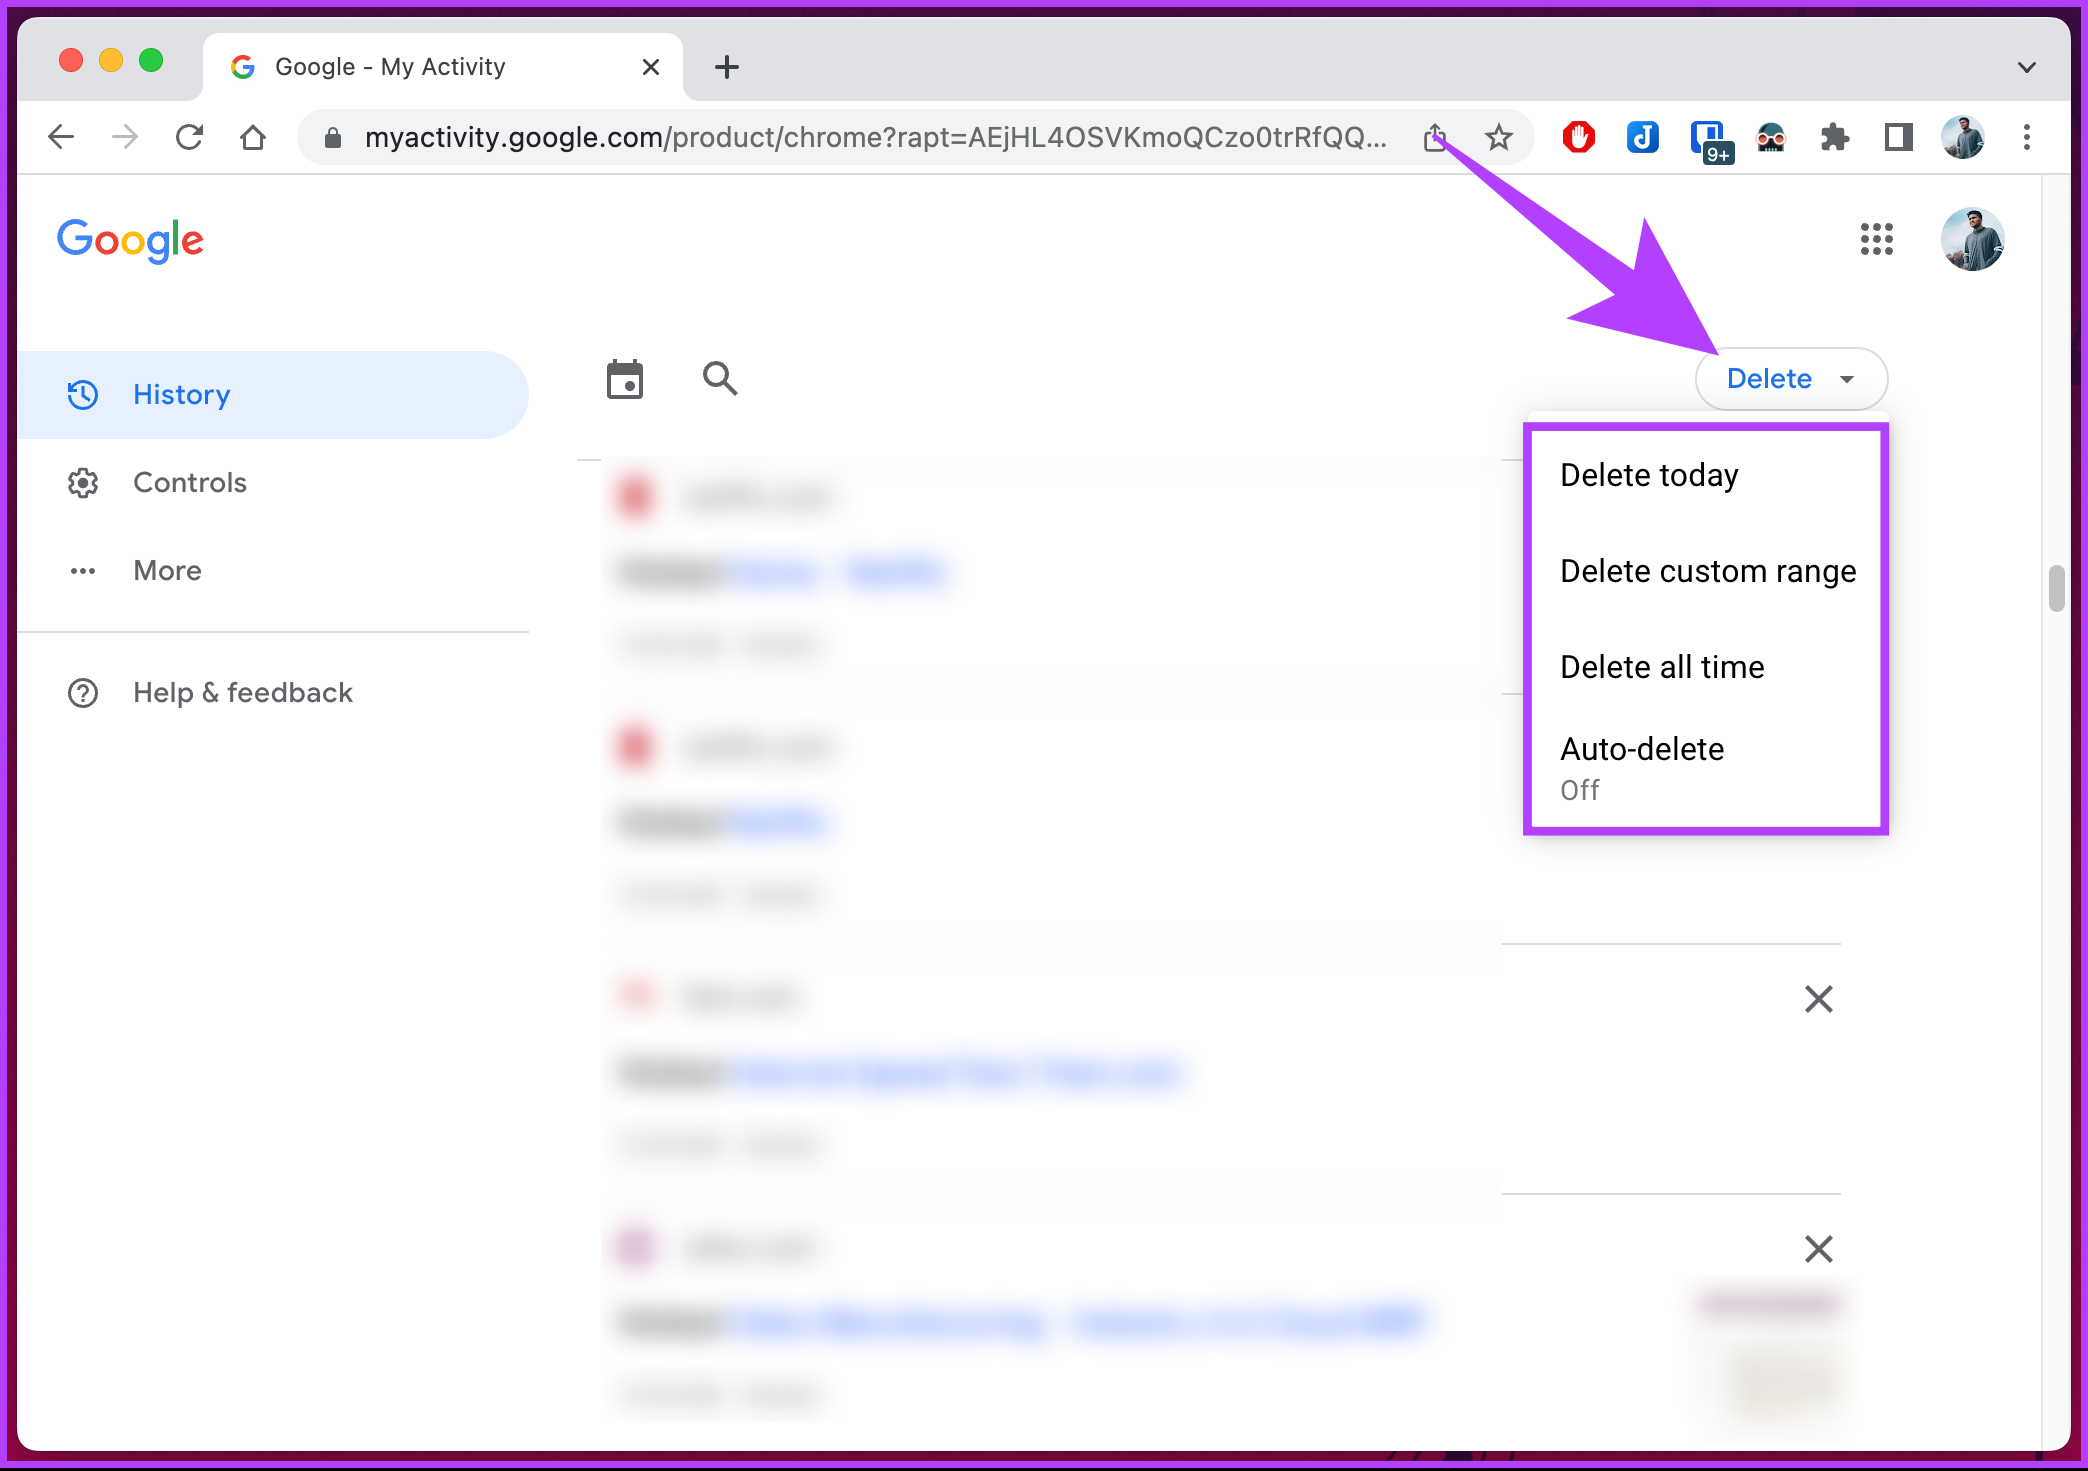
Step 1: Launch Google Chrome on your Windows or Mac computer, go to Google’s My Activity, and log in to your account if you haven’t already. Go to My Activity Step 2: Go to ‘Web & App Activity.’ Step 3: Under ‘See and delete activity,’ click the Chrome icon. Scroll through the entries to review your activity on Chrome. You can also click Details beneath a specific time for more information about that activity. Step 4: Click the X icon next to each entry to remove it from the list. Step 5: If you want to bulk delete the entry, click the delete button, and select the time frame to clear the Chrome history from your My Activity. There you go. Your Chrome browser history gets deleted from the ‘Google’s My Activity’ tab. If you don’t have access to your desktop, you can do the same using a mobile device, continue reading.
On Mobile
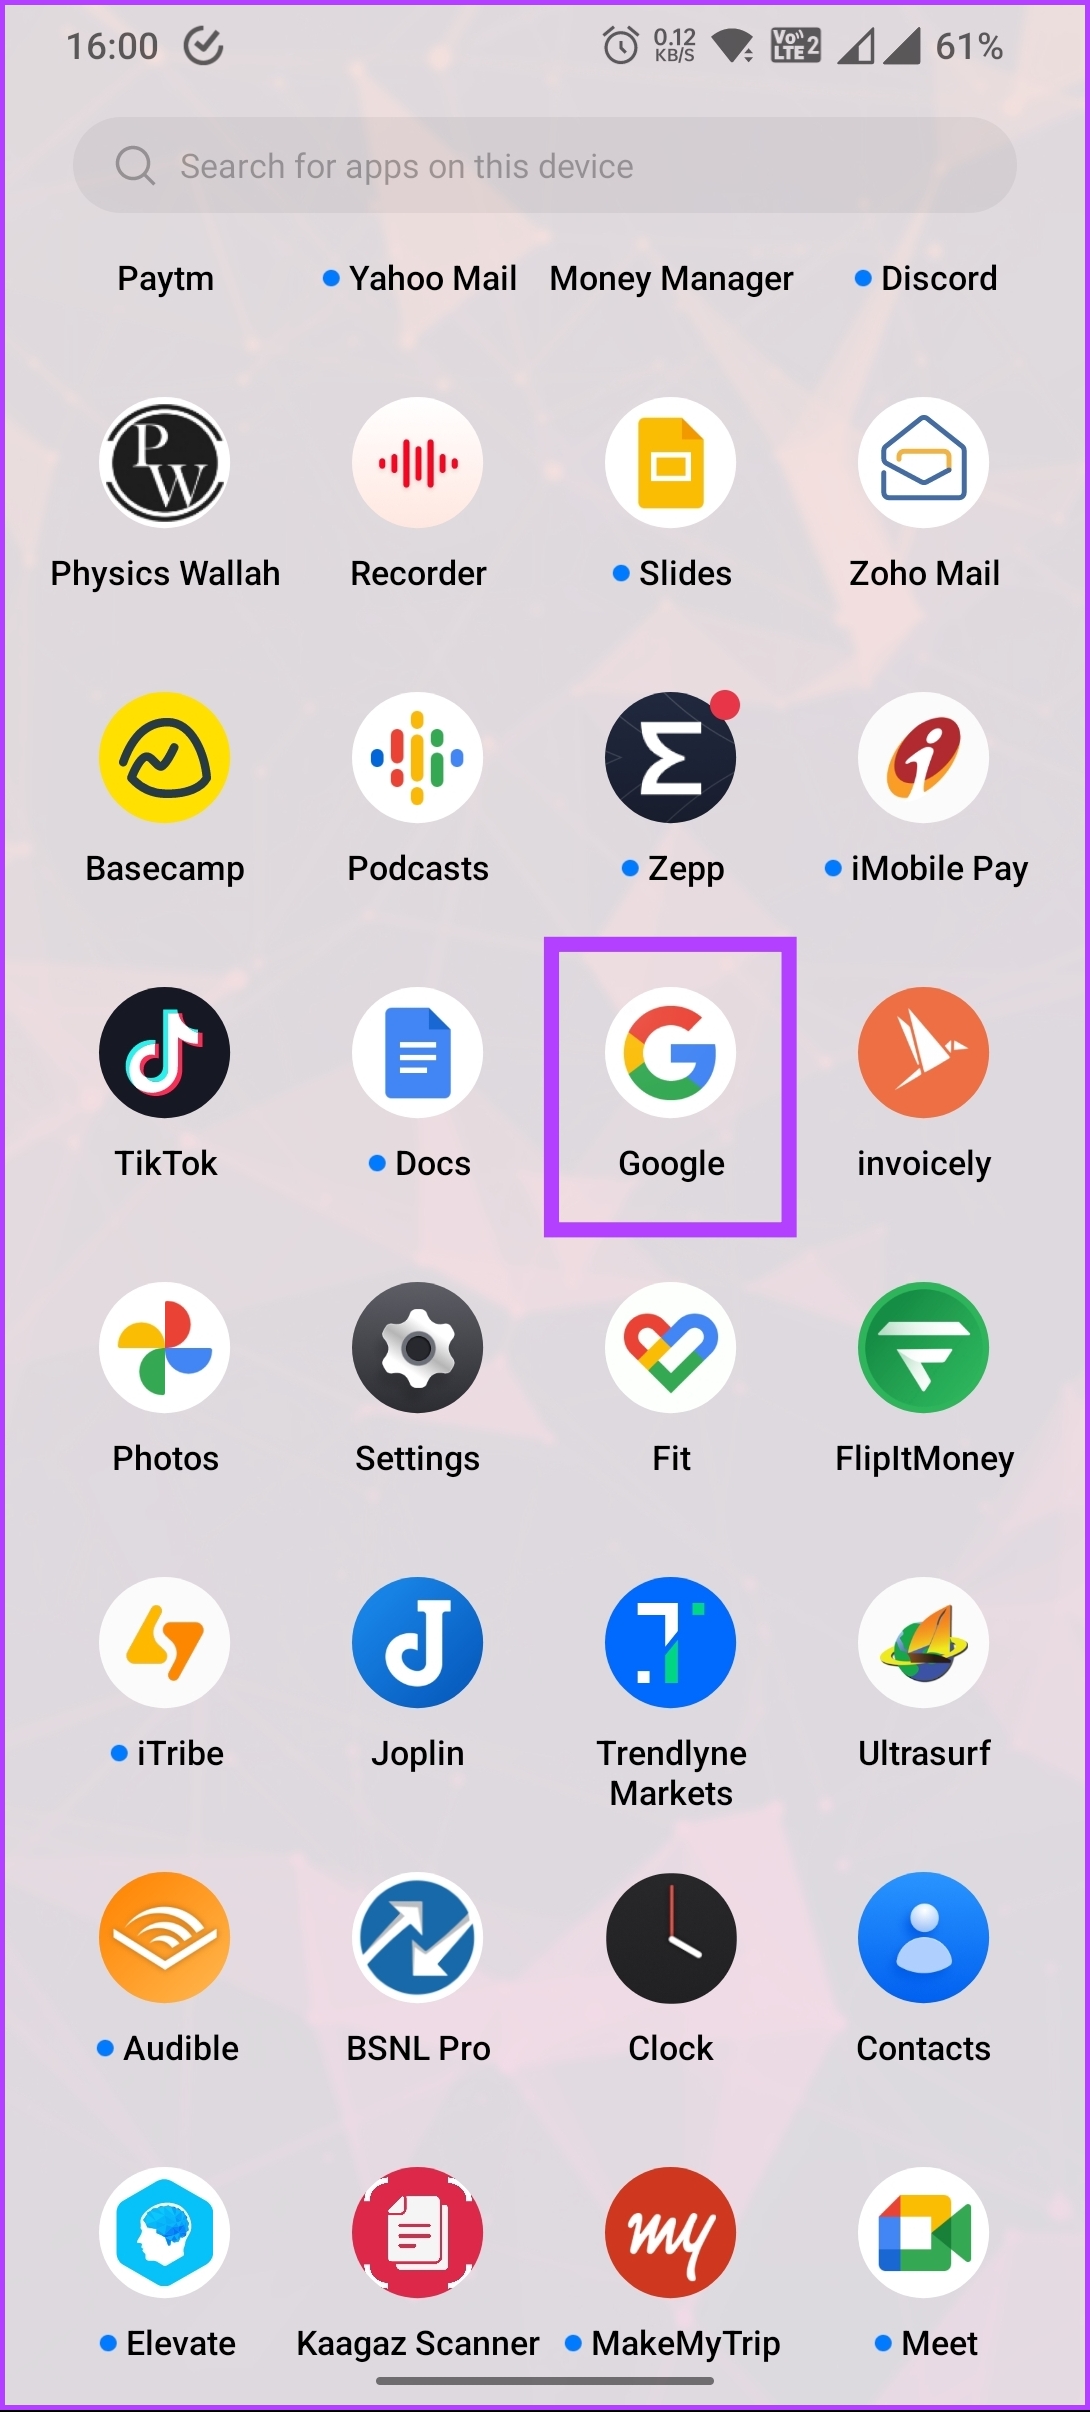
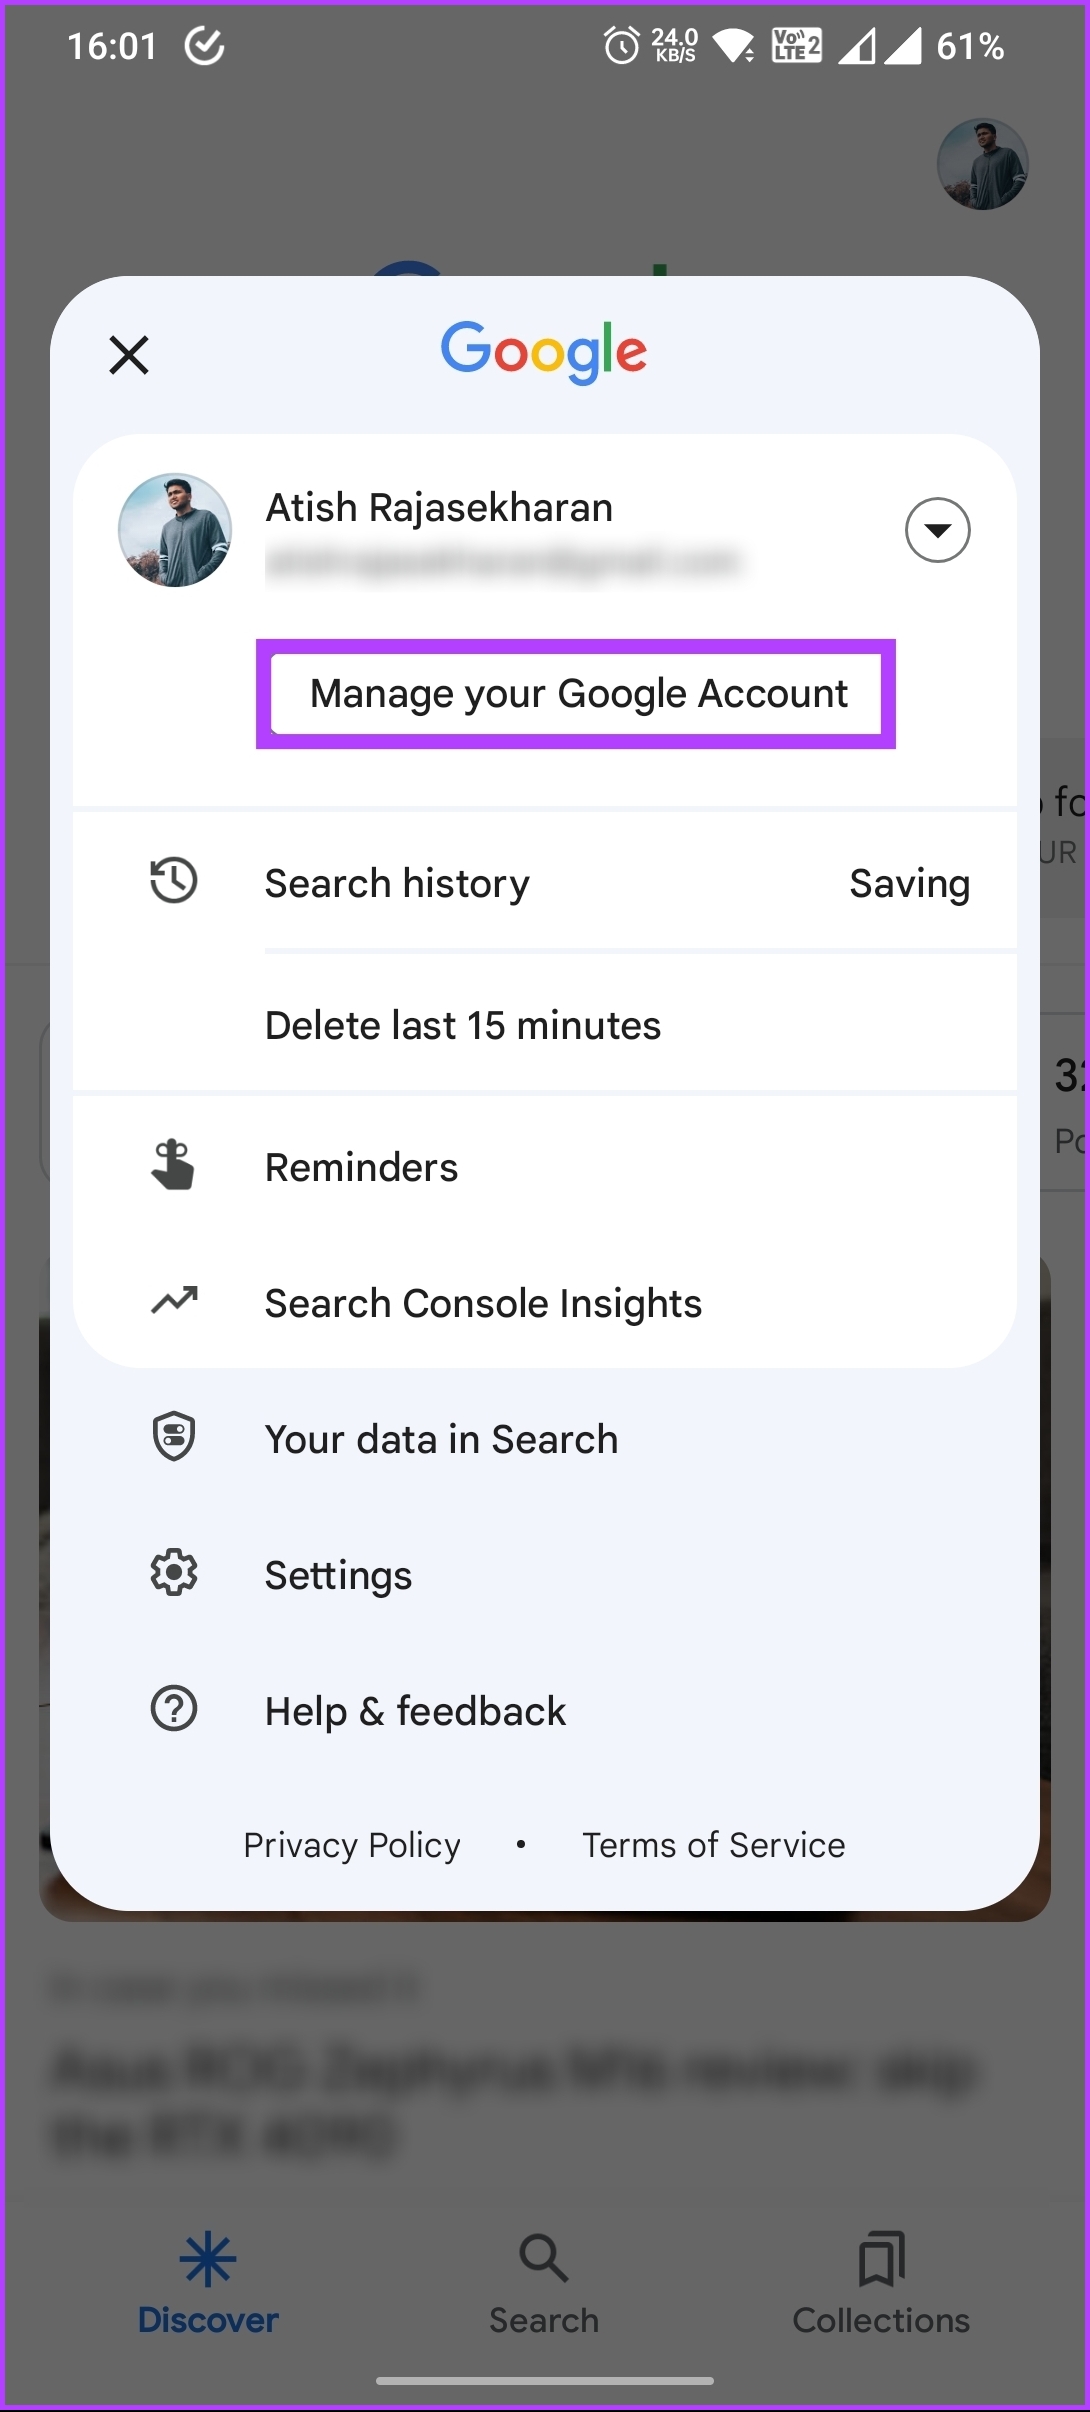
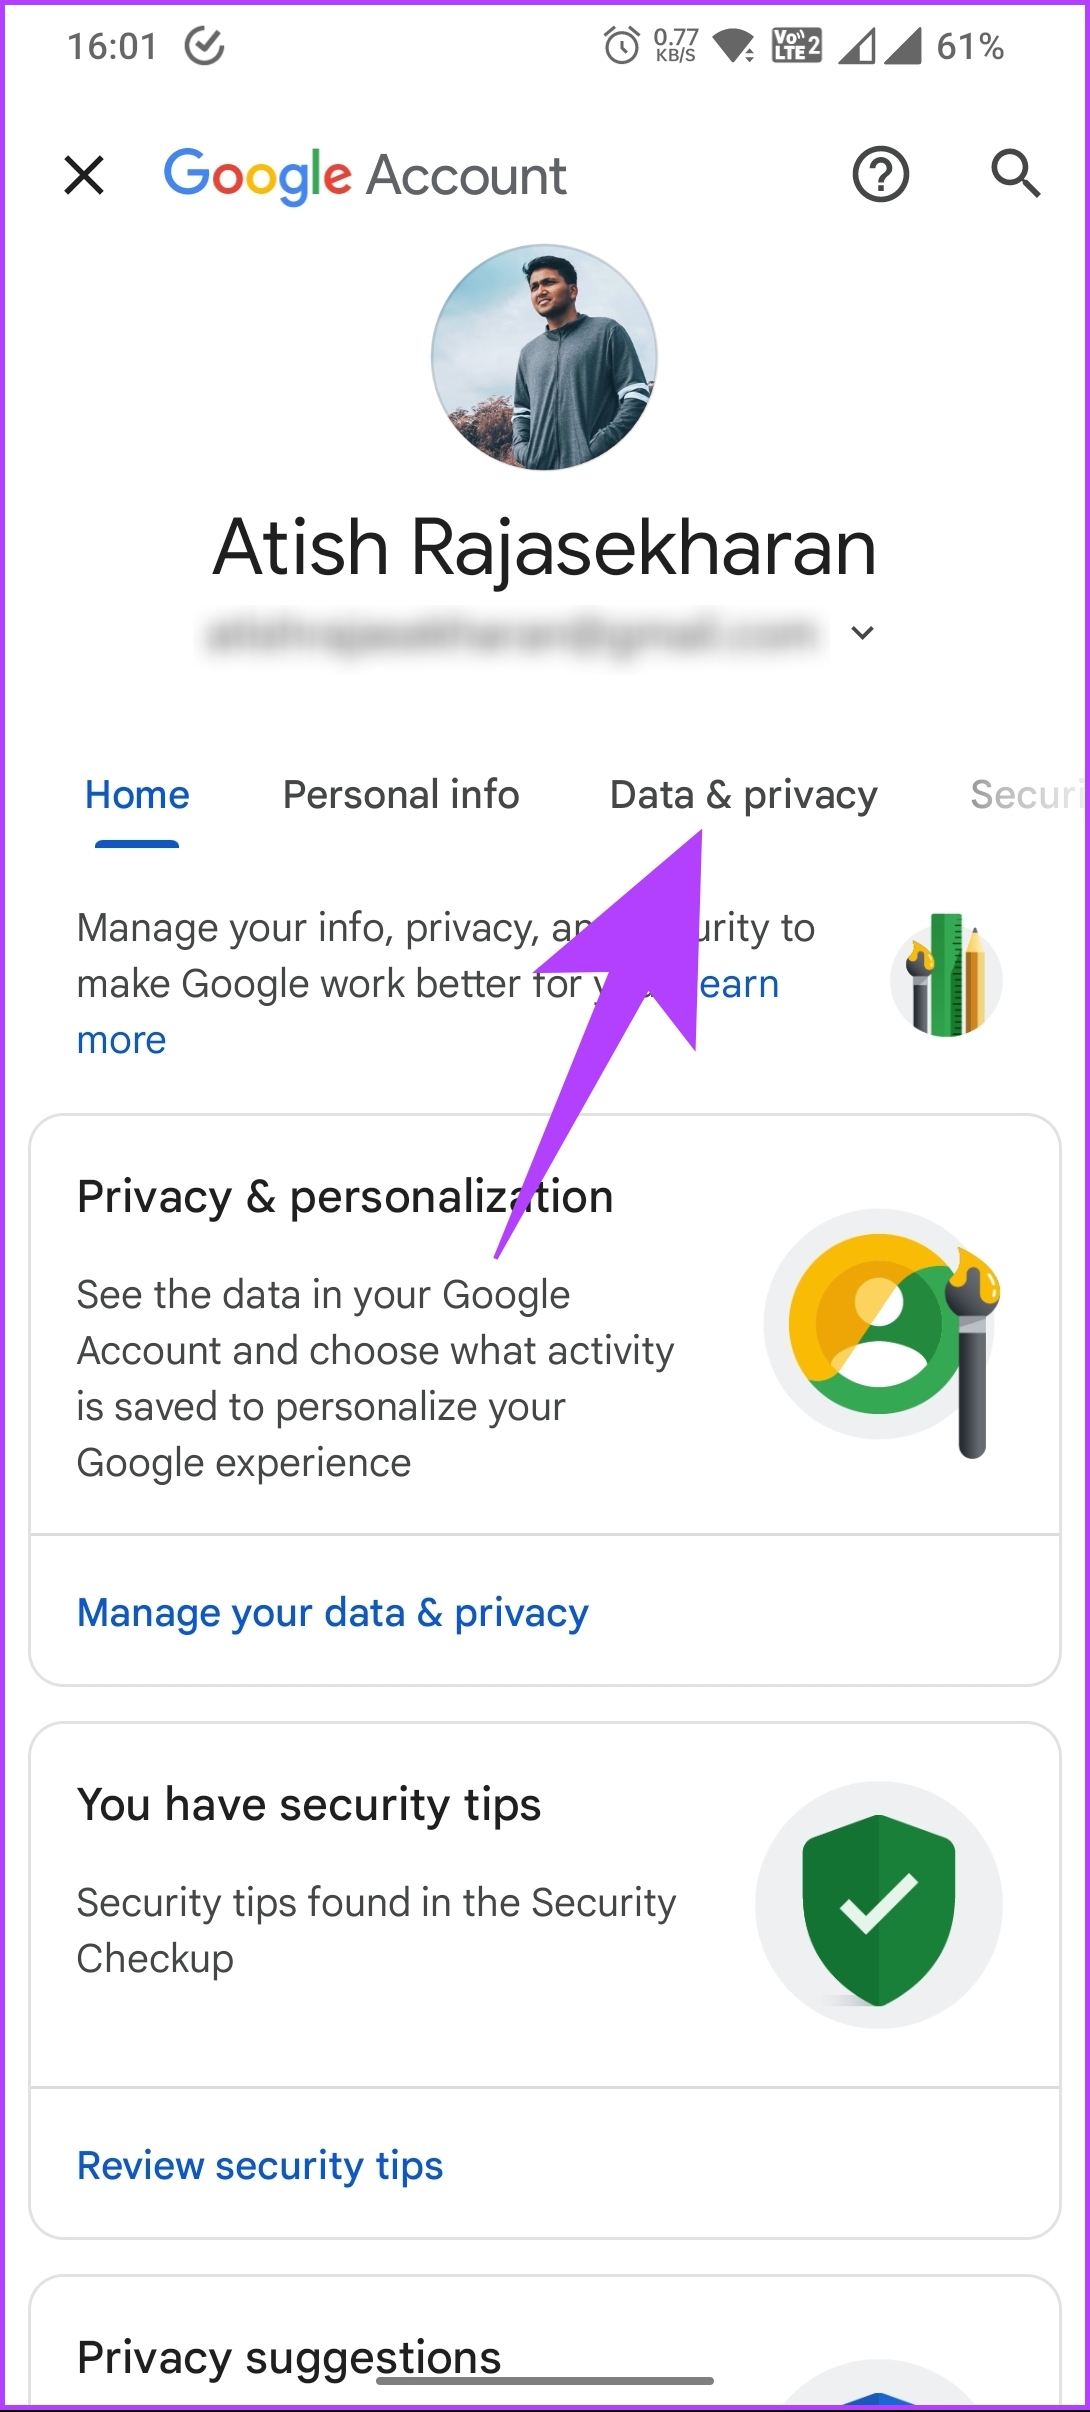
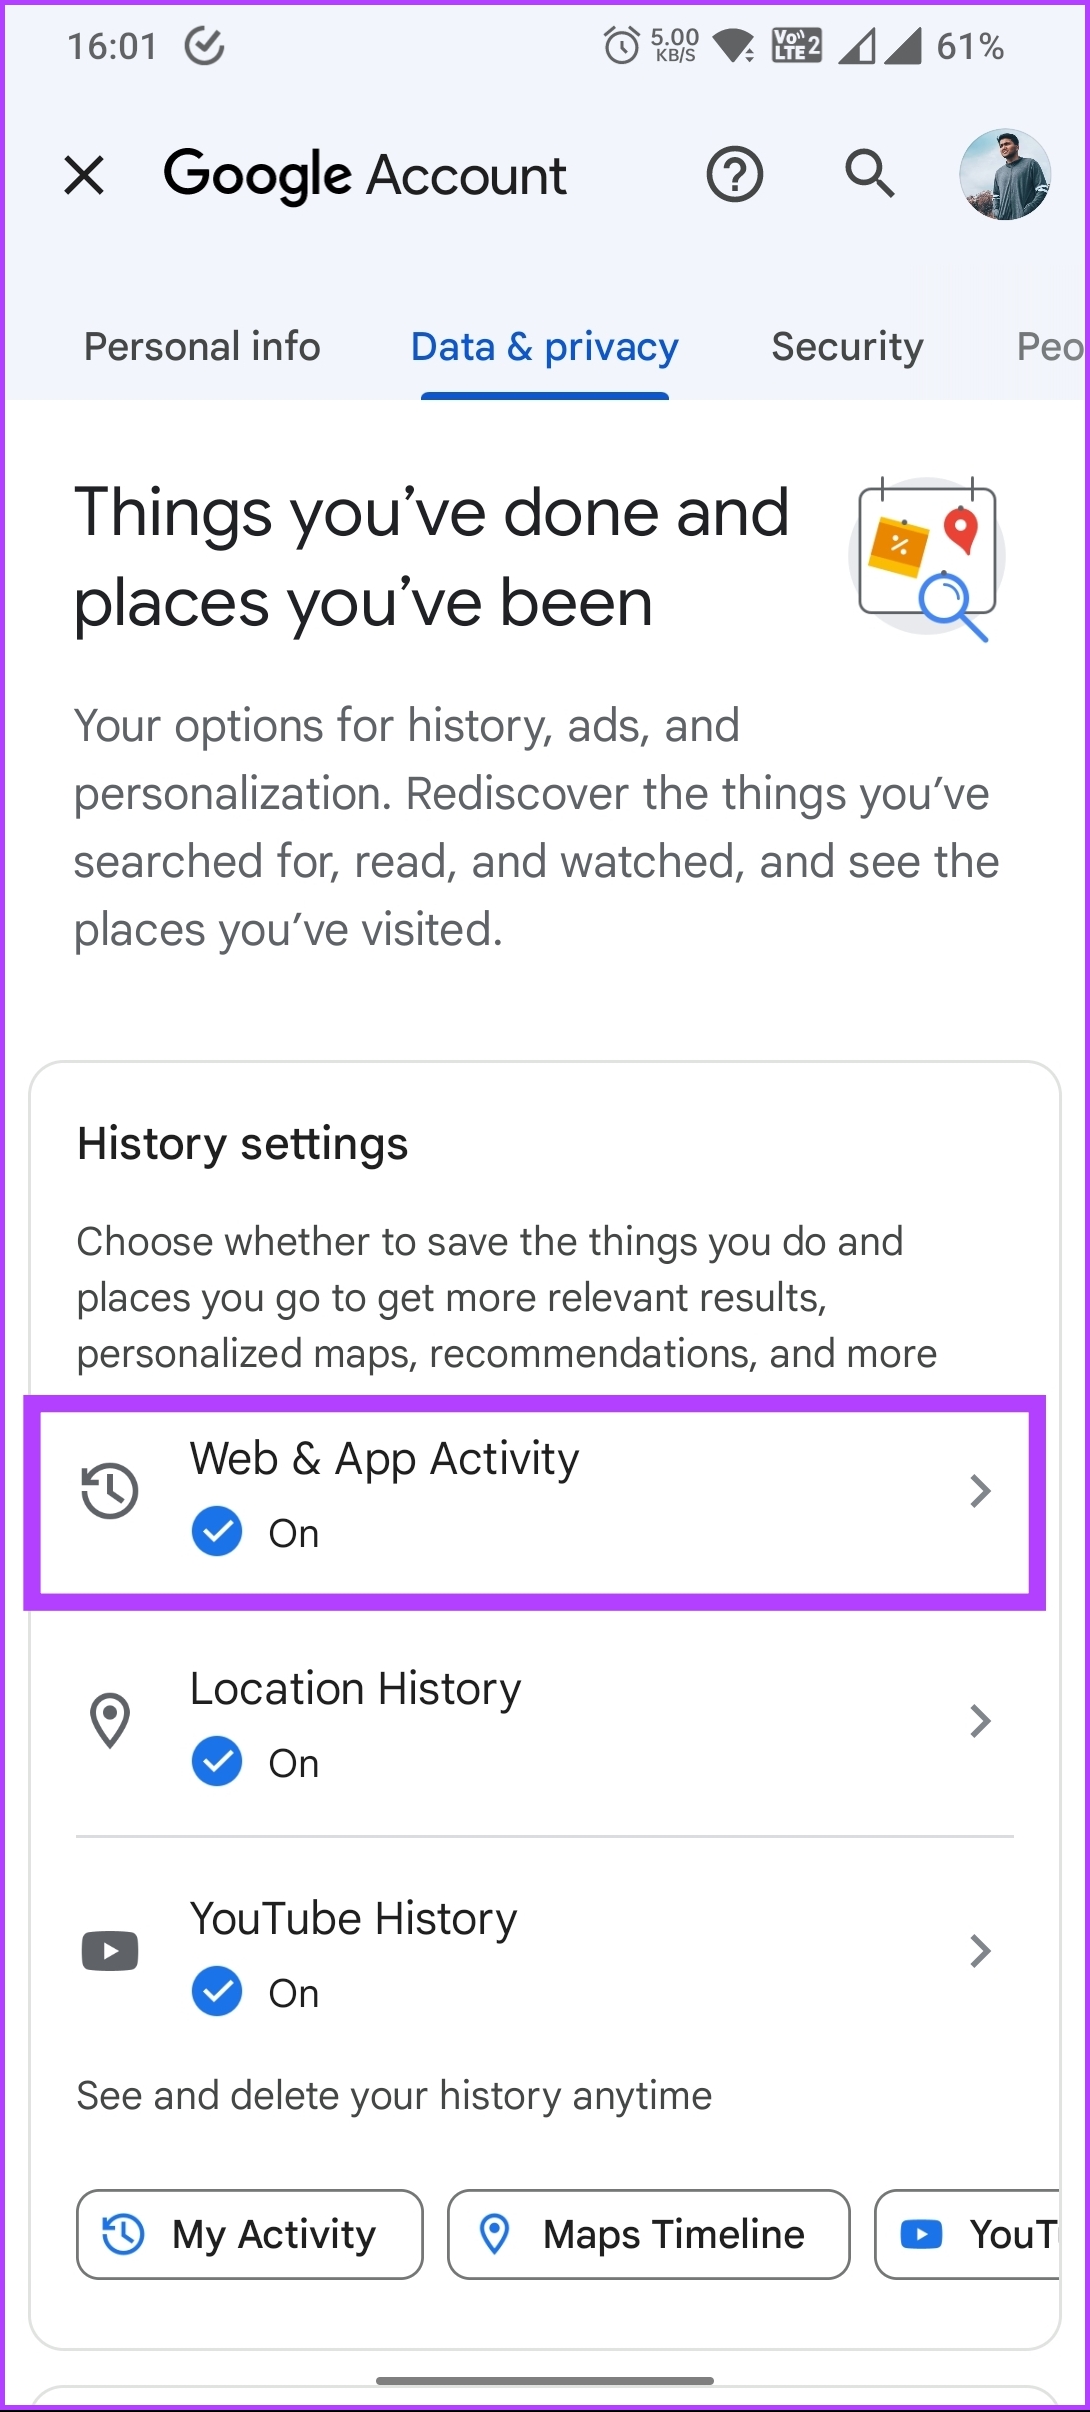
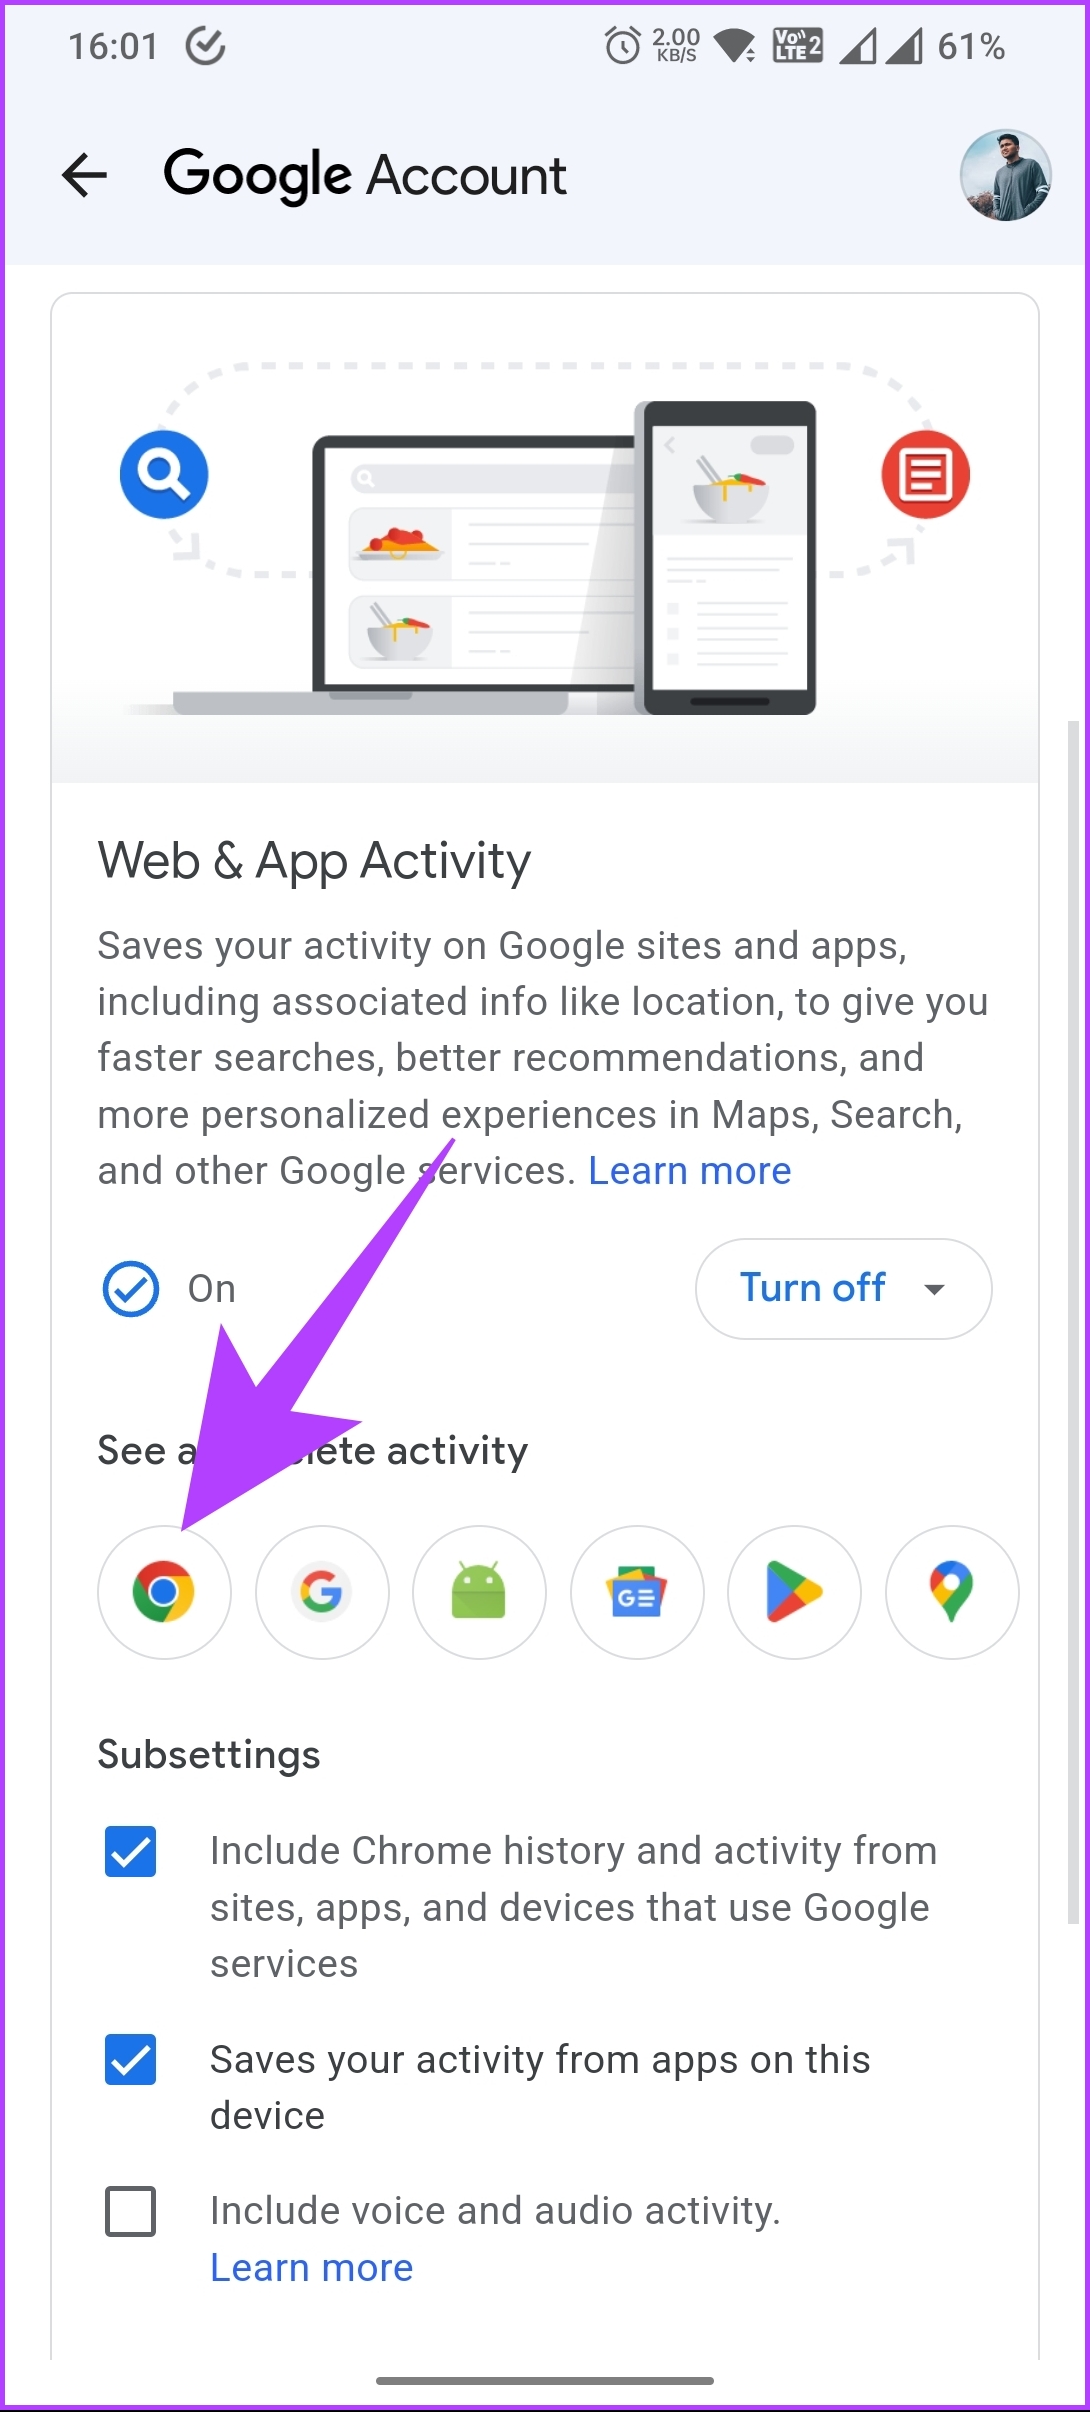
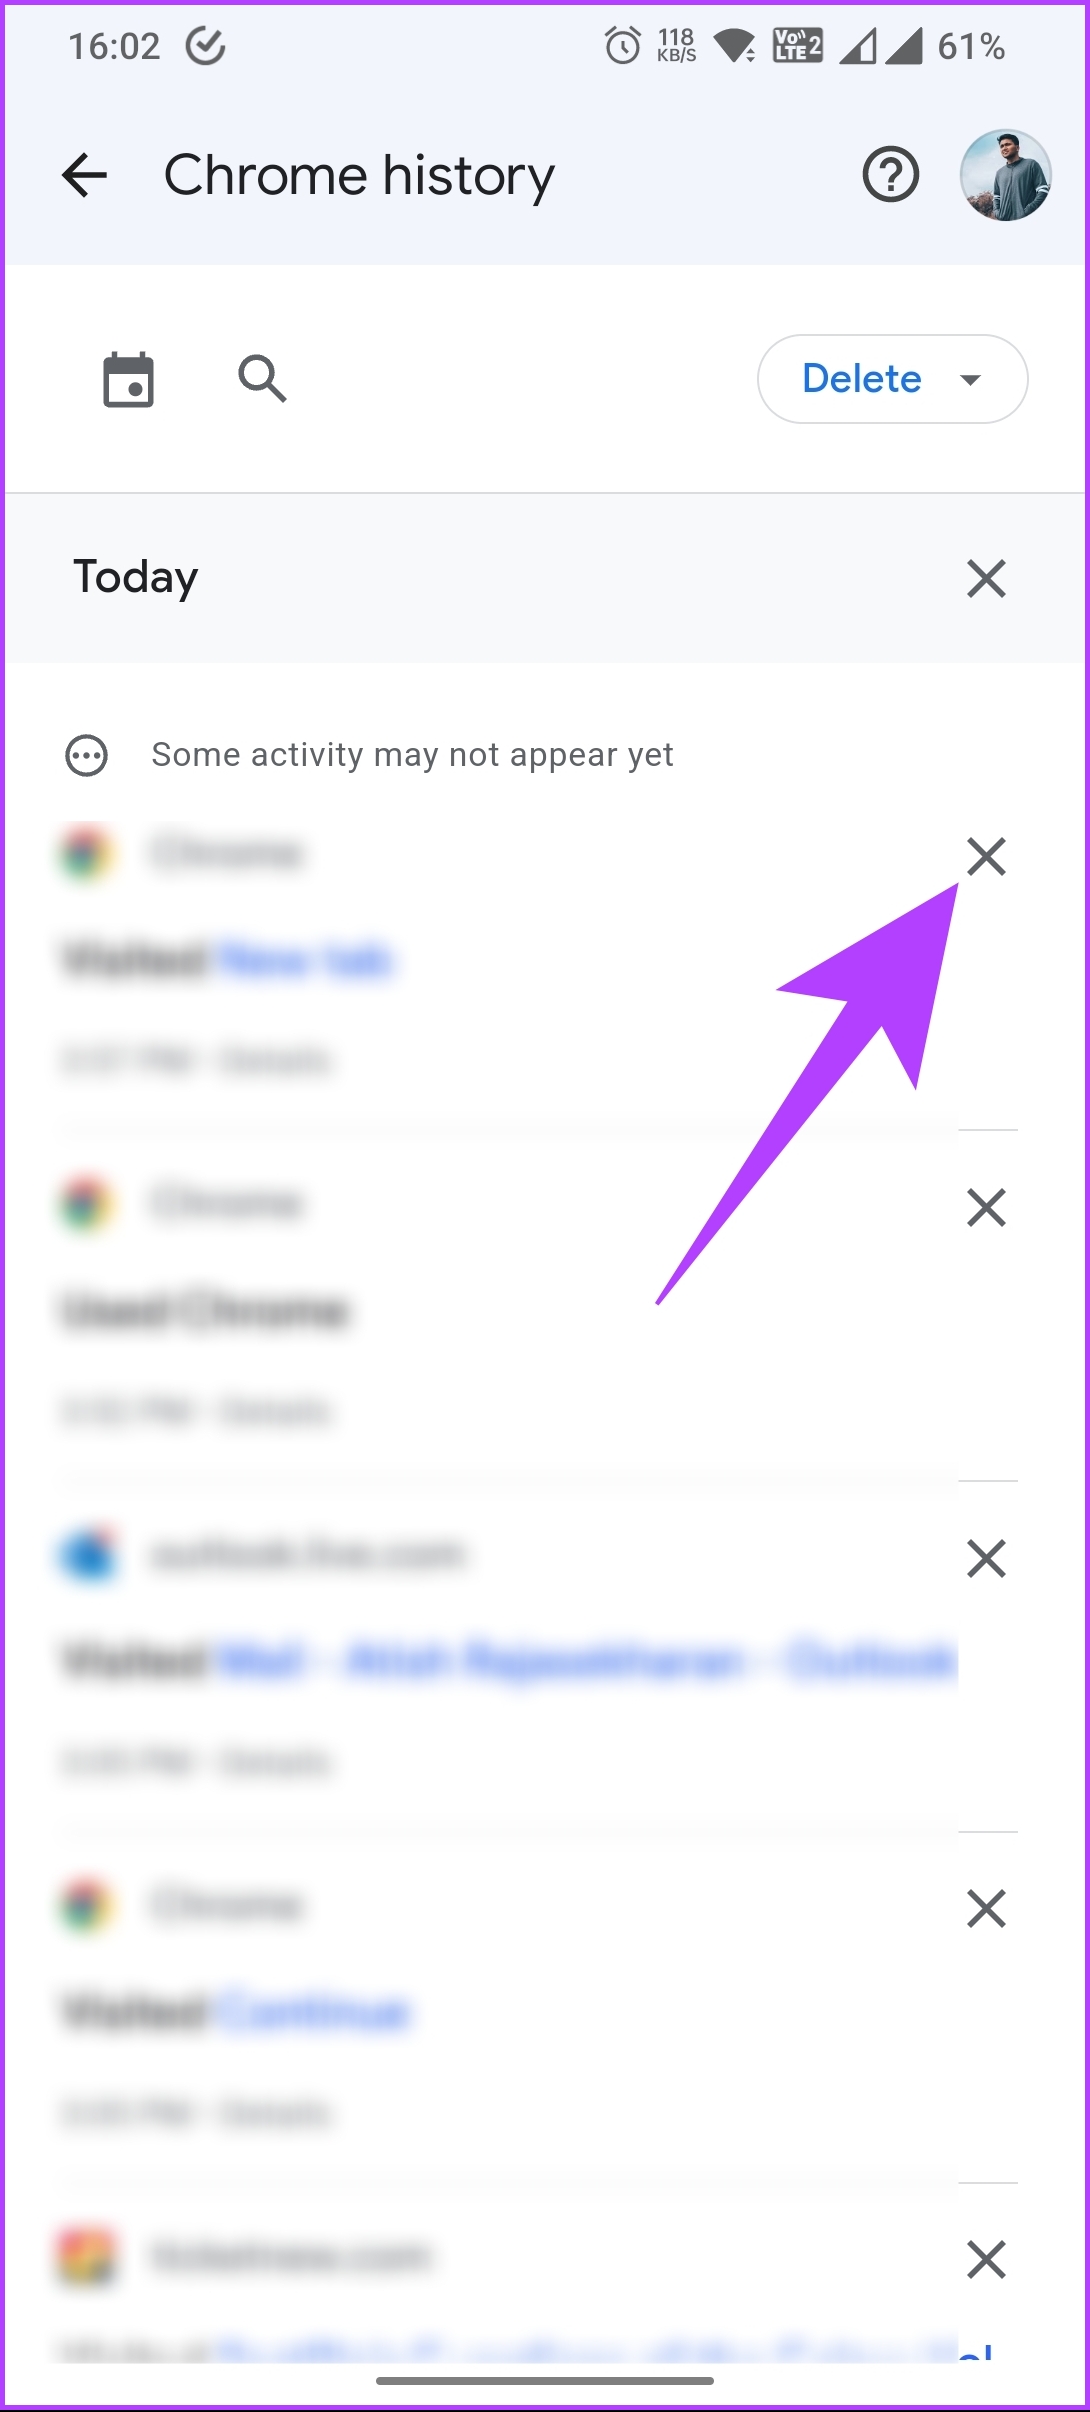
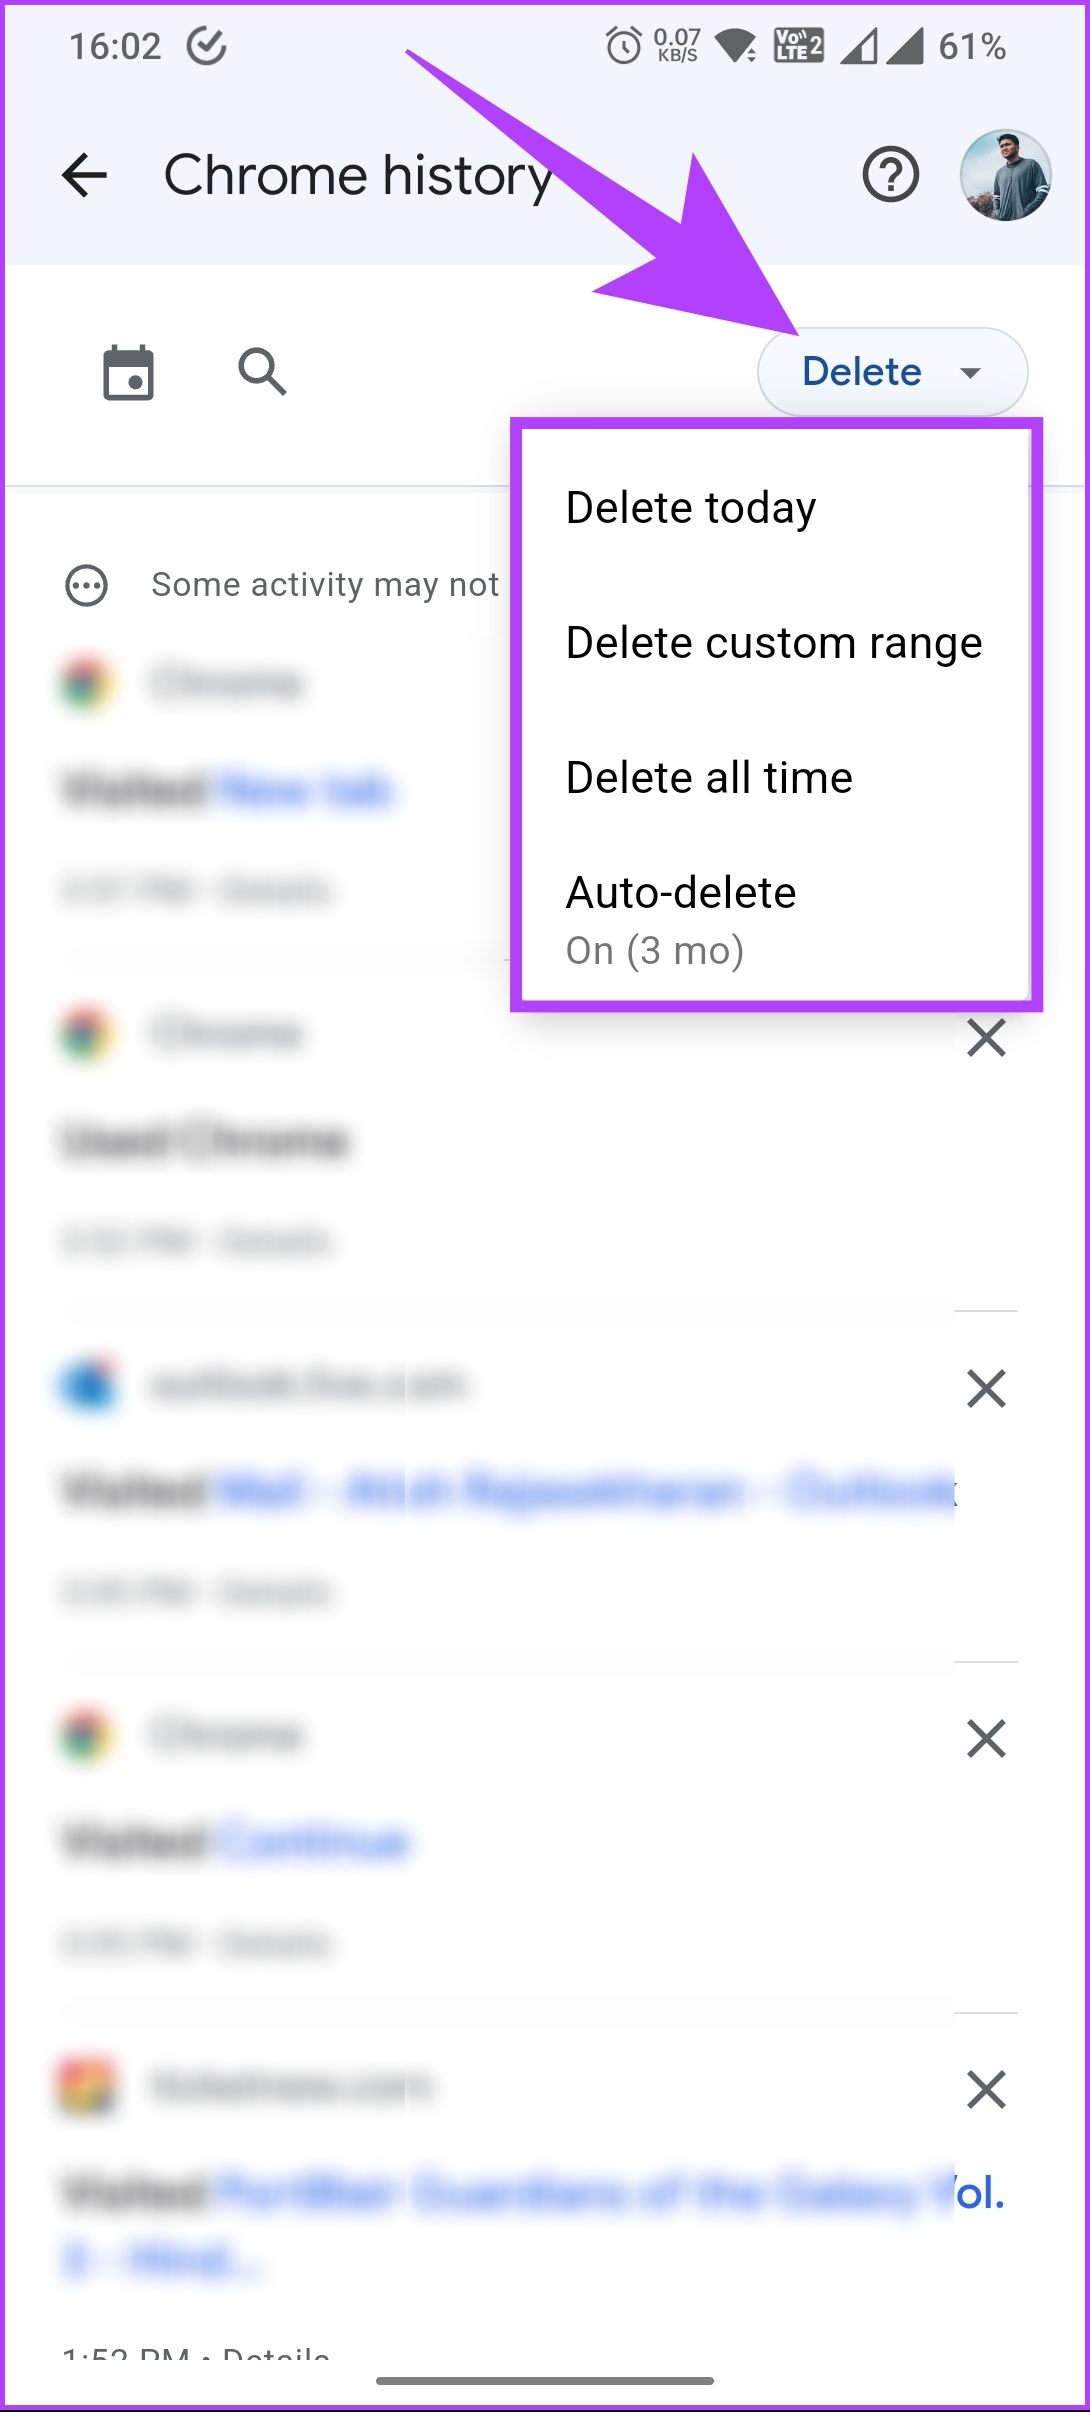
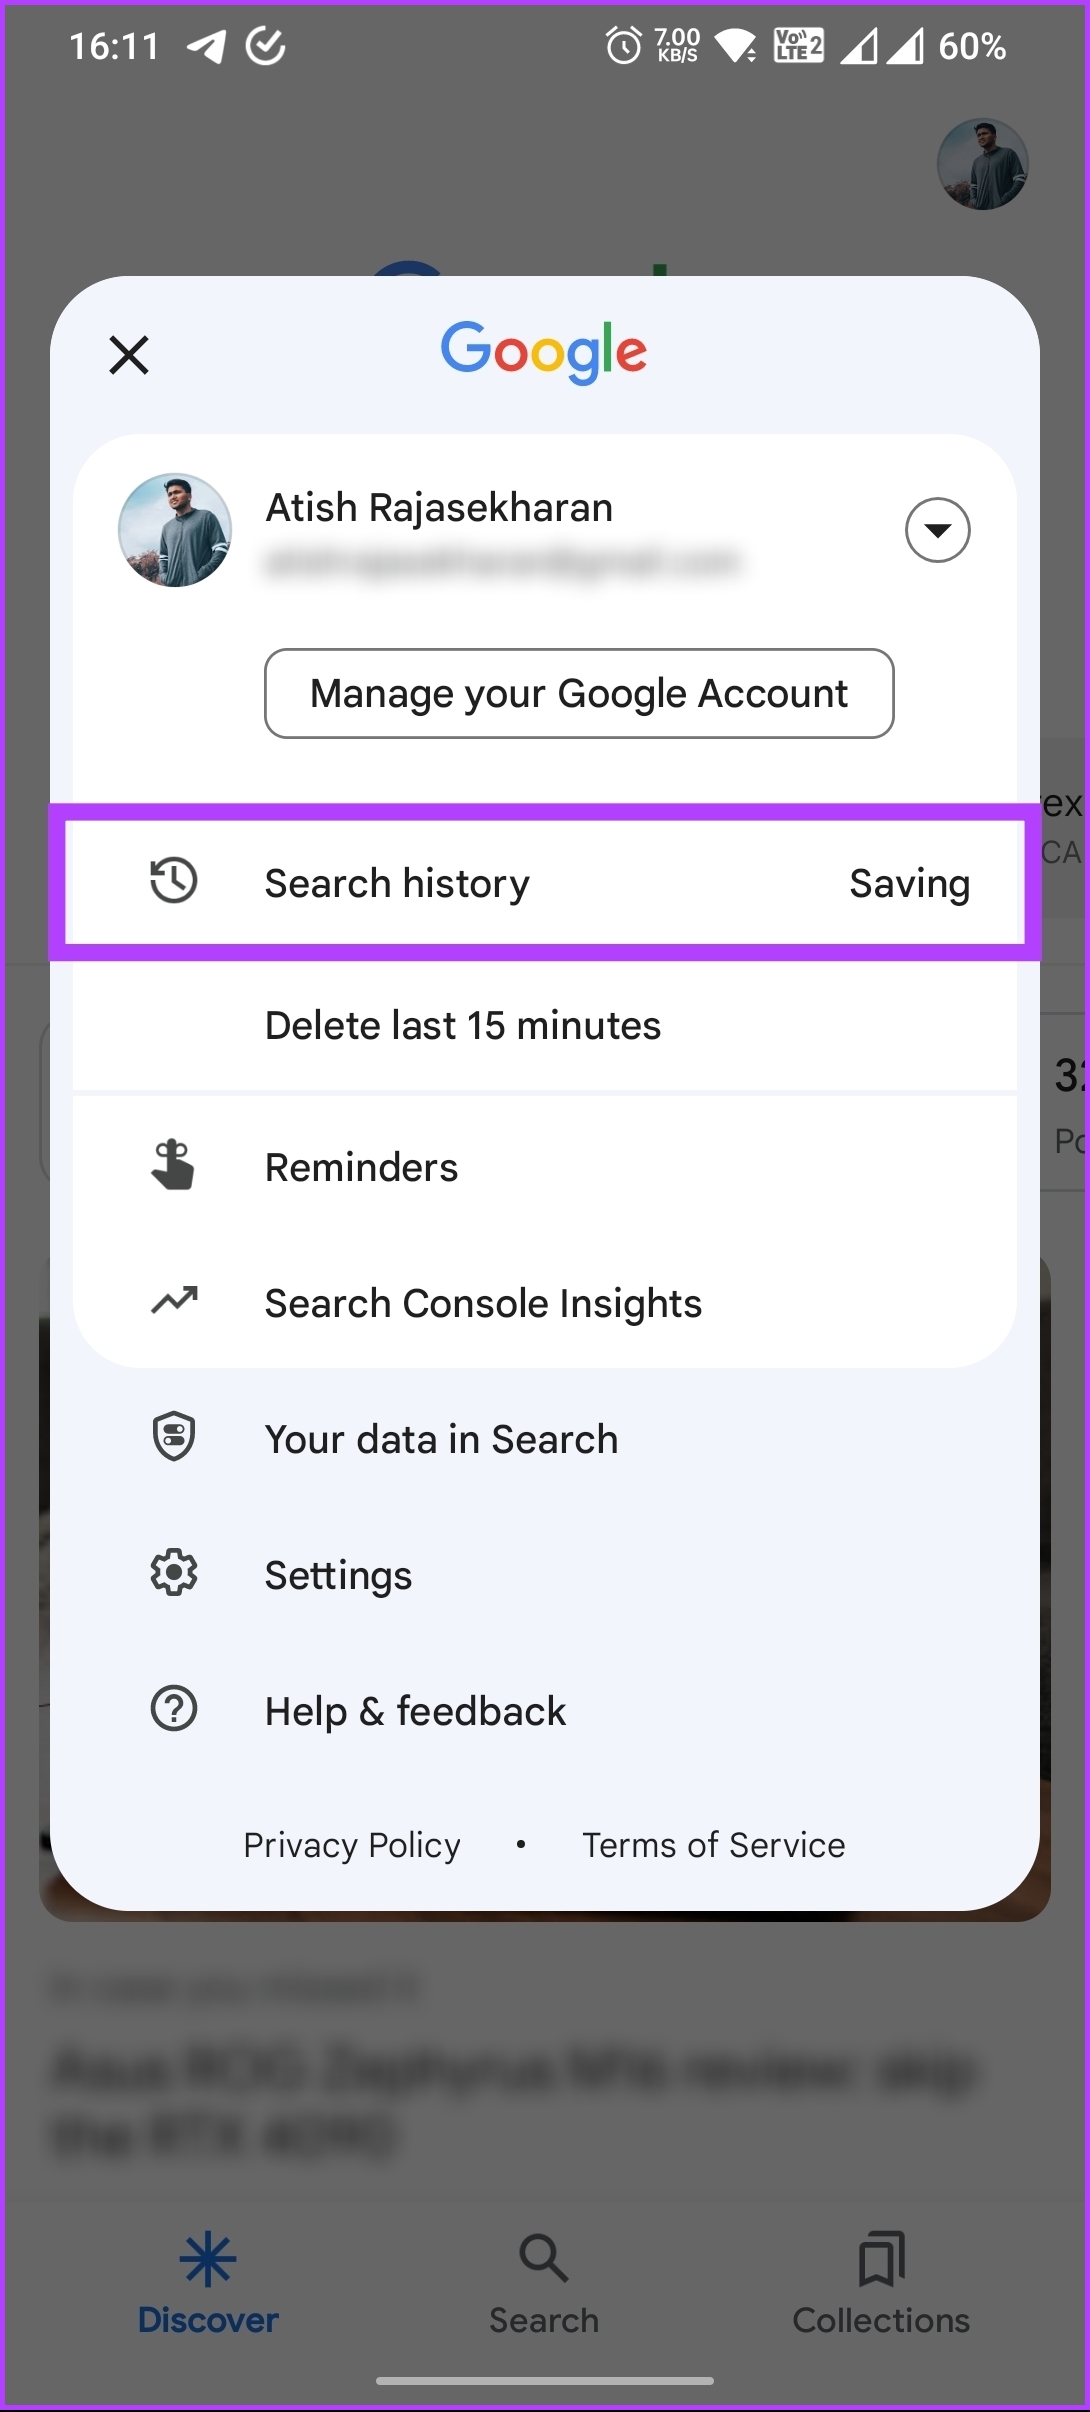
The steps may slightly change based on the operating system and app version you use on your mobile device. However, broadly, the steps are the same. Follow the steps below. Note: For ease of demonstration, we will use an Android device. Step 1: Launch the Google app on Android or iOS and tap on your profile picture at the top right corner. Step 2: Select ‘Manage your Google Account’ from the drop-down, and under the Google Account screen, go to ‘Data & privacy.’ Step 3: Scroll down, and under History settings, choose ‘Web & App Activity.’ Tap the Chrome icon under the ‘See and delete activity’ section. Scroll through the entries to review your activity on Chrome. You can also click Details beneath a specific time for more information about that activity. Note: If Passkey is enabled on your account, you must authenticate your account to view your Chrome history. Step 4: Click the X icon next to each entry to remove it from the list. Step 6: If you want to bulk delete the entry, click the delete button, and select the time frame to clear the Chrome history from your My Activity. There you have it. You have successfully deleted your Chrome history without accessing Google Chrome on your mobile device. If you don’t want to delete your Chrome history manually, you can automate it to ease things. Keep reading.
3. Auto-Delete Chrome Browsing History
Automating the clearing of Chrome history makes things efficient and easy. Moreover, it helps protect your privacy and free up storage space. Follow the below-mentioned steps.
On the Desktop
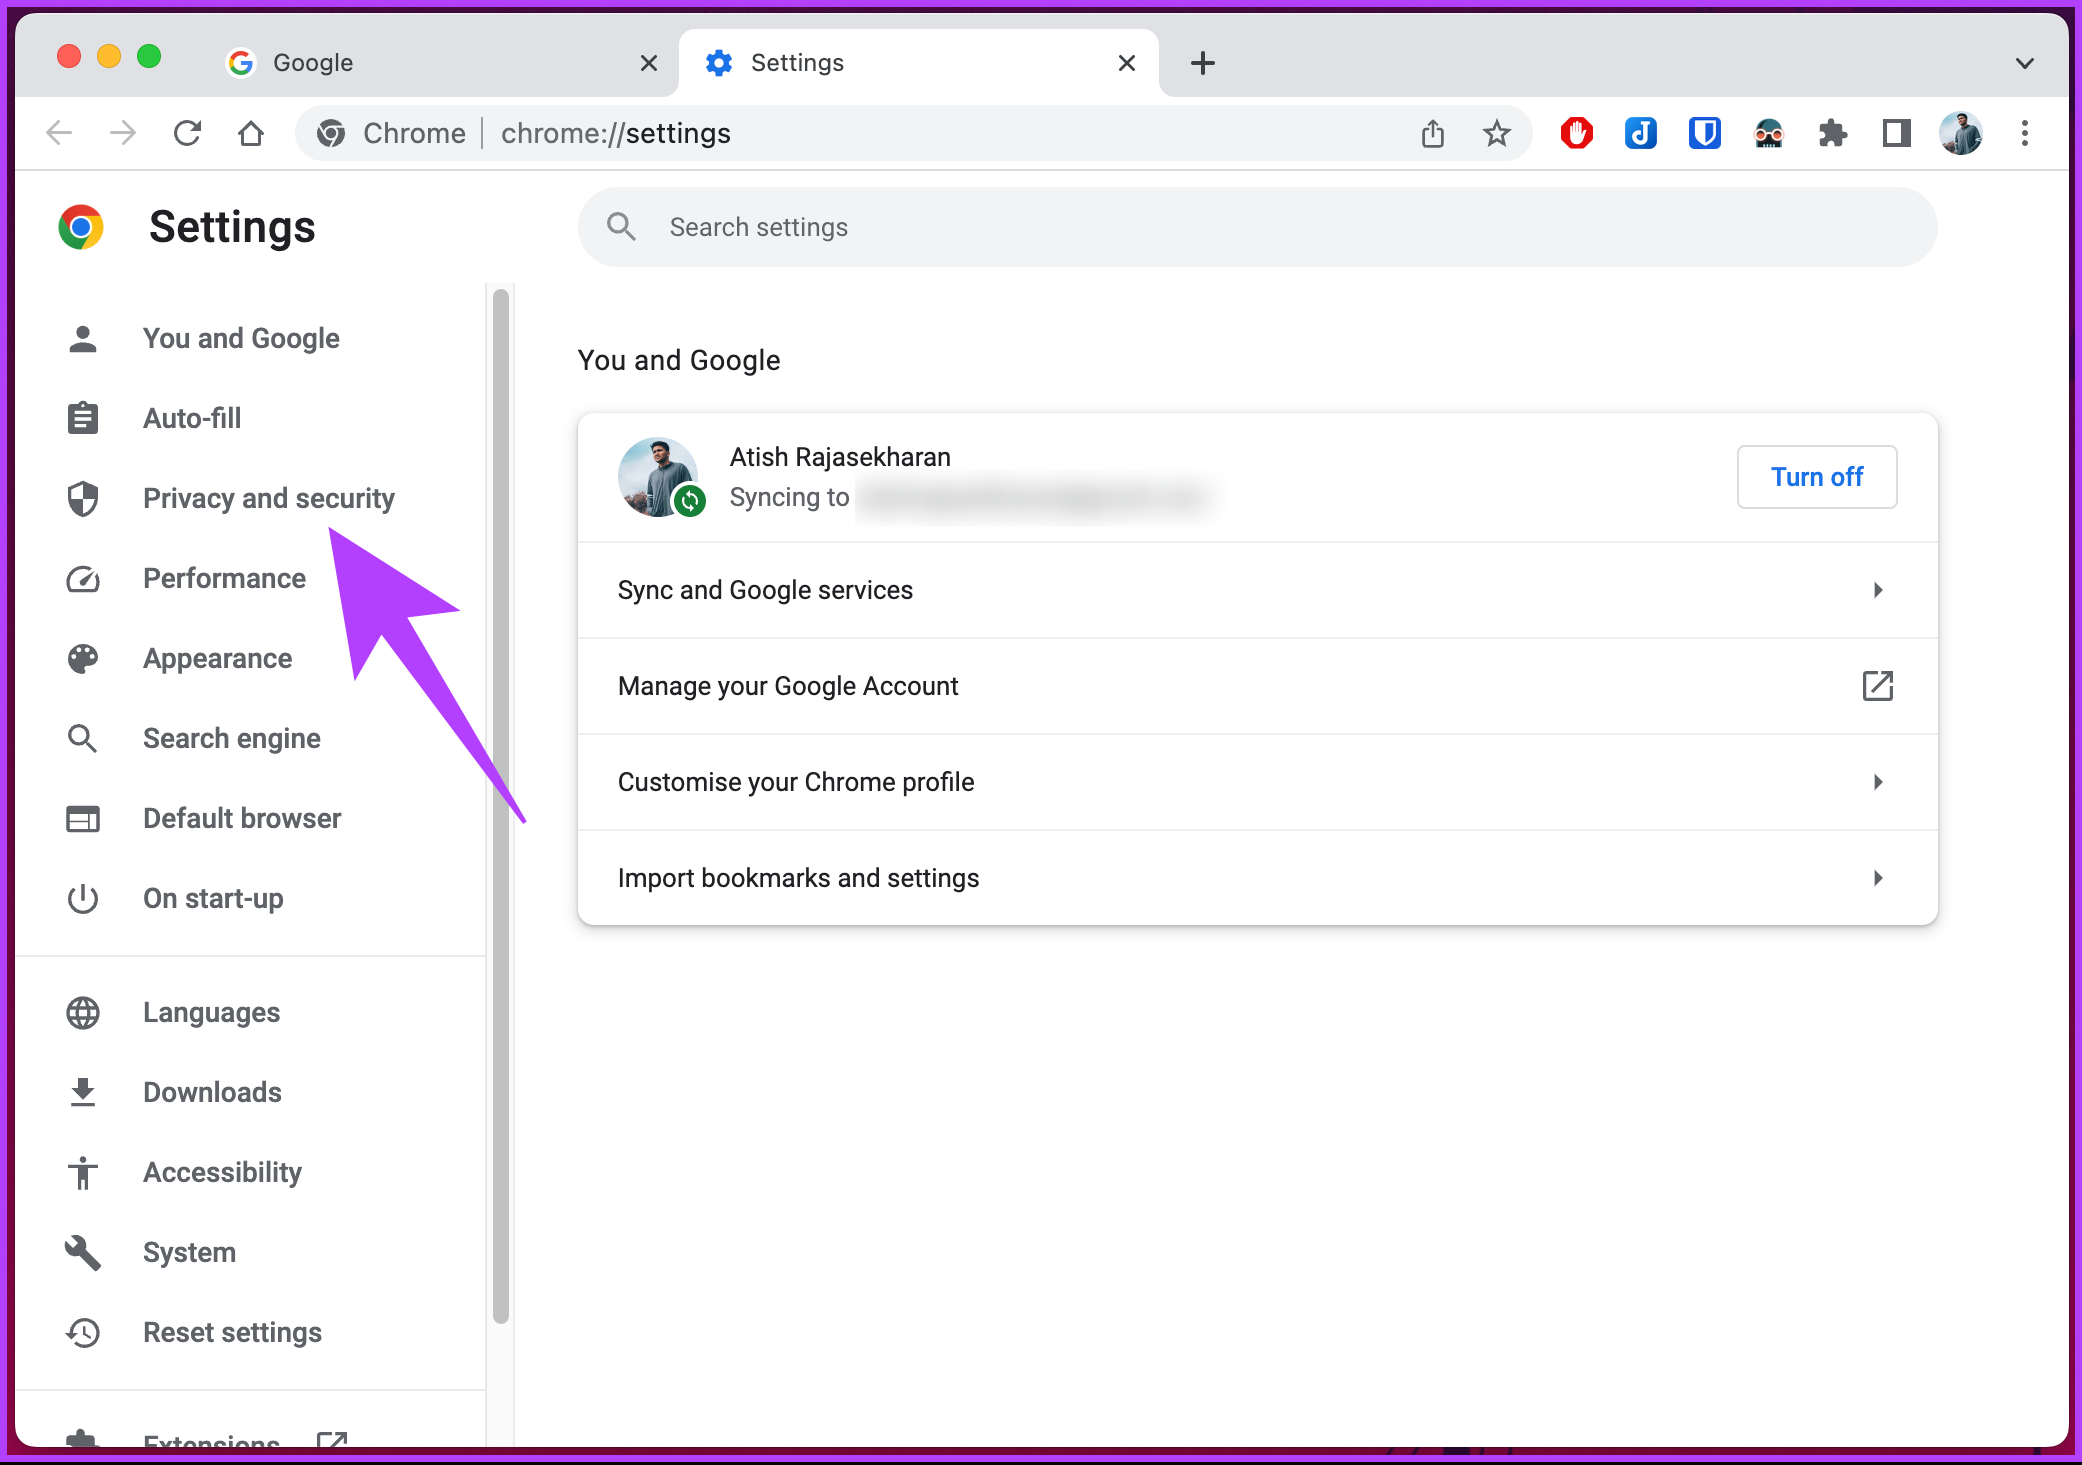
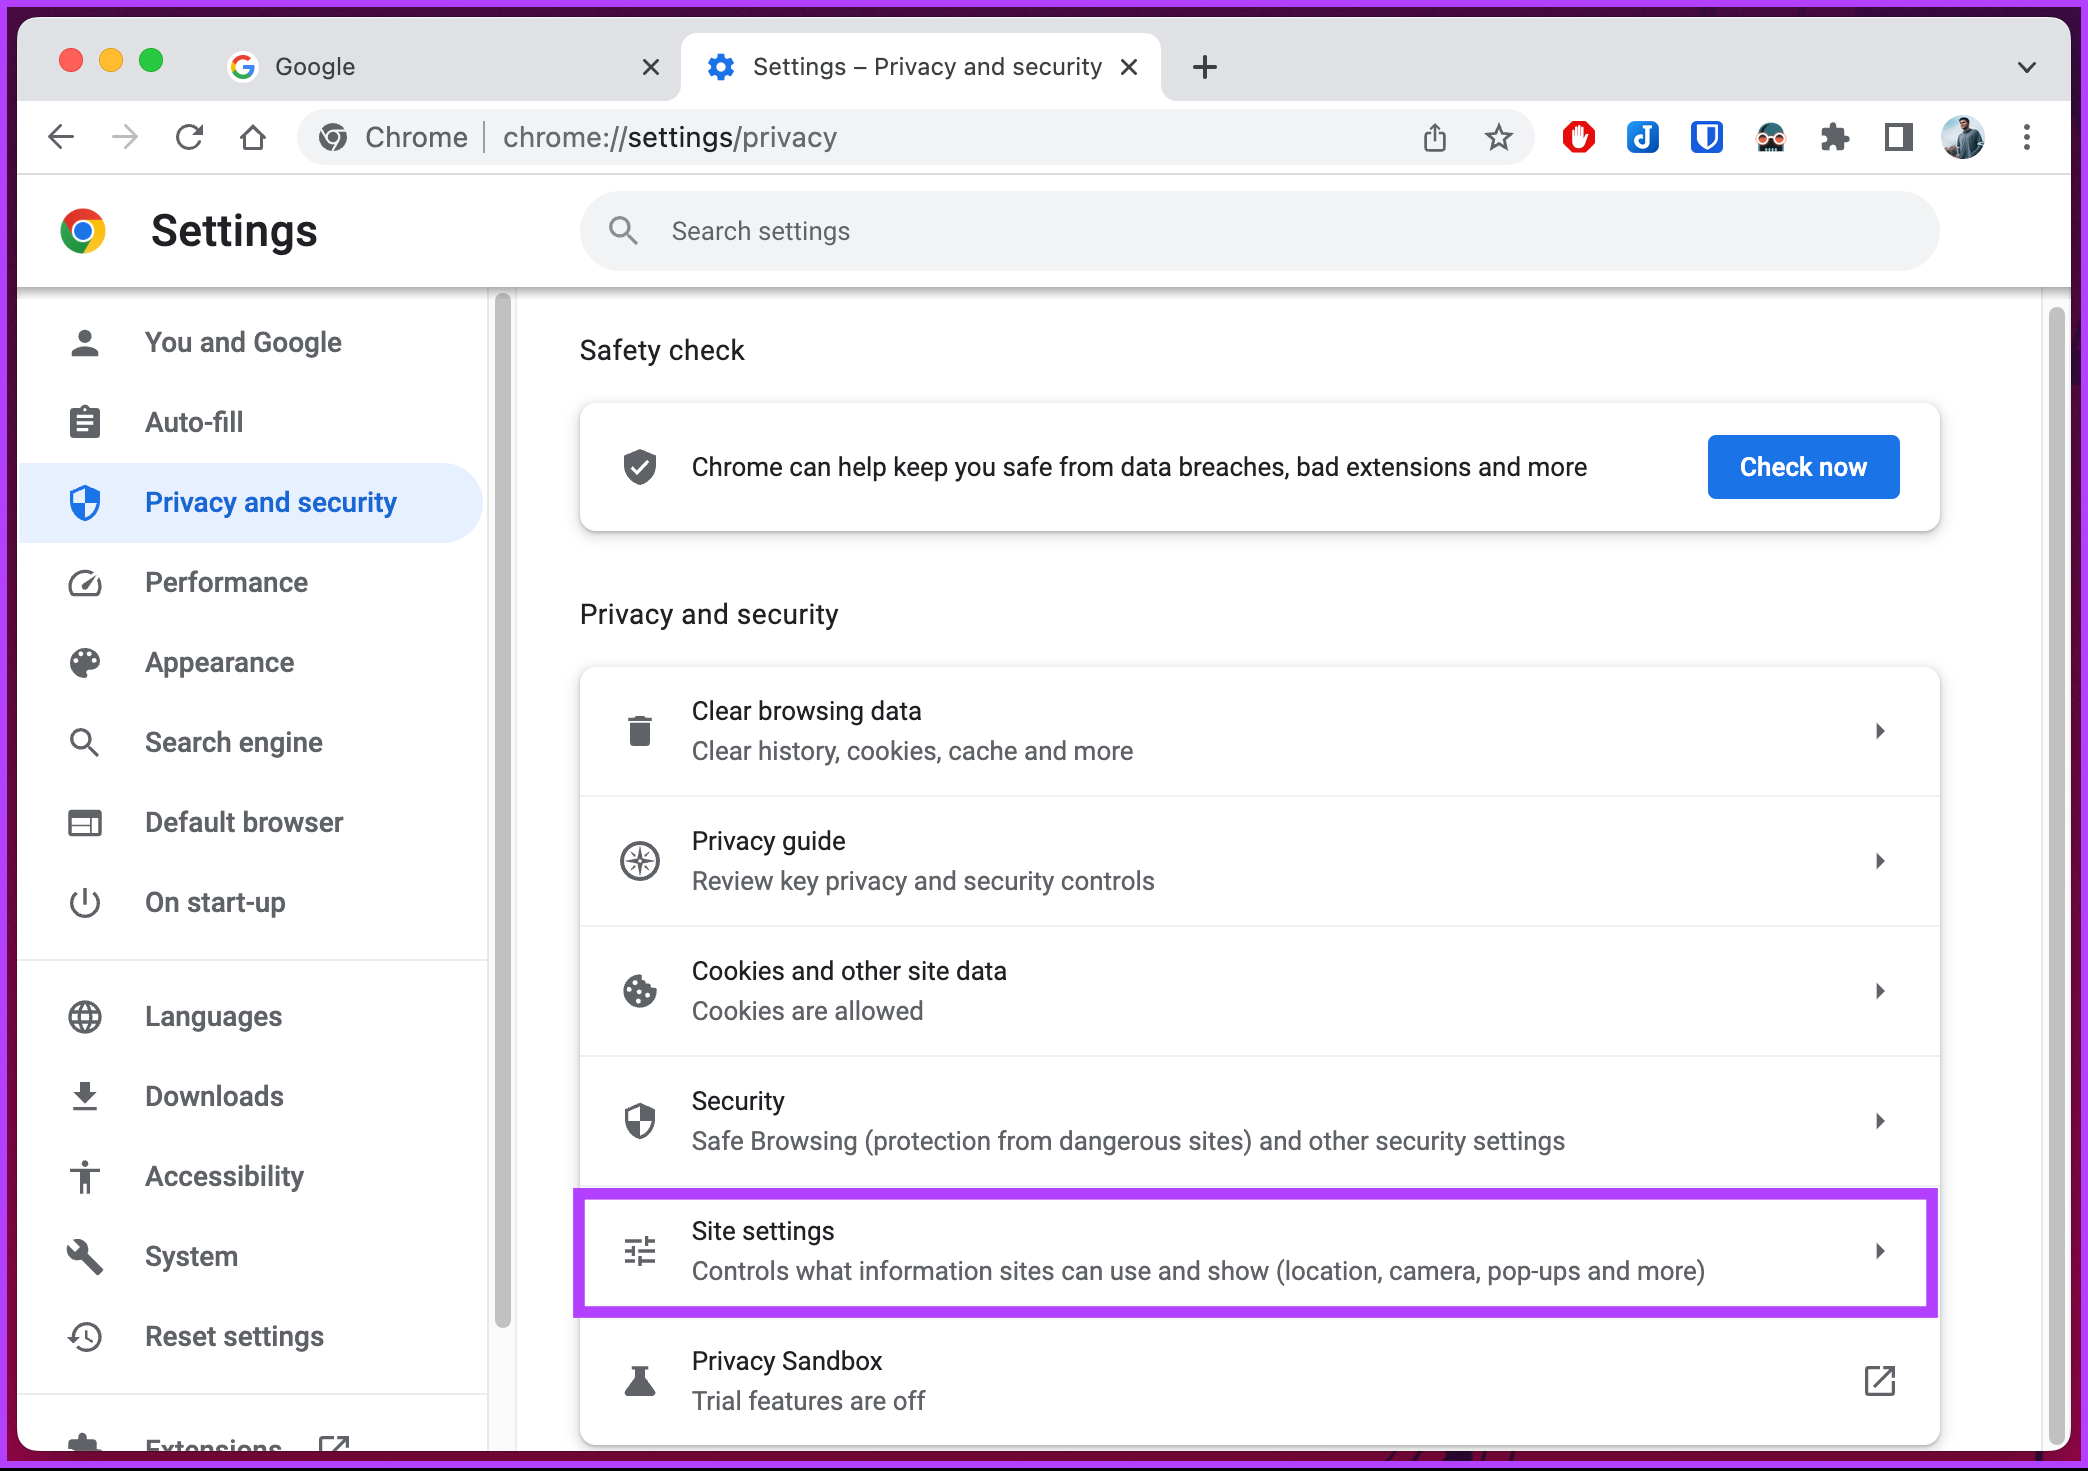
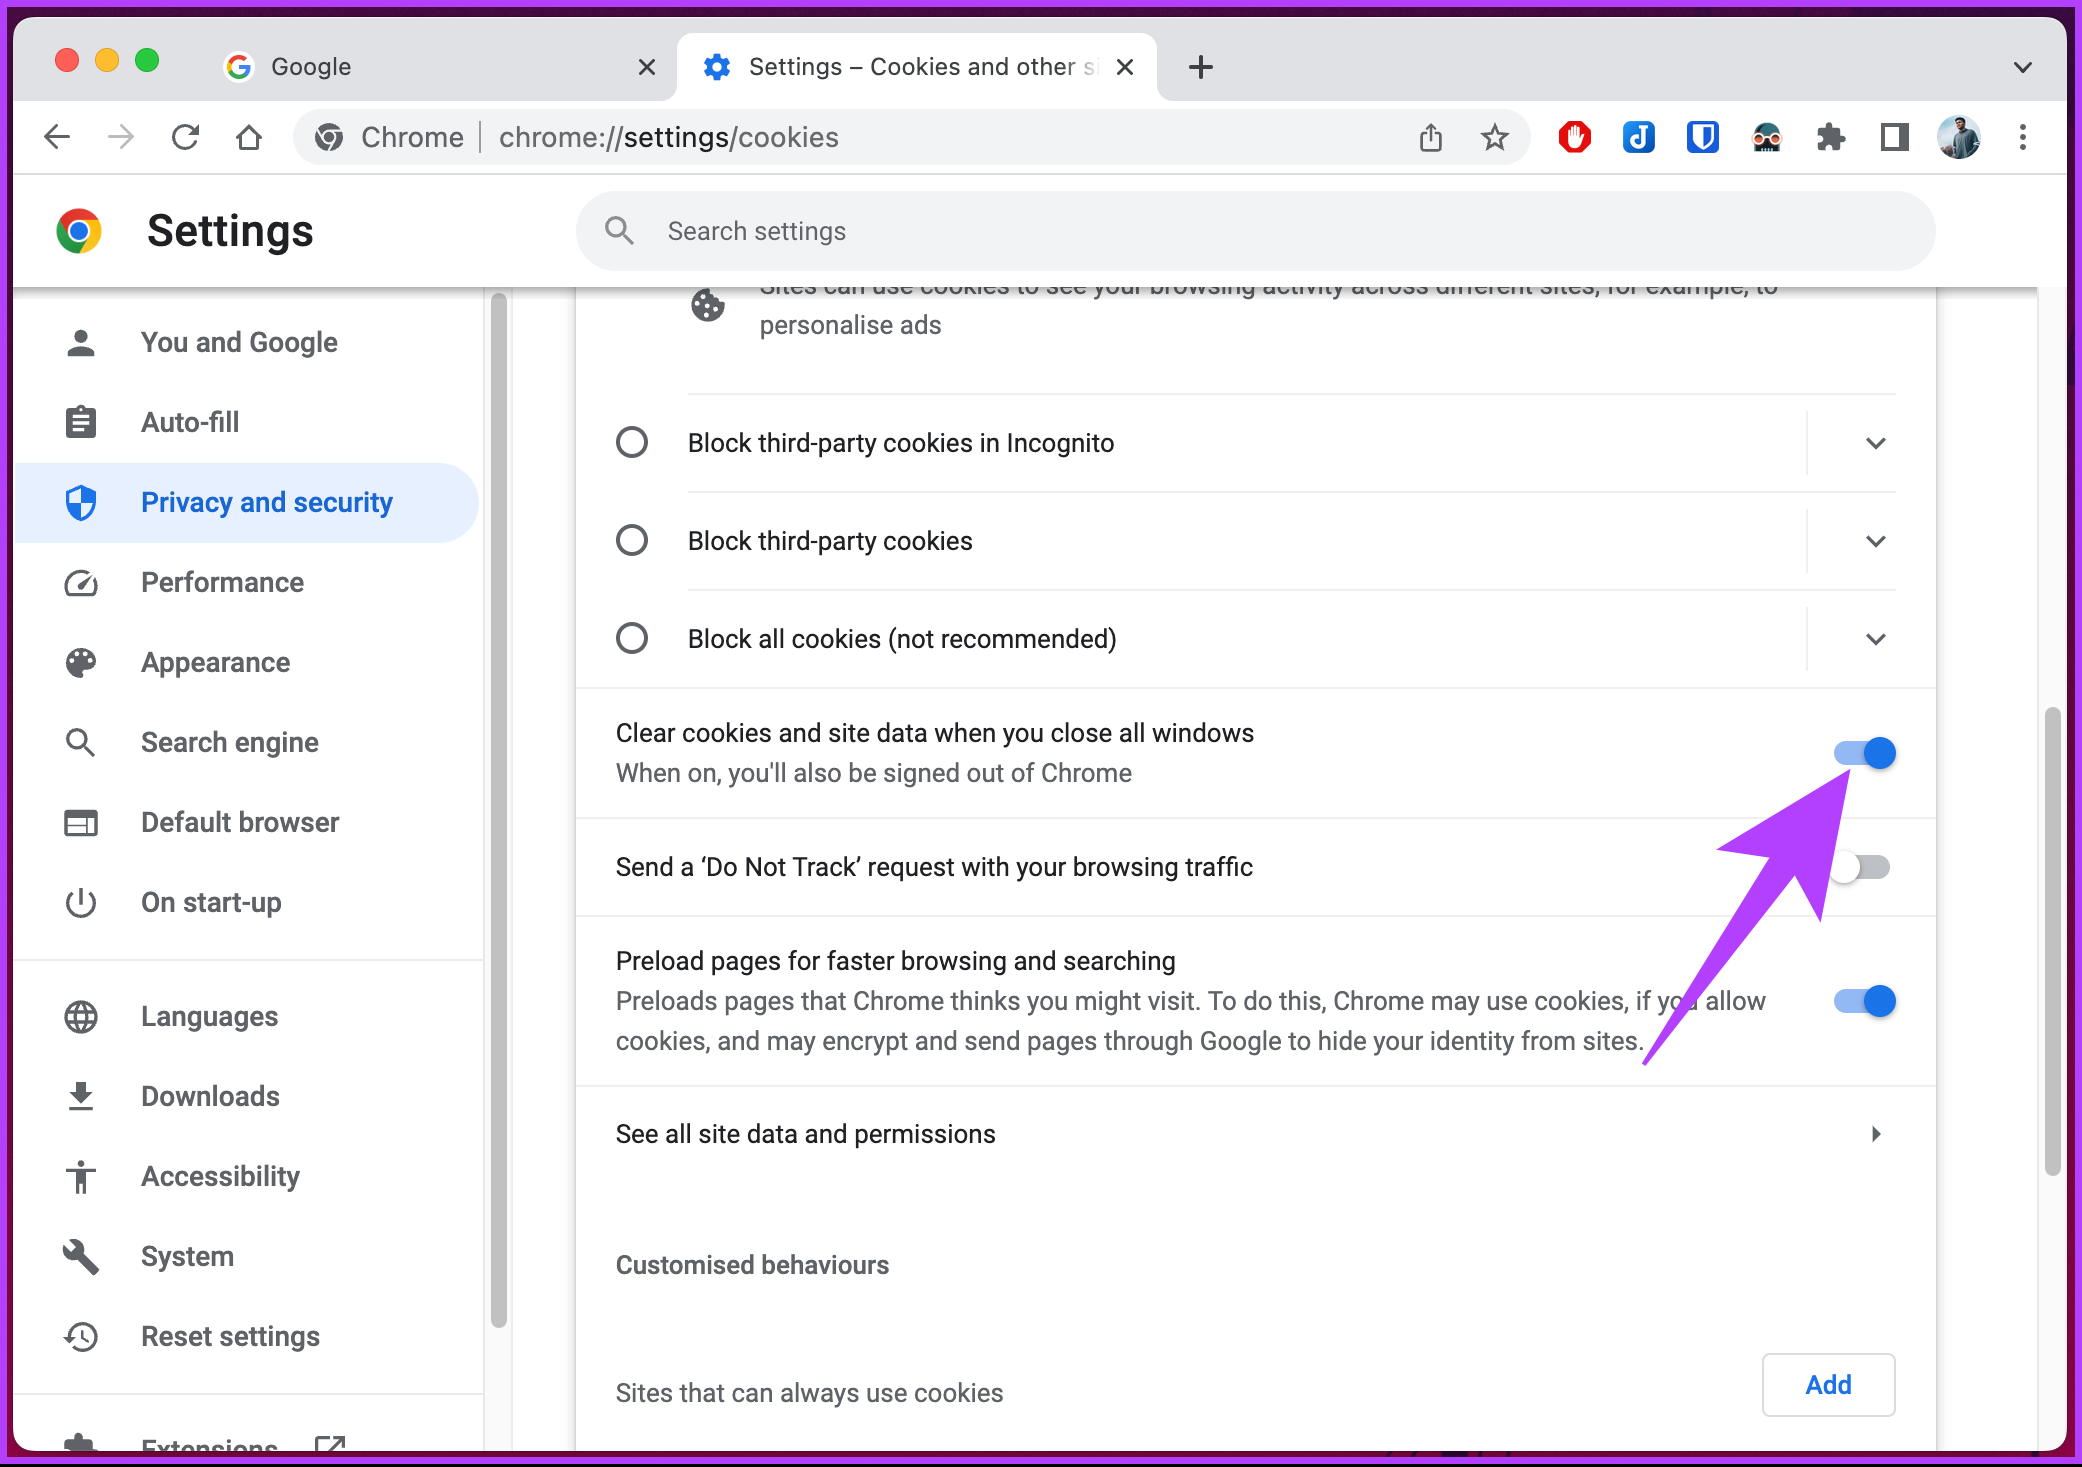
Step 1: Launch Google Chrome on your Windows or Mac computer and click the three-dot icon at the top-right corner. Step 2: From the drop-down menu, select Settings. Step 3: On the Settings page, go to ‘Privacy and security.’ Step 4: Under the ‘Privacy and security’ section, select Site Settings. Step 5: On the next page, under Content, choose ‘Cookies and site data.’ Step 6: Toggle on ‘Clear cookies and site data when you close all windows.’ That’s it. Now, when you close Chrome after browsing, all the cookies and site data, which is nothing but history, get deleted without you having to execute them manually. If you can’t access your desktop and want to auto-delete Chrome history from your mobile device, jump to the following method.
On Mobile
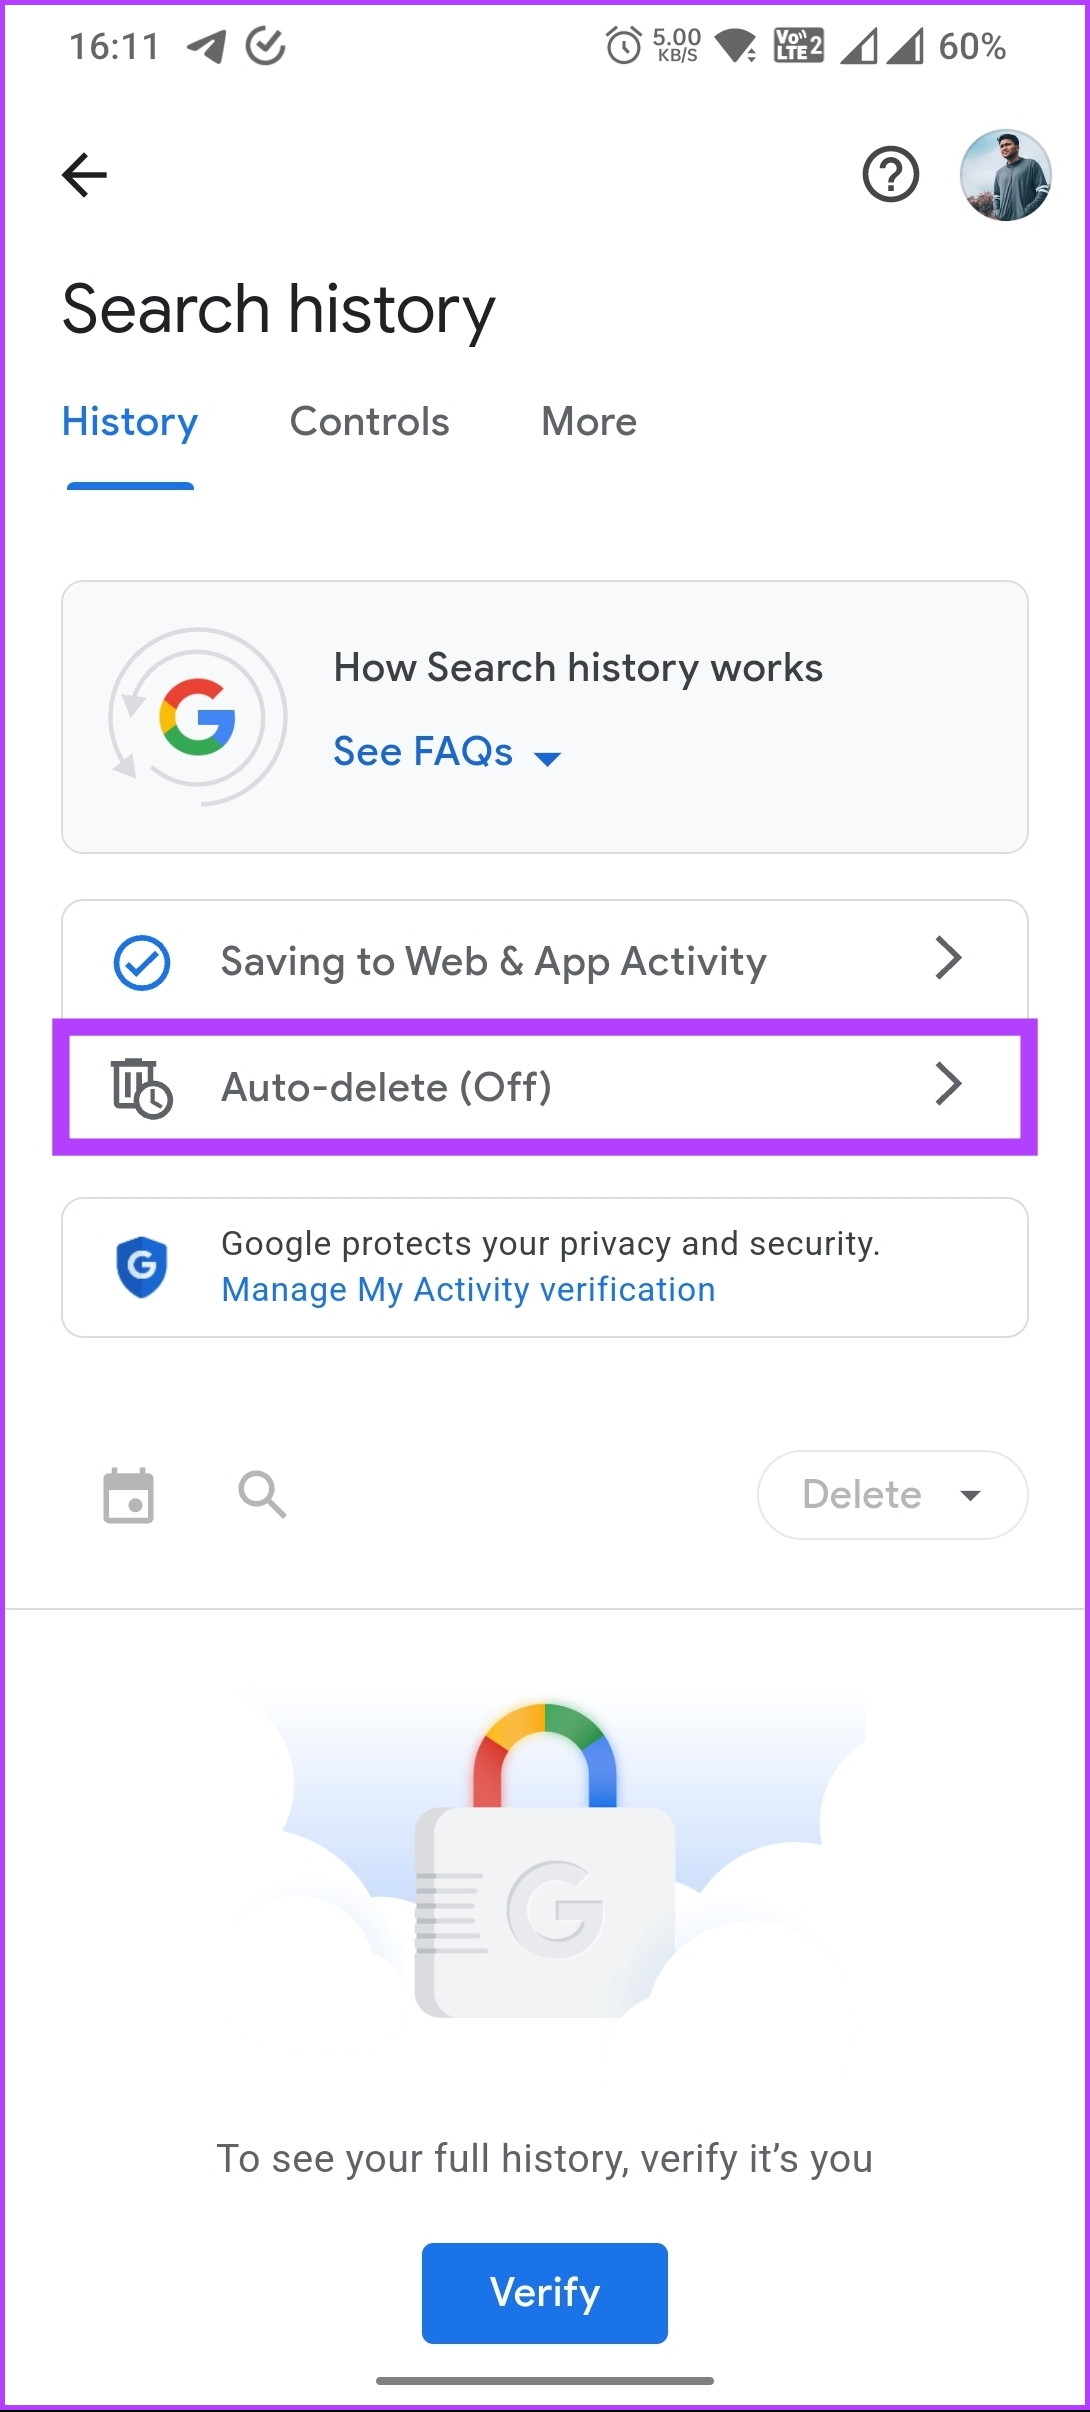
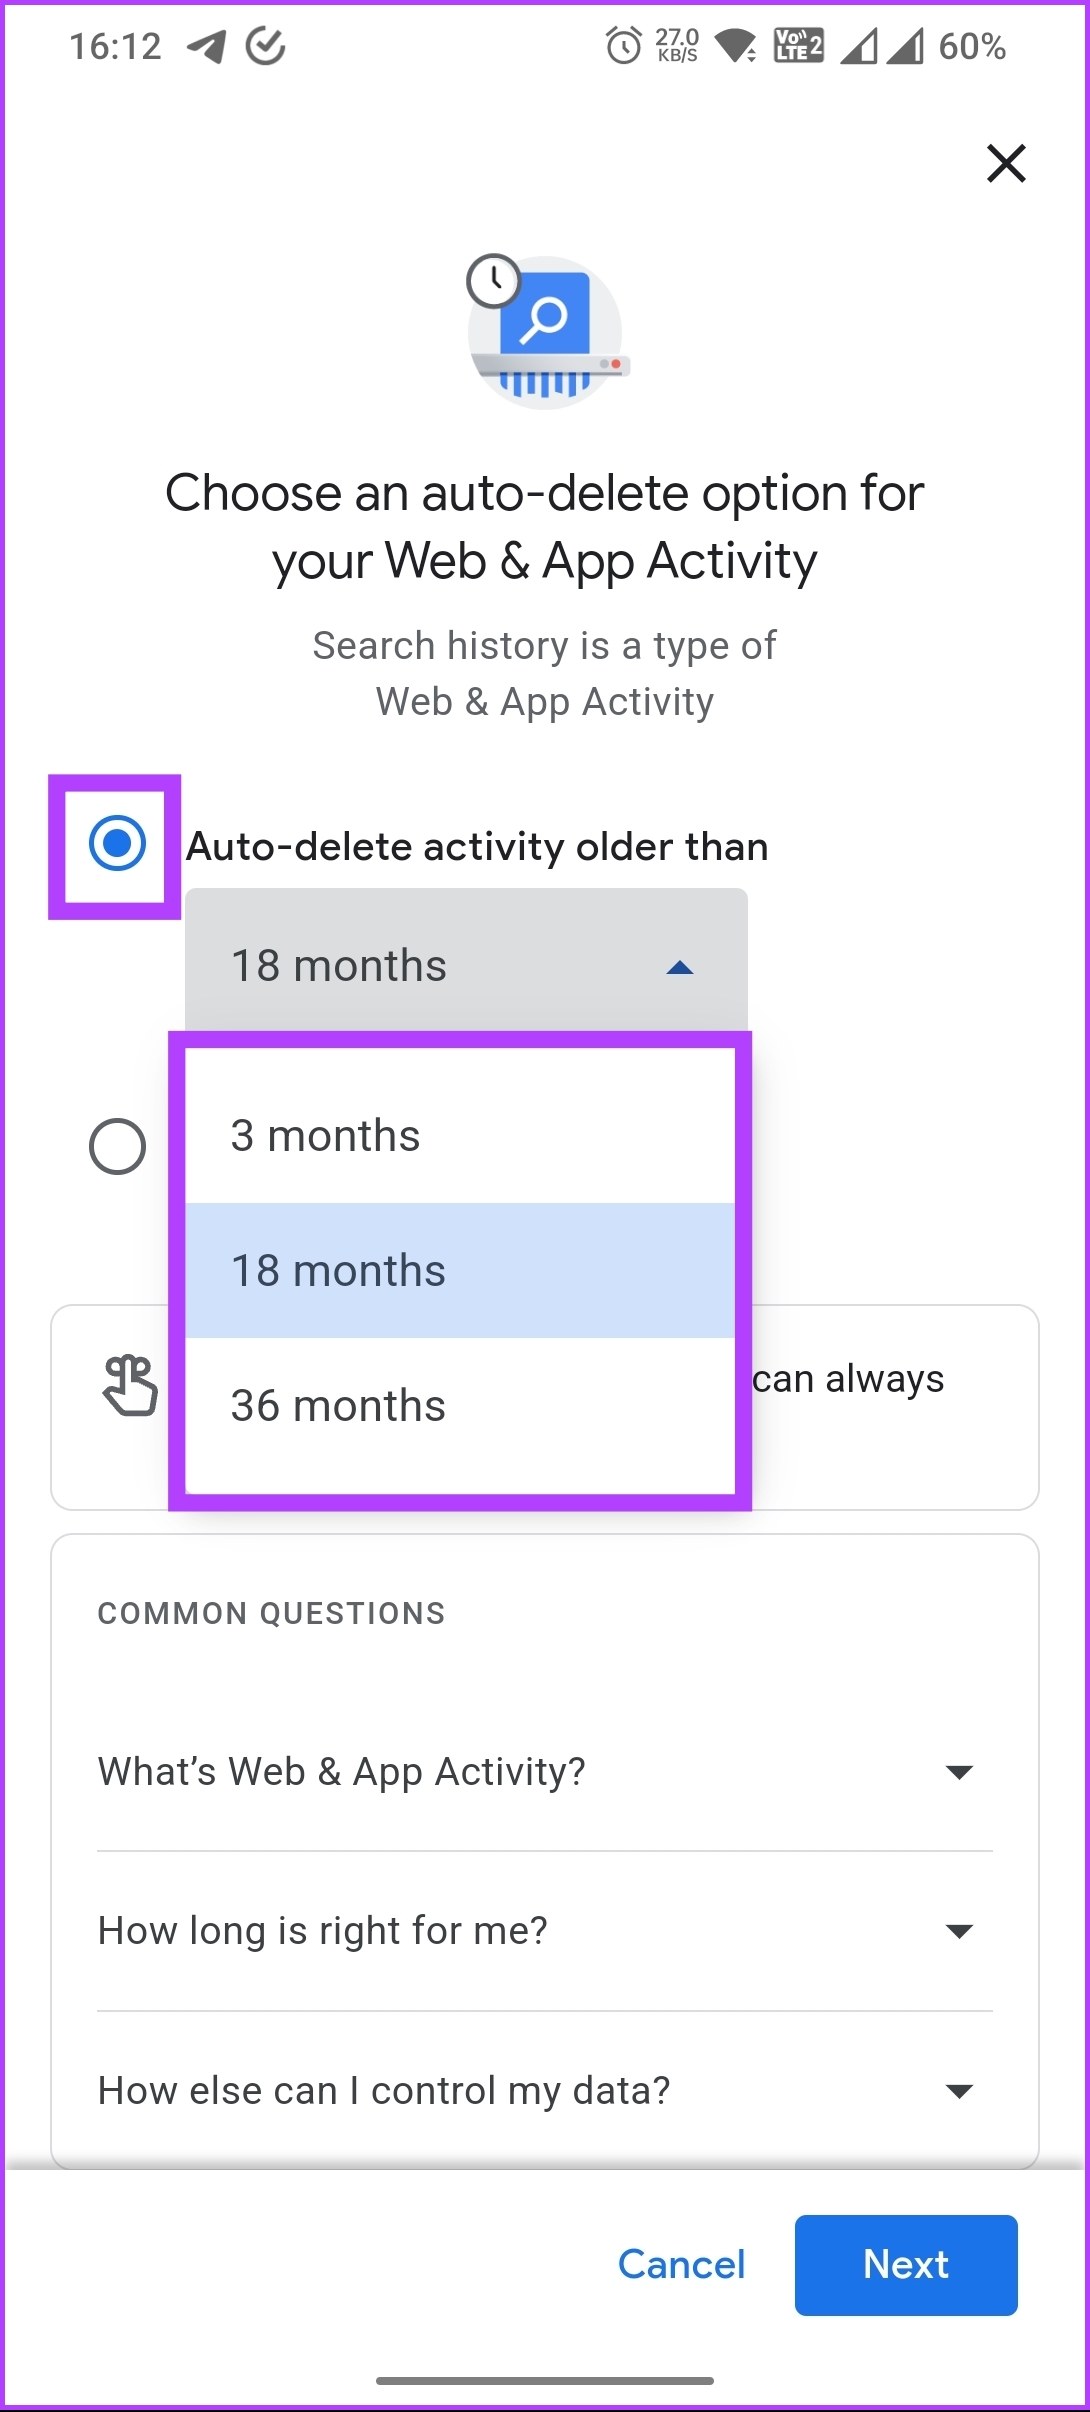
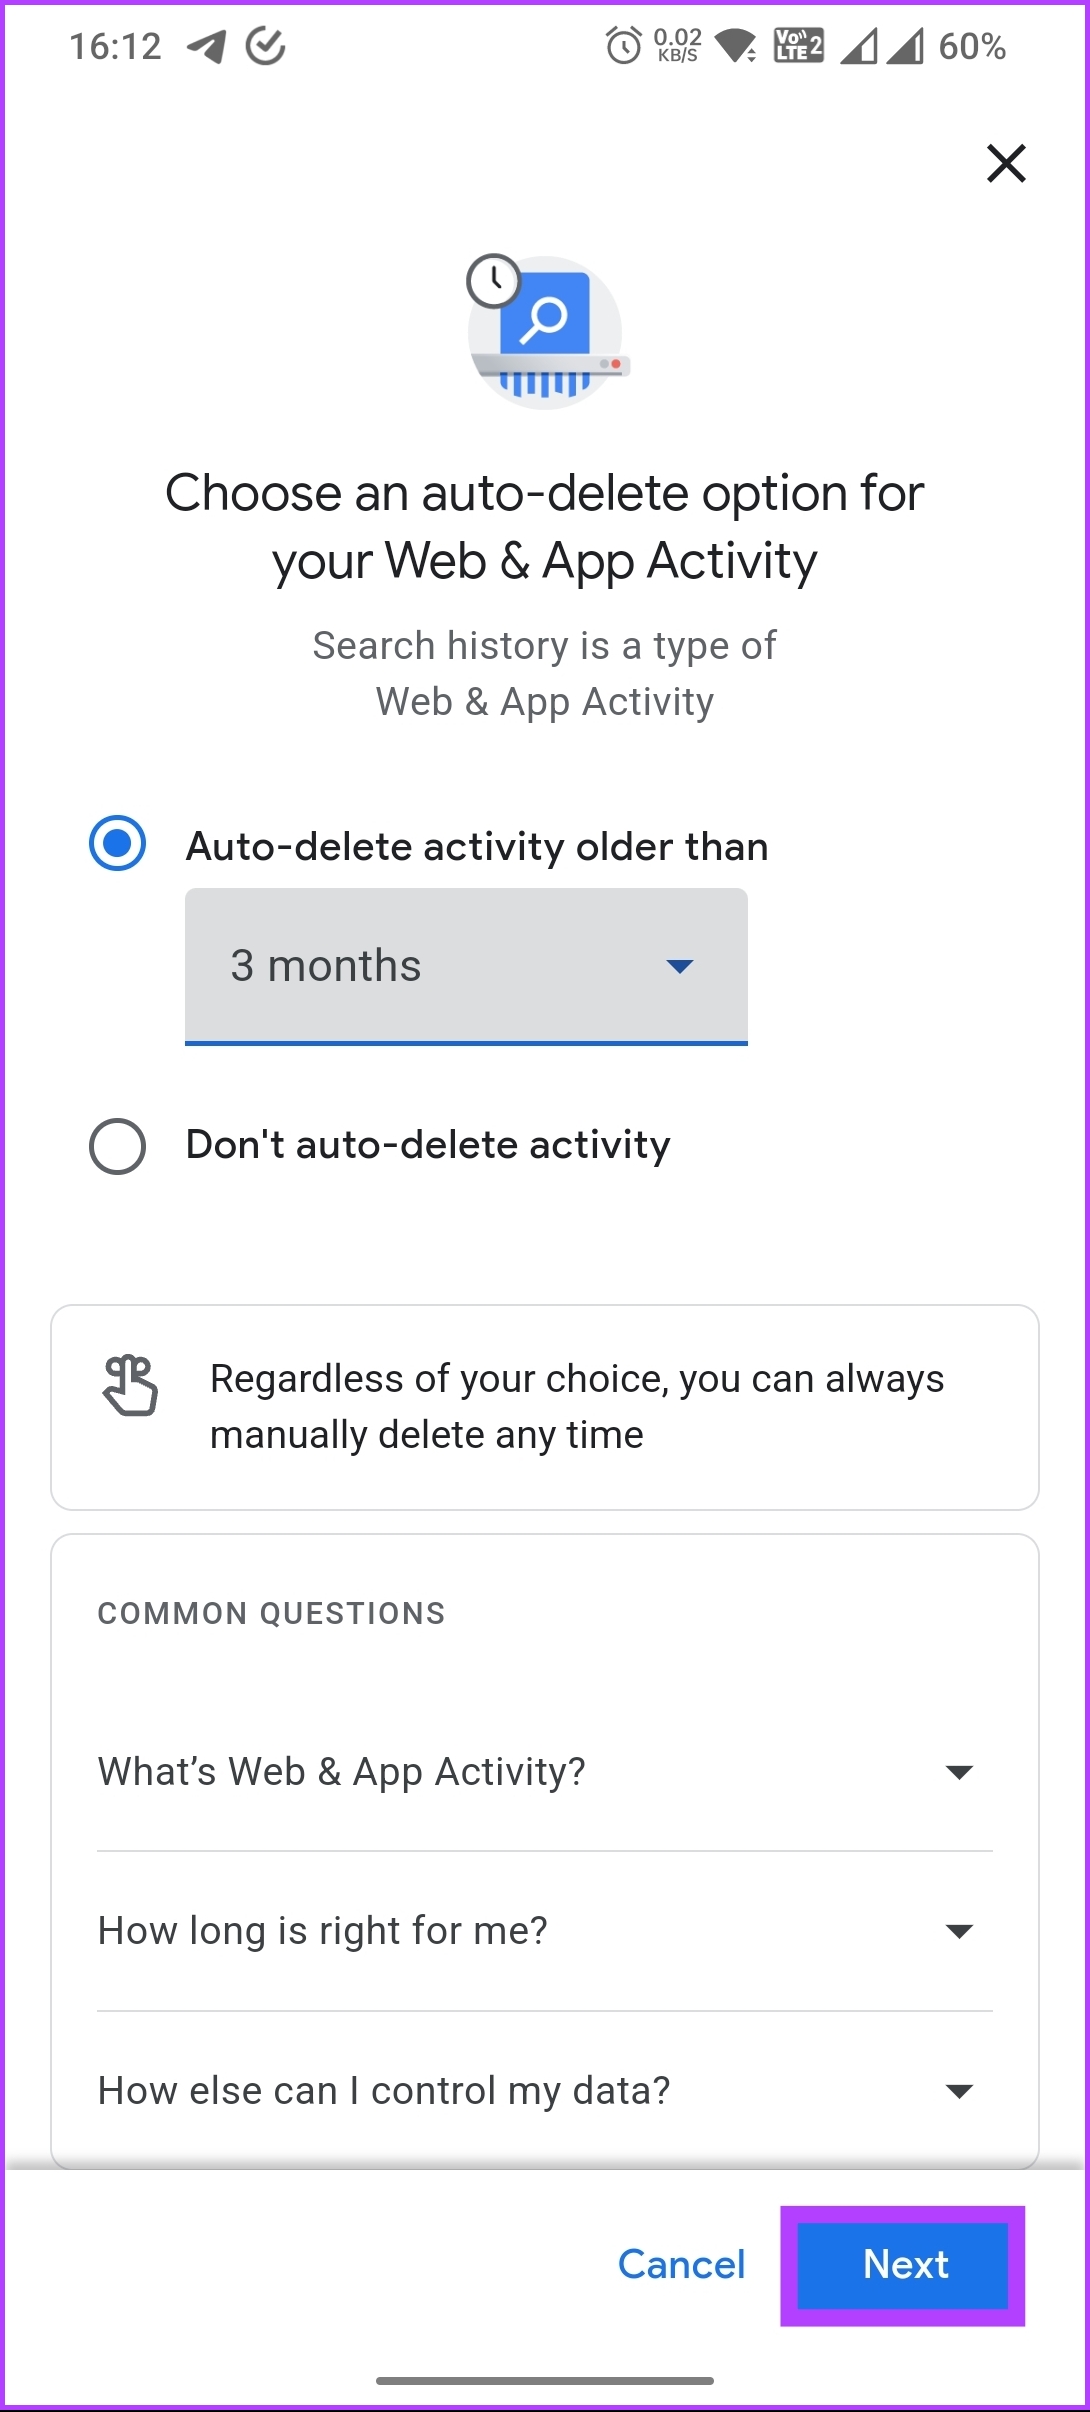
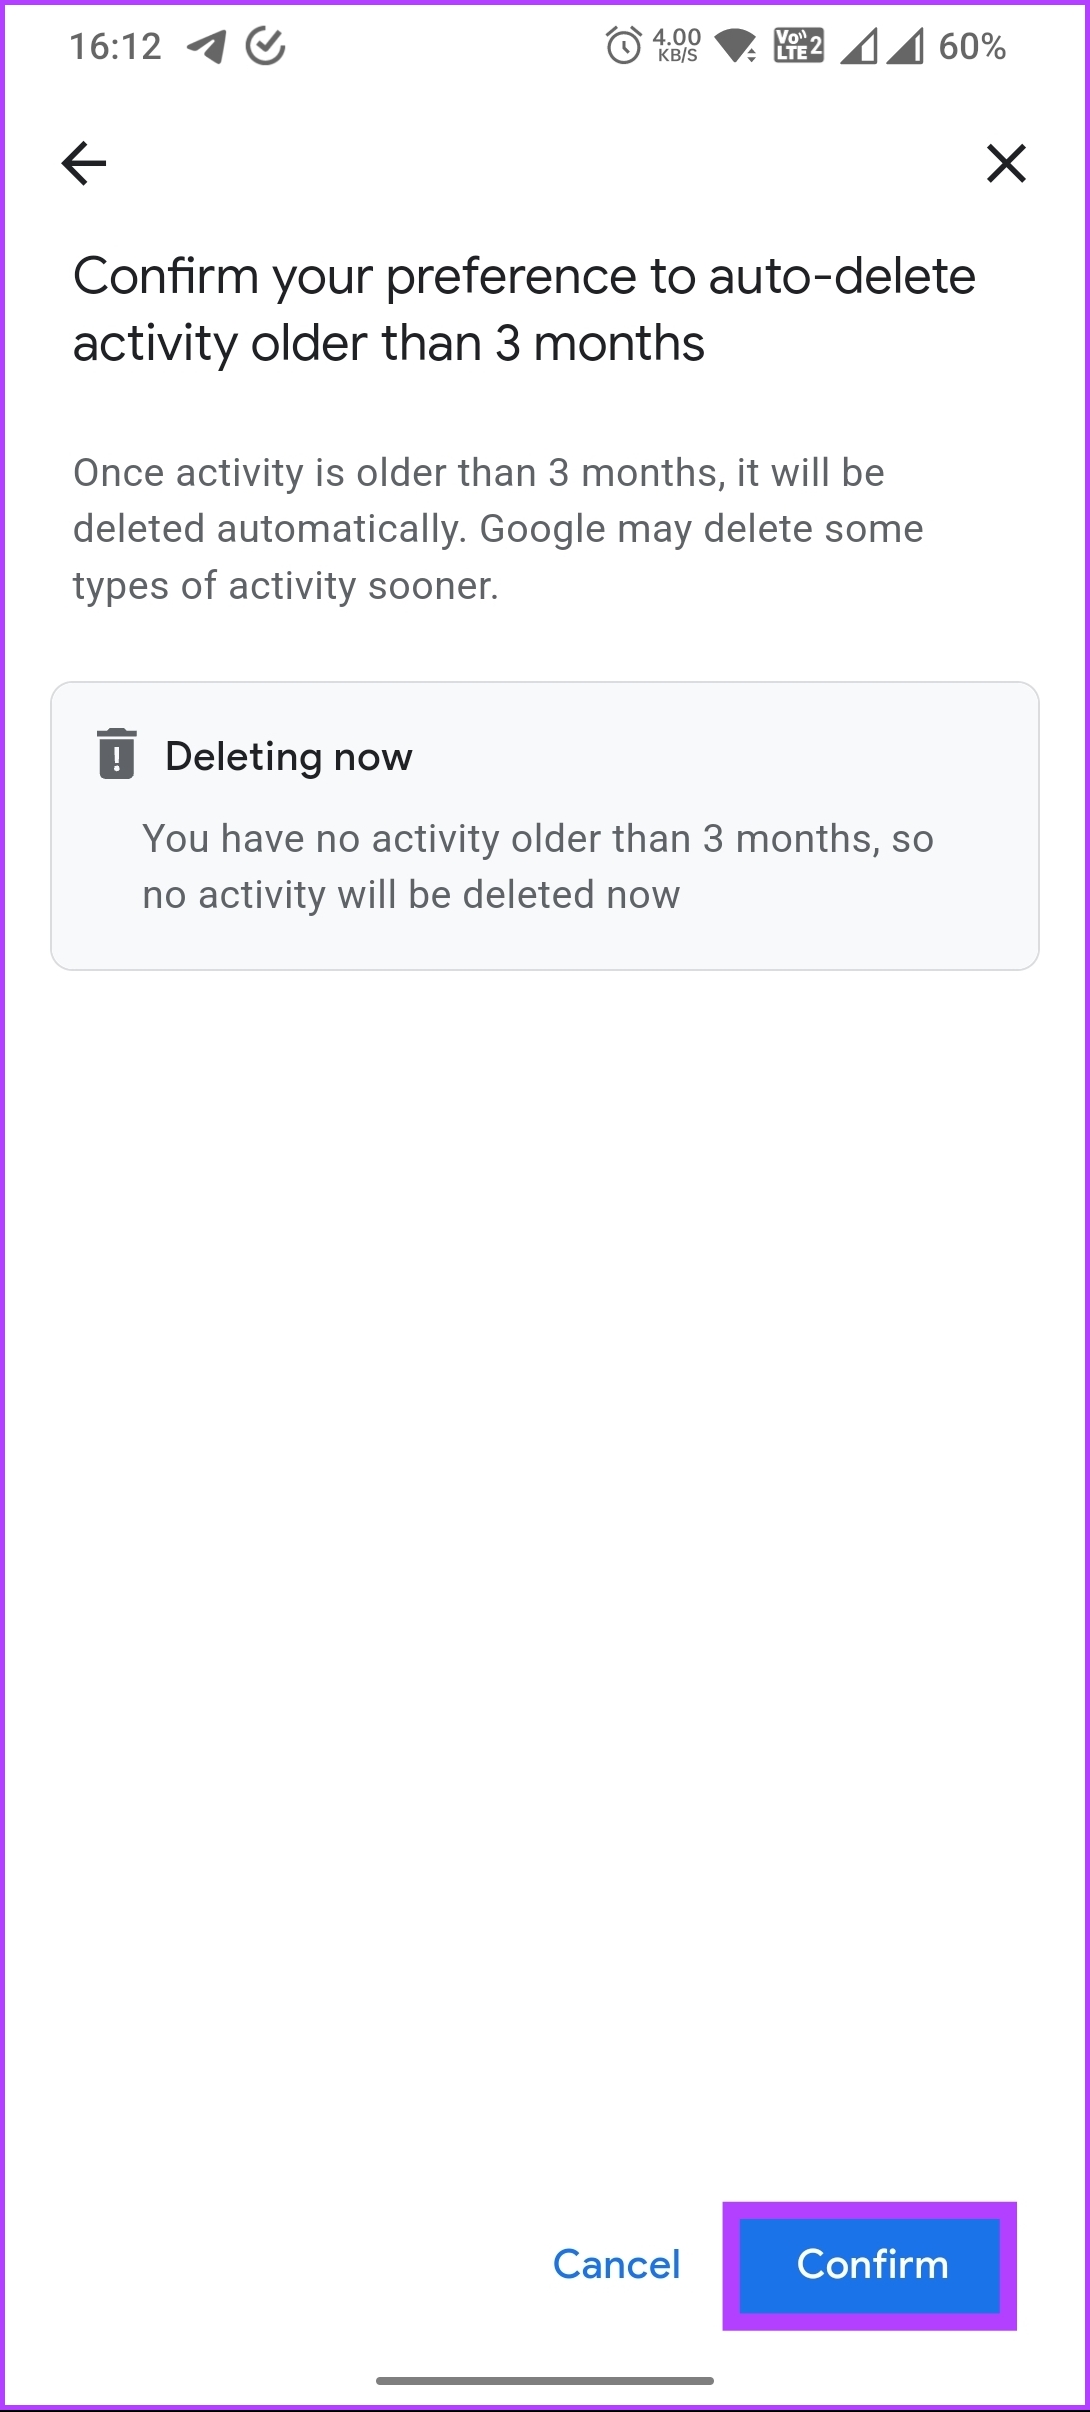
There’s no direct way to auto-clear history in your Chrome browser. So, we are going to use Google’s My Activity section to auto-delete your browsing history from Chrome. Follow the below steps. Note: For ease of demonstration, we will use an Android device. Step 1: Launch the Google app on Android or iOS and tap on your profile picture at the top right corner. Step 2: Select Search history from the drop-down, and go to Auto-delete. Step 3: On the next screen, select ‘Auto-delete activity older than’, choose the time frame, and click Next. Step 4: Tap on Confirm at the bottom right corner of the screen. With this, Chrome will automatically delete the selected browsing data after your set time. If, for some reason, you are unable to delete your Chrome browsing history, continue reading.
What to Do if You Can’t Delete Your Chrome Browsing History
If you cannot delete your Chrome browsing history, there are a few steps you can take to troubleshoot the issue. Follow the below fixes. Fix 1: Ensure you have the latest version of Chrome installed. Updates may include bug fixes that could resolve issues related to browsing history deletion. Fix 2: Some Chrome extensions may interfere with browsing history deletion. Try disabling all extensions and then attempt to delete your browsing history again.
Phase Out the Junk Data
Managing your browsing history is essential for online privacy and security. Whether you want to clear up browsing data or view your history for quick access to frequently visited websites, learning how to clear history on Chrome is necessary. By following the steps outlined in this article, you can easily take control of your browsing history and keep your online activity private. So go ahead and try it! The above article may contain affiliate links which help support Guiding Tech. However, it does not affect our editorial integrity. The content remains unbiased and authentic.