Now, to convert file types on Windows 11, you can simply start by renaming the file extension. However, certain video and text file types might not get converted. Another method to change file type is by opening the file extension in a compatible program and using the save as feature. You can also the Command Prompt to change the file extension. Let’s show you all the methods step-by-step. But before that, it will be helpful to make the file format visible for all files.
How to Use Control Panel to Make File Type Visible
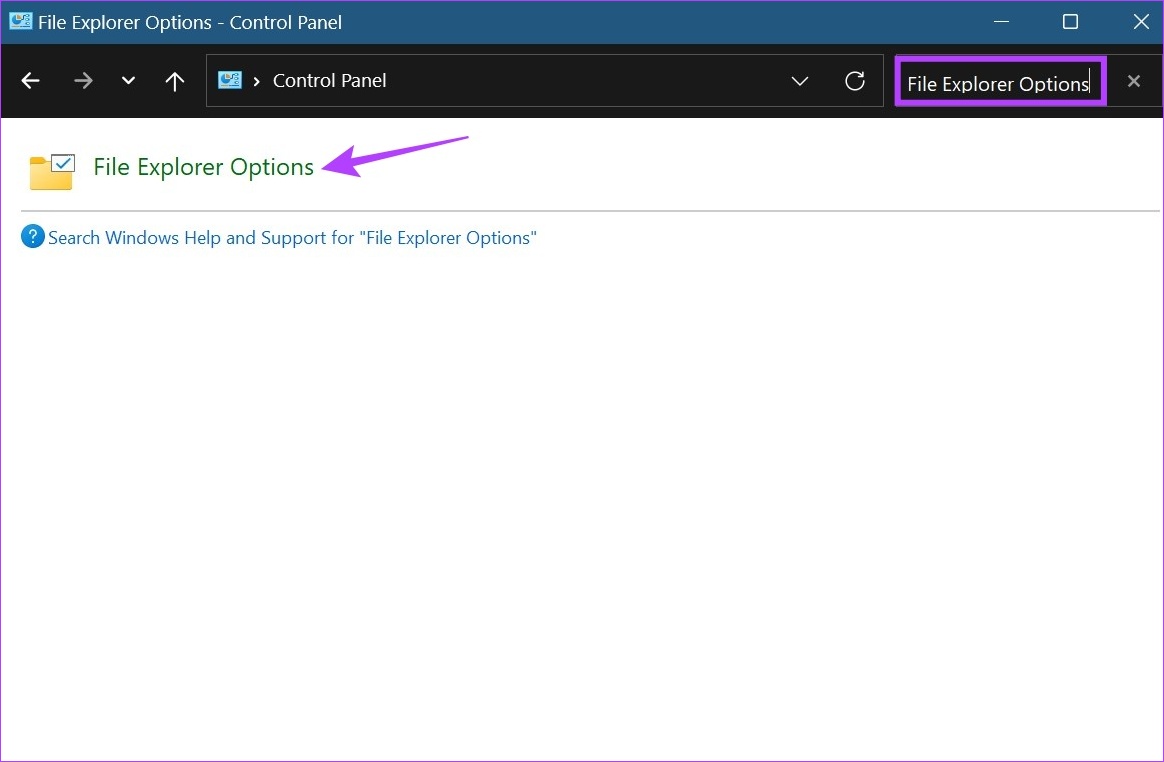
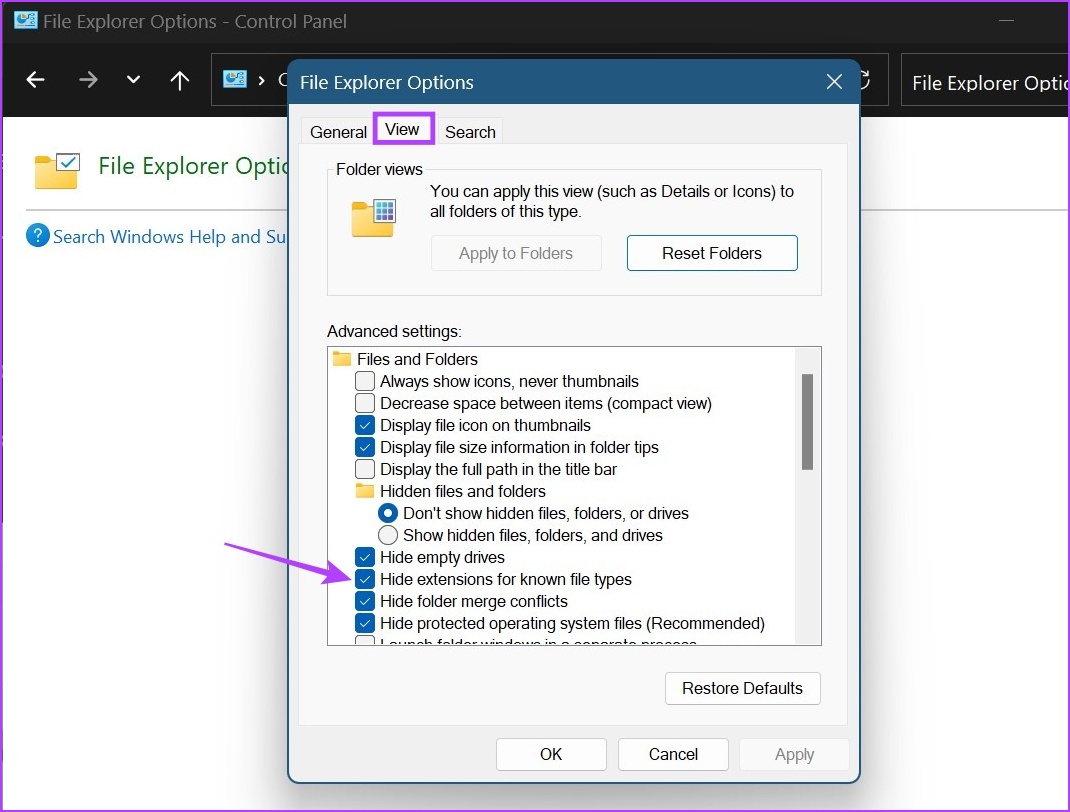
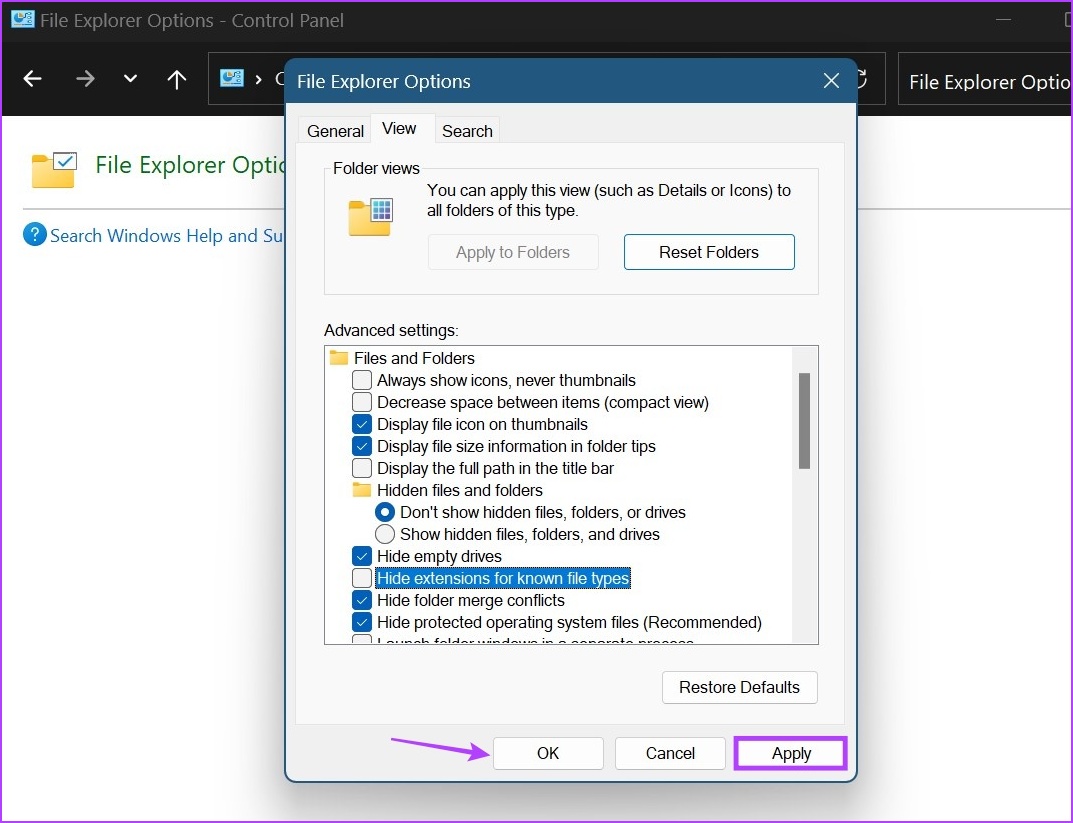
Before we go about changing the file type on Windows 11, let’s first have a look at how you can make sure that all the file extensions are visible in Windows. There are multiple ways of enabling it, let’s show you the easiest one. Follow the below steps. Step 1: Click on Search and type Control Panel. Then, open the Control Panel from the search results. Step 2: In the Control Panel search bar, type ‘File Explorer Options‘. Step 3: Then, open File Explorer Options. Step 4: From the menu options, click on View. Step 5: Then, scroll down and uncheck the ‘Hide extensions for known file types’ option. Step 6: Click on Apply followed by OK. This will enable file extension names. Now, you can go ahead and change the file extension on Windows 11.
How to Change File Type on Windows 11
Once the file extension is visible for all the files, we can now proceed with changing the file type. As mentioned above, there are three major ways you can convert file types in Windows 11. Let’s have a detailed look at them all.
1. Rename the File
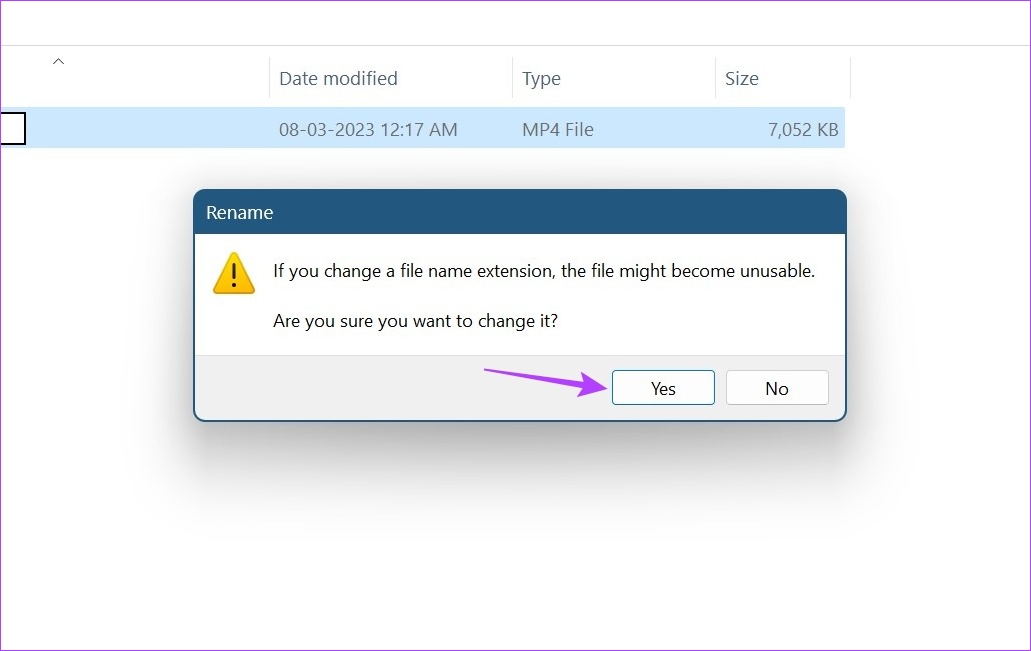
When changing the file type using the rename option, all you need to do is select the file and change the name of its extension. Follow the below steps to do it. Note: When using the rename option to convert file types, ensure the before and after file extensions are similar to each other or your file might get corrupted. Step 1: Open the relevant folder and click on the file you wish to change the file type for. Step 2: Then, from the menu options, click on Rename. Step 3: Here, rename the extension. Step 4: Then, click on Yes. This will change the file type. Once this is done, try opening the file again to see if the change has been successful. This should especially be done when converting video files as they usually change their file extension name while still retaining their original extension characteristics.
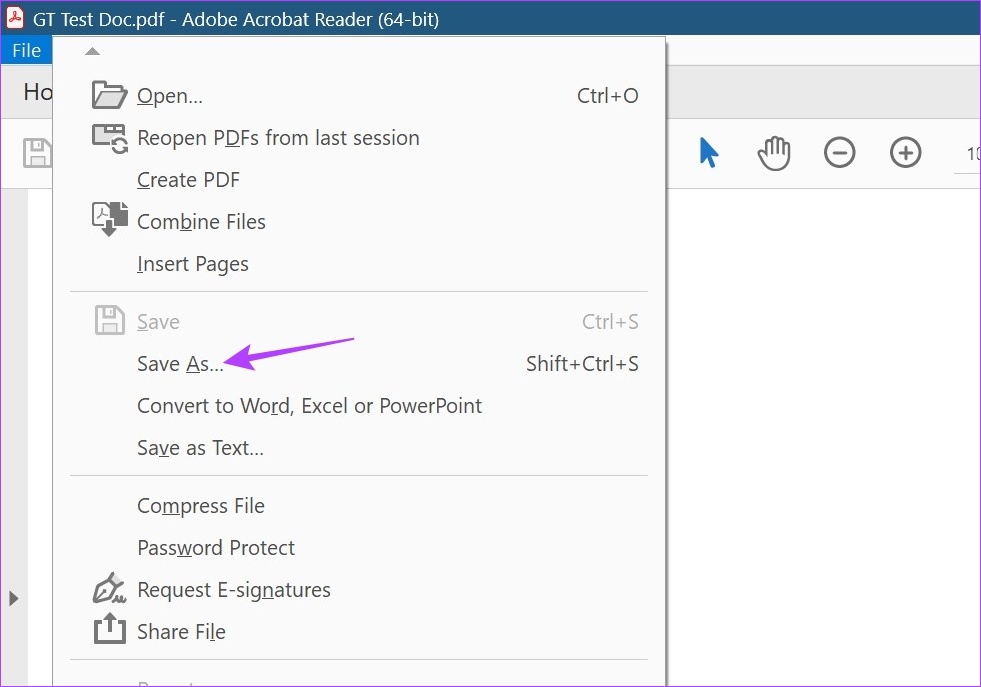
2. Using the Save as Option to Convert File Extension
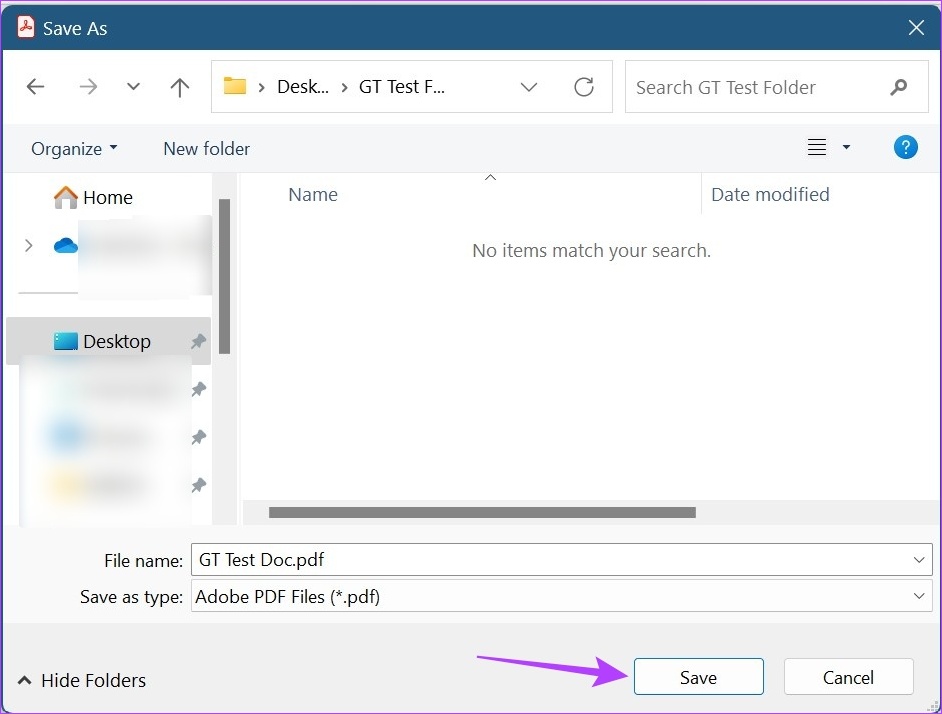
With the save as option, you can simply open the file extension in the relevant software. Then, using the Settings menu, save the file again, but this time in a different format. Here’s how to do it. Note: For demonstration purposes, we will be using a .pdf file with Adobe Acrobat PDF Reader. Step 1: Go to the relevant folder and open the target file. Step 2: Then, click on the File options. Step 3: Here, click on Save As. Step 4: Then, select the format you want to save the file as. Step 5: Select the folder you want to save the file to and click on Save. This will convert the file type and save it according to your preference.
3. Using Command Prompt
The third and last way to change the file type on Windows 11 is by using the Command Prompt. Here, you can either change the file extension for individual files one by one or change multiple file extensions at once. Here’s how to do it.
1. Change File Type for an Individual File
Step 1: Right-click on the Windows icon and select Terminal. Step 2: Click on the down arrow once the Terminal opens and click on Command Prompt. Step 3: Then, go to the folder that has the file and right-click on it. Step 4: Here, click on ‘Copy as path’. Step 5: Now, go to Command Prompt and type the following command: Step 6: Press enter. This will open a new line with the file name. Step 7: Here, type the following command and press enter. Note: Replace file-with-extension-1 with the file name and its original extension followed by the file name and the extension you want to convert it in. This will change the file format for the individual file.
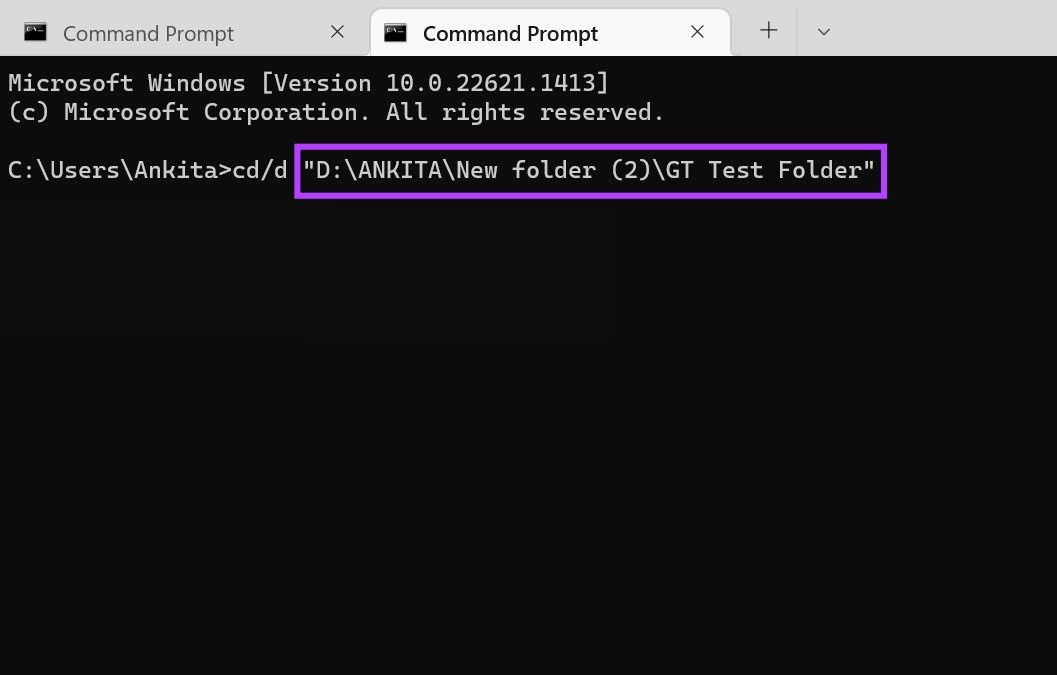
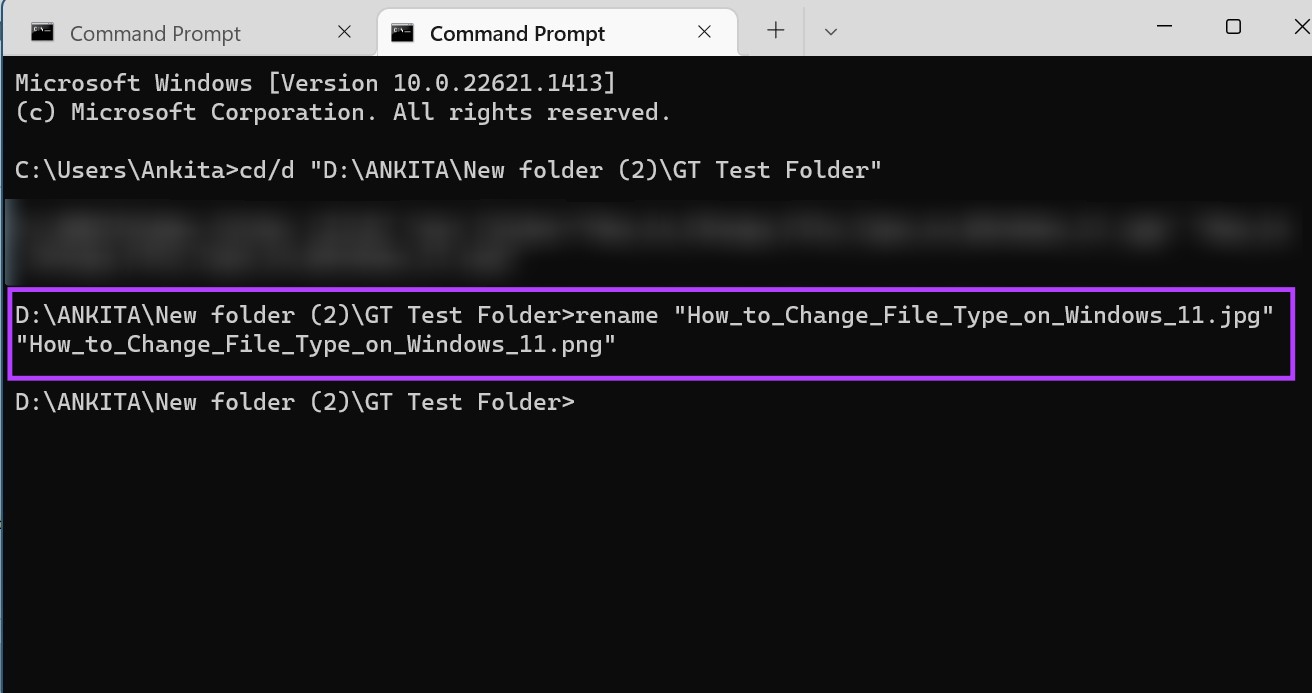
2. Change Multiple File Extensions at Once
Step 1: Go to the folder that has the file and right-click on it. Step 2: Then, click on ‘Copy as path’. Step 3: Now, right-click on the Windows icon and select Terminal. Step 4: Here, click on the down arrow and click on Command Prompt. Step 5: Now, type the following command and press enter. This will open a new line with the file name. Step 6: Here, according to your requirement, type any of the below-mentioned commands and press enter.
For converting multiple files within that same folder:
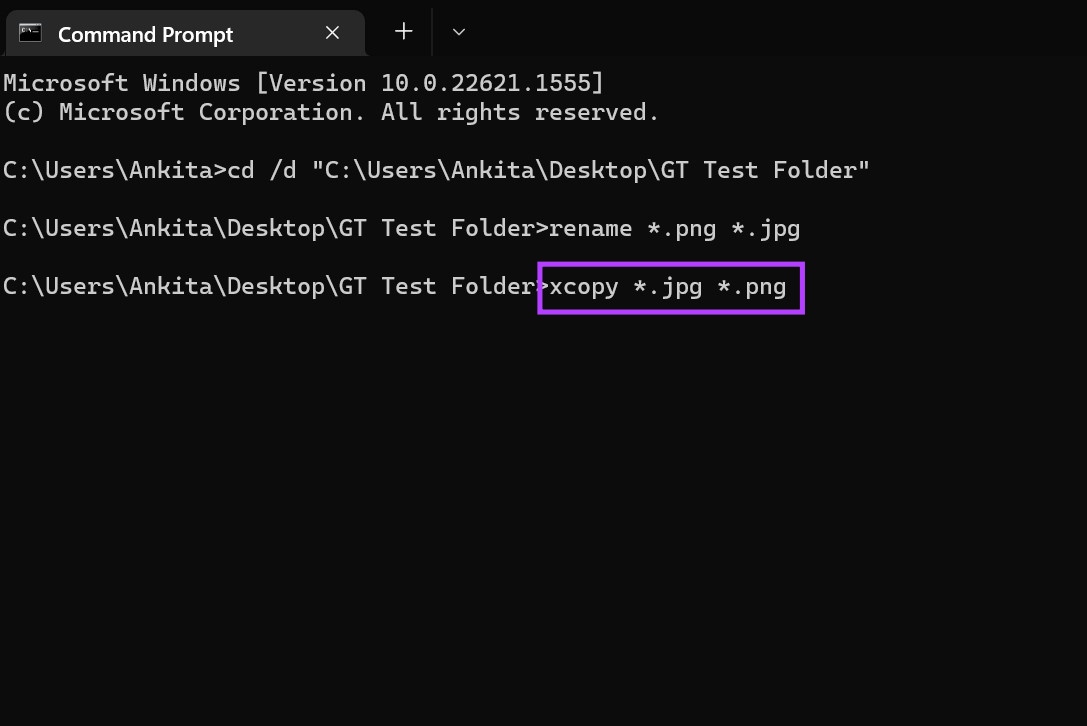
For converting multiple files while saving a copy of the original:
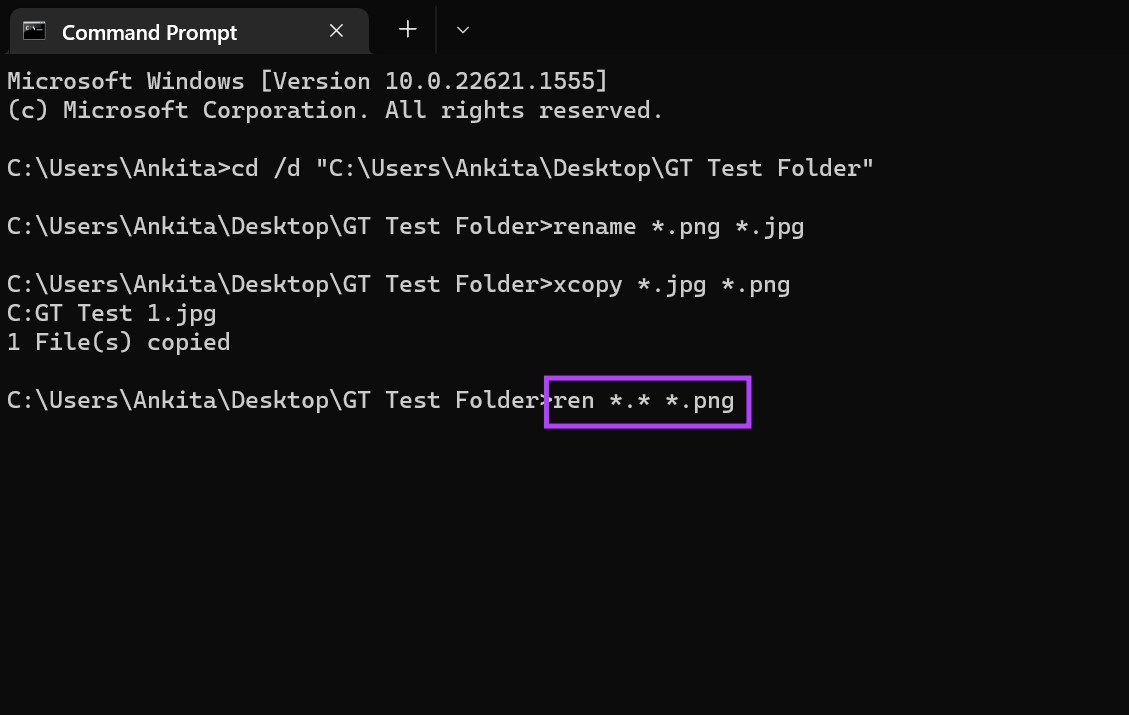
For converting multiple files regardless of what their original extension is:
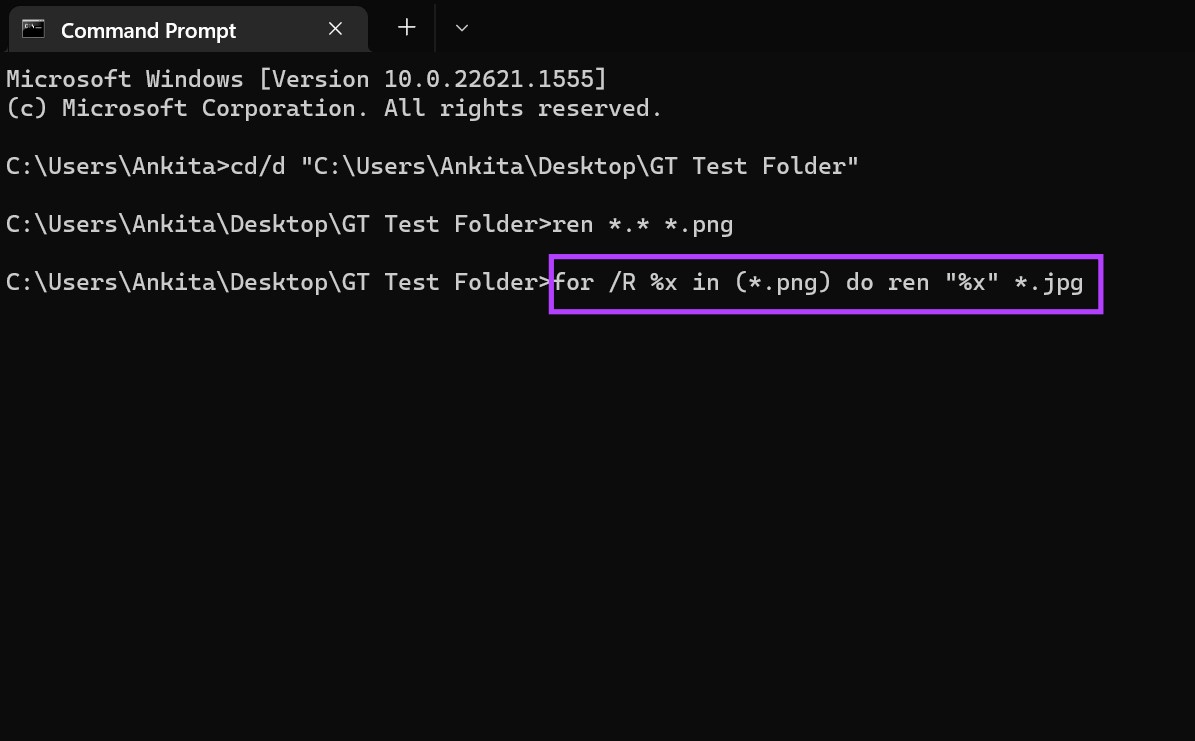
For converting multiple files for all the sub-folders in that folder:
Once you press enter, the command will be executed accordingly.
4. Using Online Converters to Convert Your File
You can use other third-party tools like Online-Convert and Could Convert to convert the file types for your video, text, and image files respectively. They’re also highly recommended when converting media files as they completely convert the media files to the desired format, something that the abovementioned methods might not be able to do.
Change the File Type
So these were all the ways you can change the file extension on Windows 11. We hope that this helped you in changing the file to your preferred format. Additionally, if you wish to customize your device, you can also turn off Sticky Keys in Windows 11. The above article may contain affiliate links which help support Guiding Tech. However, it does not affect our editorial integrity. The content remains unbiased and authentic.